Ink what?! Ink Smooshing! This is a fun technique that only requires a few supplies. Some ink, acrylic blocks, water and paper is really all you need! When it comes to ink, Distress Inks and Distress Oxides work wonderfully, though any water-based ink will work great. For paper, Canson Watercolor is what I used in my samples today, though any brand watercolor paper would also work. Watercolor paper will hold up to water the best, but feel free to try other types of paper for varying results.

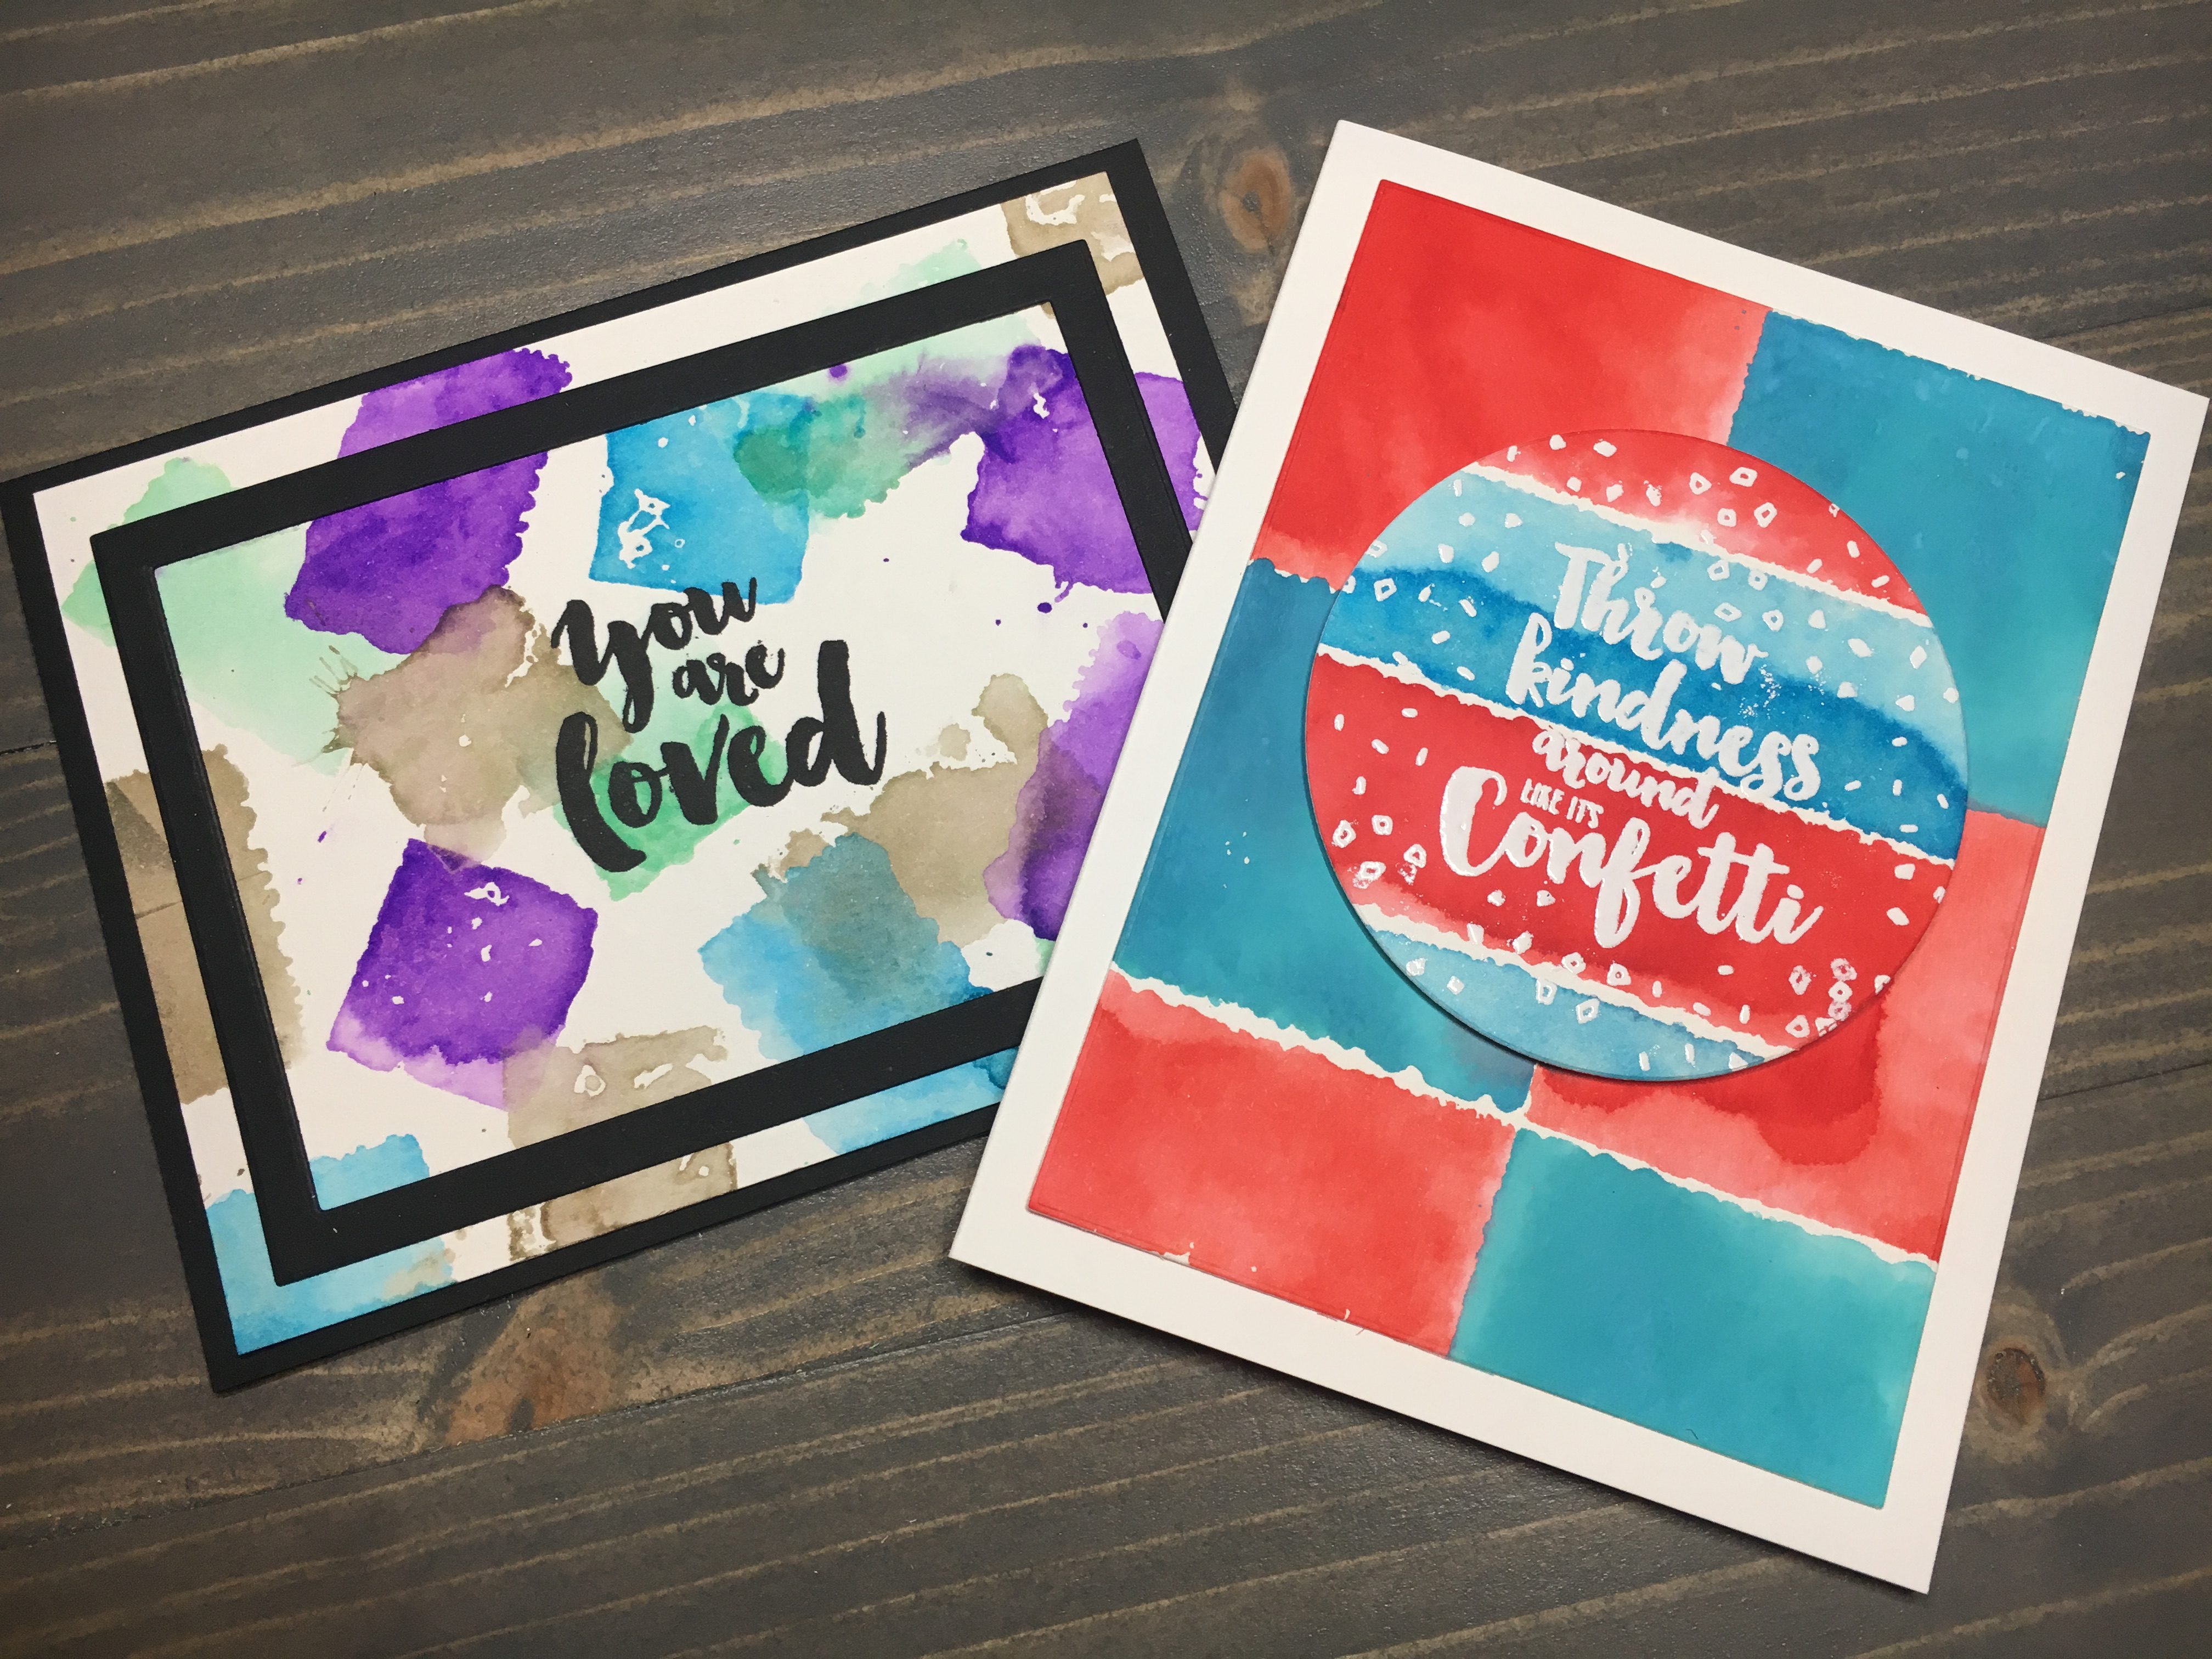
Let’s get started! For the first example, I selected the following colors of Distress Ink: Wilted Violet, Cracked Pistachio, Mermaid Lagoon and Pumice Stone. I started with Wilted Violet and applied ink directly to my acrylic block. After spritzing with water (I used a Tim Holtz Distress Sprayer, but a regular spray bottle would work just as well) I smooshed the block directly onto the watercolor paper. I let the block sit for a few seconds before lifting off. I let the water pool while I re-inked the block and smooshed again in a new spot. I continued inking up my blocks (cleaning between colors), smooshing, then repeating until I was happy with the coverage.


Note, Distress Inks do not layer, the colors will mix when wet. To cut down on mixing, dry ink with a heat tool before smooshing an additional color on top. Some mixing is great, too much will turn everything muddy. Colors increase mobility when additional water is used, so experiment with how much water you add.
After the panel dried fully, I adhered the panel to an A2 sized card made from black cardstock. I added a black frame by utilizing a couple dies from Waffle Flower’s A2 Layers Die set. I stamped a sentiment from Honey Bee’s Beautiful Life stamp set using Gina K Amalgam Ink. Due to the textured nature of watercolor paper, I utilized my Tim Holtz Stamp Platform and stamped the sentiment multiple times to get a solid impression.


Time for more smooshing! For the second and third panels, I used more Distress Inks: Barn Door and Mermaid Lagoon. This time, I spent some time lining up acrylic blocks for a more prescriptive result. Though I was intentional on my block placement, I still gained organic variations in color and shape because of the added water.


After drying both panels with a heat tool, I selected another sentiment from Honey Bee’s Beautiful Life stamp set. After stamping in Versamark I heat embossed using Ranger White Embossing Powder. I also stamped and heat embossed multiple bunches of confetti, completely surrounding the sentiment.


Using a die from my stash, I cut a circle from the panel with the sentiment. Using Scotch Foam Tape I popped up the die cut on top of the other panel.


The ink smooshing is really the focal point for both these cards. With simplistic finishes, these cards turn out both interesting and eye-catching. Pull out some inks and acrylic blocks from your stash and give this technique a try!
If you are interested in the stamp set I used, check out honeybeestamps.com. They have fantastic stamps and dies, among other great card making supplies.


