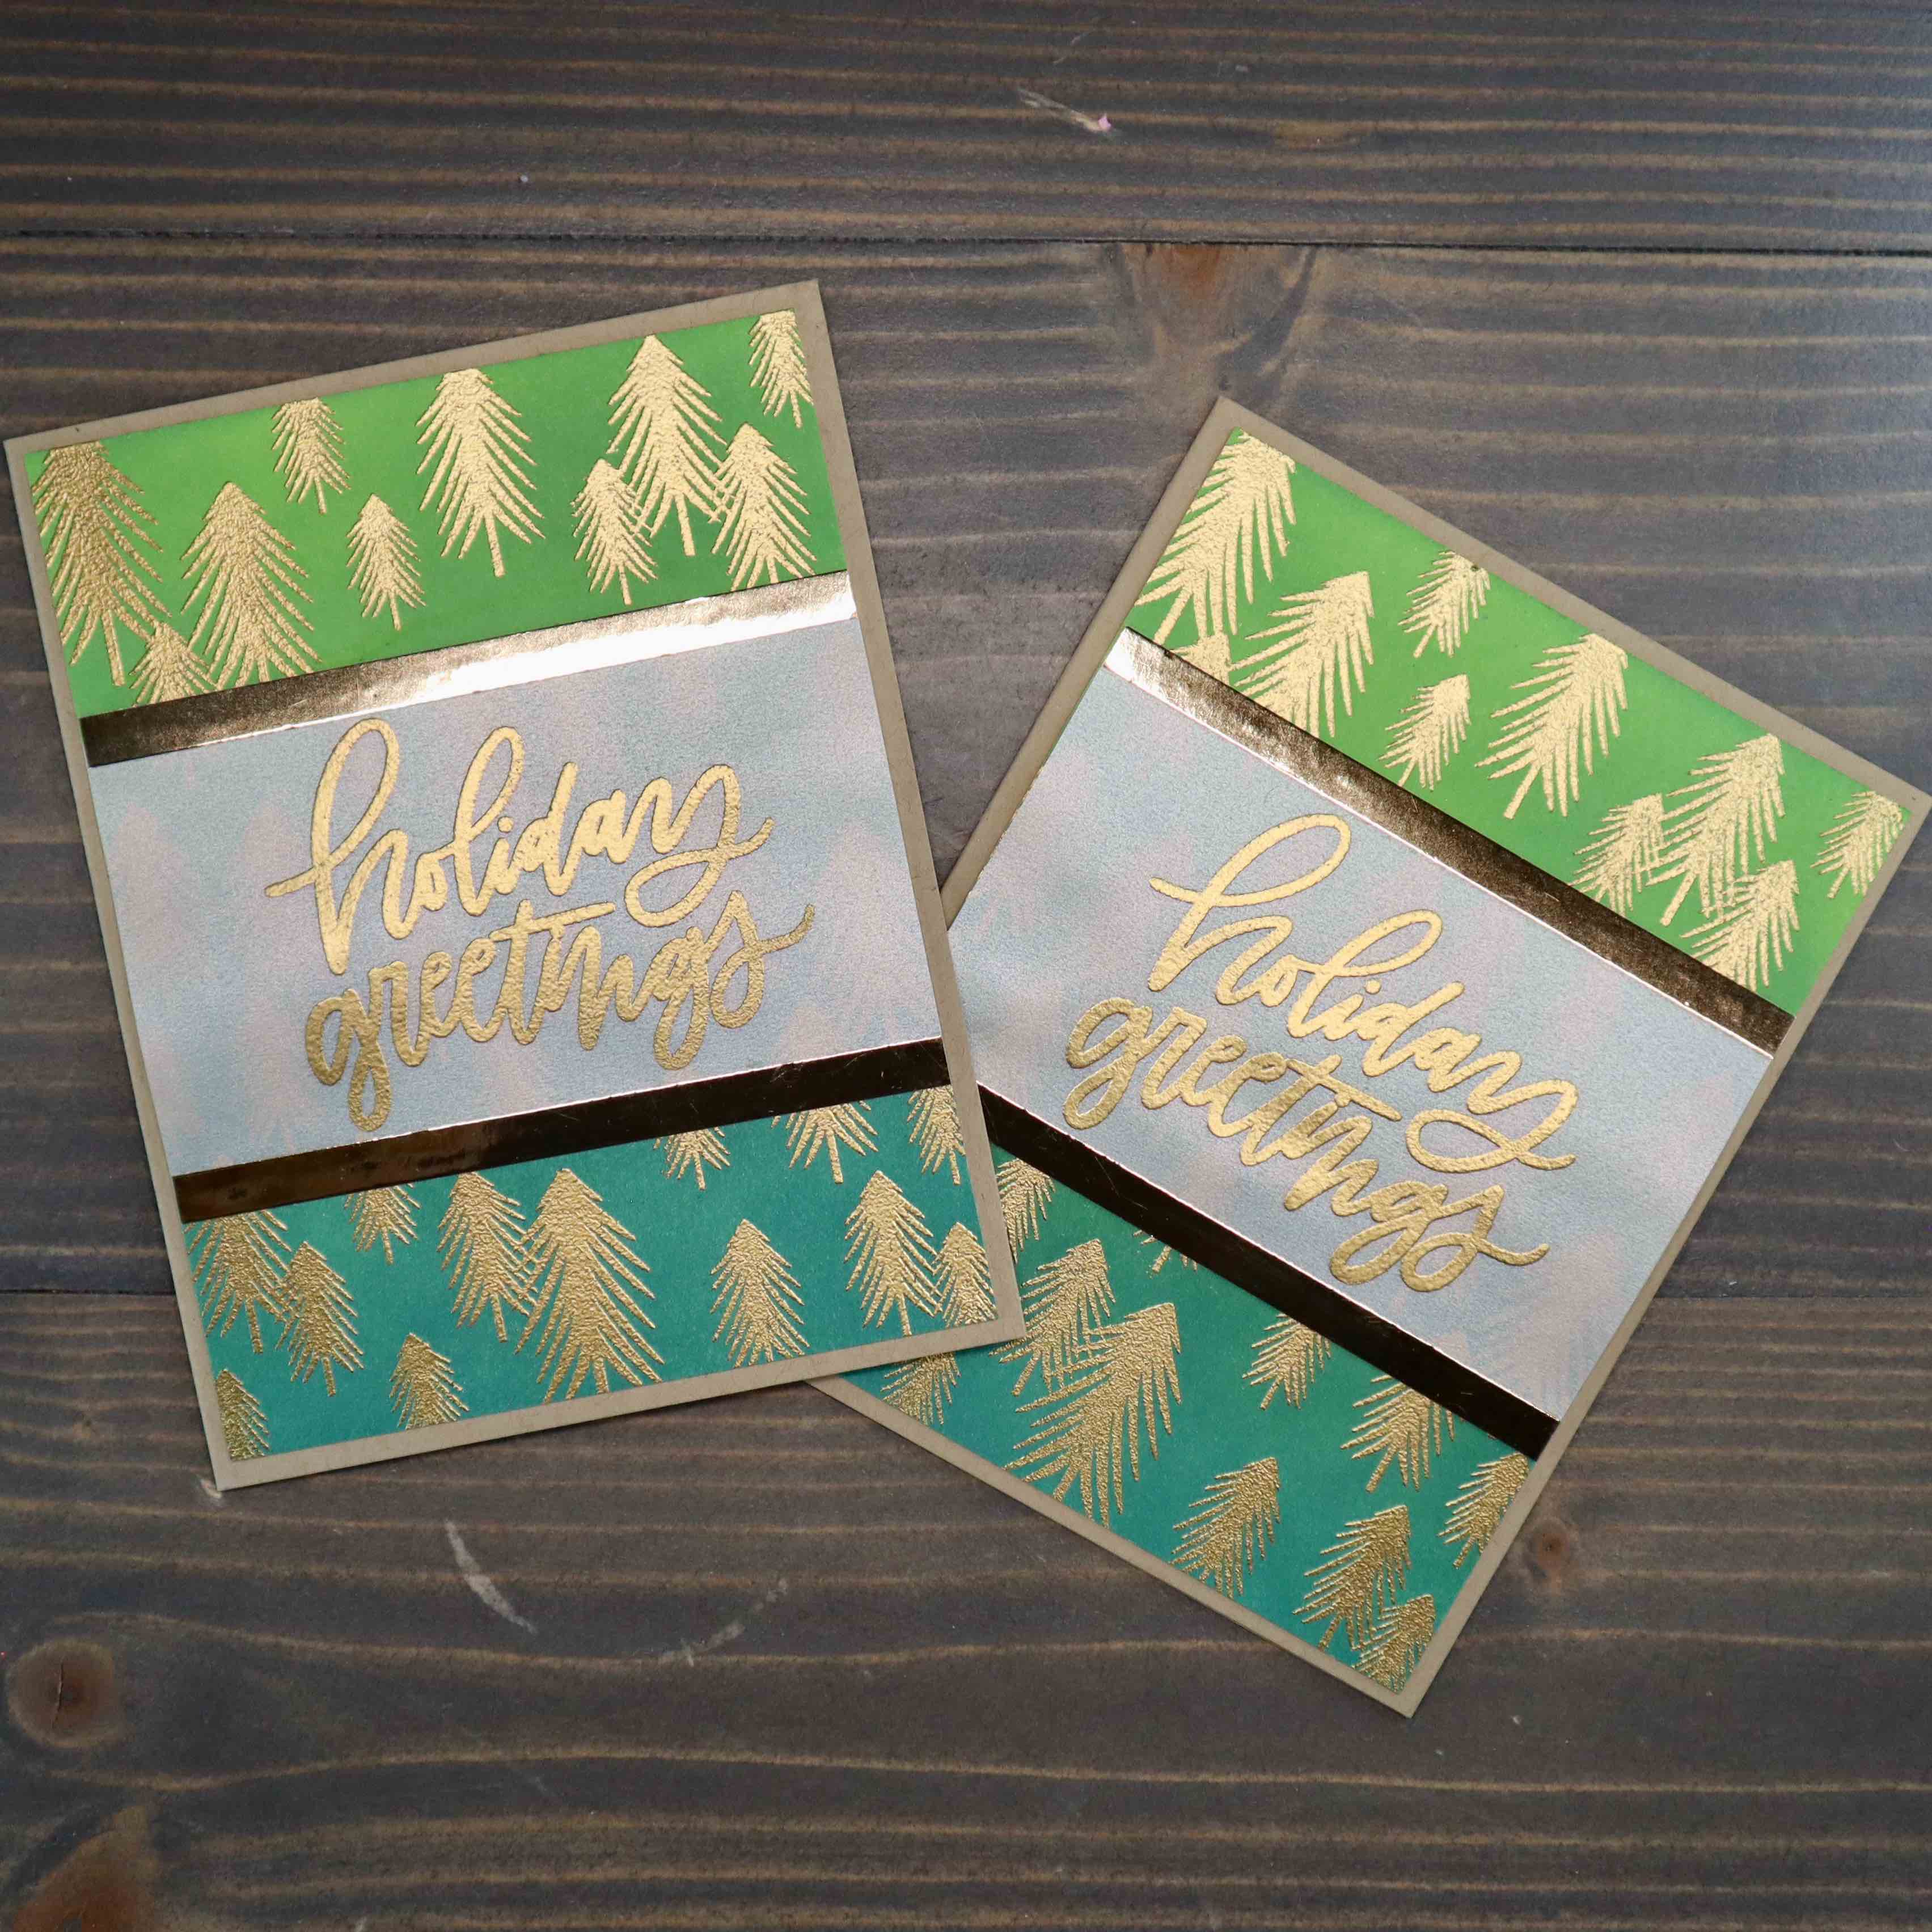
Today’s ink blending and embossing holiday cards are absolutely gorgeous! As the title suggests, this card consists of an ink blended panel, paired with gold heat embossing. A few added elements make these cards absolutely perfect!
Check out the link below to see the full tutorial on my YouTube Channel – plus other holiday cards you might be interested in.
Ink Blending
These cards begin with ink blending. Starting with this gives the panels enough time to dry, which distress oxide inks require prior to embossing over top. Using circular motions, I begin with my blending tool off the page and then move onto the page. This helps prevent harsh lines when blending.
Moving back and forth between colors aids in a fluid color blend. Ink does not need to be added every time tools are switched.
I use my Ranger Heat It Tool to accelerate the drying on card panels.
Heat Embossing
While the panels are drying, I move on to embossing my sentiment. After stamping my sentiment using VersaMark ink and adding embossing powder, I preheat my Wagner Heat Tool prior to moving the heat to my vellum. Vellum is somewhat delicate and will warp quickly, so the faster you heat embossing the better. A hot heat gun helps activate the embossing powder quicker, so overall time heat is on the vellum is decreased.
Prior to embossing my ink blended panels, I do an embossing powder check. To do this, simply sprinkle some embossing powder directly onto the panel (prior to stamping) and see if any sticks to the ink. If all the powder falls off, your panel is sufficiently dry to heat emboss. If some sticks, brush off the powder and set aside panel to dry longer, or use a heat tool to help the panel dry quicker.
Card Finishing
I started by cutting and folding A2 card bases from Gina K Kraft card stock. Next, I trimmed my ink blended and embossed panels to 4” x 5 1/4”. This will provide an 1/8” border of the Kraft card base to show around the panel.
Next, I trimmed a scrap of Gold Harvest Mirror card stock into 1/4” strips, which I used to border my vellum sentiment. A thin strip of liquid glue along the top and bottom edges of the sentiment adhered the vellum to the card, and the gold strips framed it nicely.
A quick trim of overhanging bits, then double sided adhesive to adhere the card panel to the card base finished these cards off.
I love how gold and kraft go together so seamlessly and the simple elegance of the design showcases the sentiment perfectly on this ink blended and embossed holiday card. For more inspiration on using gold on holiday cards, Click Here to see a post from last year’s 12 Days of Cardmaking series.
Supplies
Neenah Classic Crest Solar White Cardstock: 110lb for card base, 80lb for die cutting