Floral Die Cut Card

Floral Die Cut Card

Today’s floral die cut card is inspired by Altenew’s September Inspiration Challenge. This challenge is posted on Altenew’s Card Blog, and the inspiration photo is below. 

To see the full video tutorial, click on my video below.

Stamping & Coloring

To start, I stamped images from Altenew’s Pen Sketched Flowers stamp set using an ink safe for alcohol markers.

Next, I colored flowers and leaves using Copic Markers. The flowers were all colored the same way. To begin, a solid base of R02 which covered the entire flower. The remaining colors utilized a flicking stroke, starting at base of petal moving toward the outer edge, each subsequent color with a shorter stroke. First, R14, followed by R24, and finally R29. 

The leaves and stems were completed in a similar manner, starting with a base of BG10, followed by G21, then G24.

After coloring, I used the coordinating dies to create my die cuts. 

Background

Using Altenew’s Stone Wall stencil and Altenew inks (Industrial Diamond, Pure Graphite), I ink blended a card panel. In addition, I used Industrial Diamond alone on the top panel of an A2 card base.

Using an Oblong Hexagons die from The Stamp Market, I die cut a center panel from the inked card panel which had been trimmed to 4” x 5 1/4”.

Butterfly

Sizzix Thinlits Scribbly Butterflies dies provided the perfect butterfly accent for this card. Starting with black cardstock, I die cut the smallest butterfly from the set. Using Copic Markers (BG10, G21, G24), I inked a scrap of Vellum, then trimmed it to fit as a backer for the butterfly (ensuring inked size of vellum was faced down). I adhered them using liquid glue. 

Card Assembly

Next, came the sentiment which was stamped using VersaMark ink then heat embossed using Ranger Embossing Powder in black. Next, I arranged the flowers and leaves to span the stone stenciled card panel, leaving a bit of space for the butterfly in the bottom corner, across from the sentiment.

I used liquid glue to adhere everything together, then popped the entire panel up off the card base using scrapbook.com adhesive foam. 

To finalize, Glossy Accents over the butterfly brings a bit of shine, and Nuvo Crystal Drops at the flower centers finished them off nicely. 

Floral Die Cut Card

The simple message on this card is perfect to balance the stenciled card panel and brightness from the flowers. This floral die cut card has great contrast from the grey’s and blue greens, to the pop of the coral and red.

Floral Die Cut Card

I hope you like what I’ve put together for Altenew’s September 2020 Inspiration Challenge: Butterfly Garden – I definitely had a fun time diving into it! For more inspiration using Altenew products, see my post on Simple Water Color Flower Card.

Floral Die Cut Card

Additionally, I created a second, similar card using a different color palette and different coloring technique.. The below card was used creating the following Copic inks: G21, G24, G28, V01, V05, V06, V09. Let me know in the comments below what you think of this color palette, and which card overall is your favorite.

Floral Die Cut Card
Floral Die Cut Card

Supplies

Neenah Classic Crest Solar White Cardstock: 110lb for card base, 80lb for die cutting

Gina K Card Stock in Black Onyx

Graffix Vellum

Altenew Pen Sketched Flowers stamp die bundle

Misti Stamping Tool

Copic Sketch Markers: BG10, G21, G24, R02, R14, R24, R29

Altenew Stone Wall stencil

Wendy Vecchi Make Art Stay-tion

Altenew Crisp Dye Ink in Industrial Diamond and Pure Graphite

Ink Blending Brushes Small and Medium

The Stamp Market Oblong Hexagons dies

Tim Holtz Sizzix Thinlits Scribbly Butterflies

VersaMark Watermark Ink

Ranger Embossing Powder in Black

Spellbinders Platinum 6 Die Cutting and Embossing Machine

Gina K Connect Glue

Scrapbook.com Double Sided Adhesive Foam Roll

Scrapbook.com Double Sided Adhesive Shapes

Nuvo Crystal Drops in Ebony Black

Ranger Glossy Accents

Related Post

2 thoughts on “Floral Die Cut Card

Comments are closed.
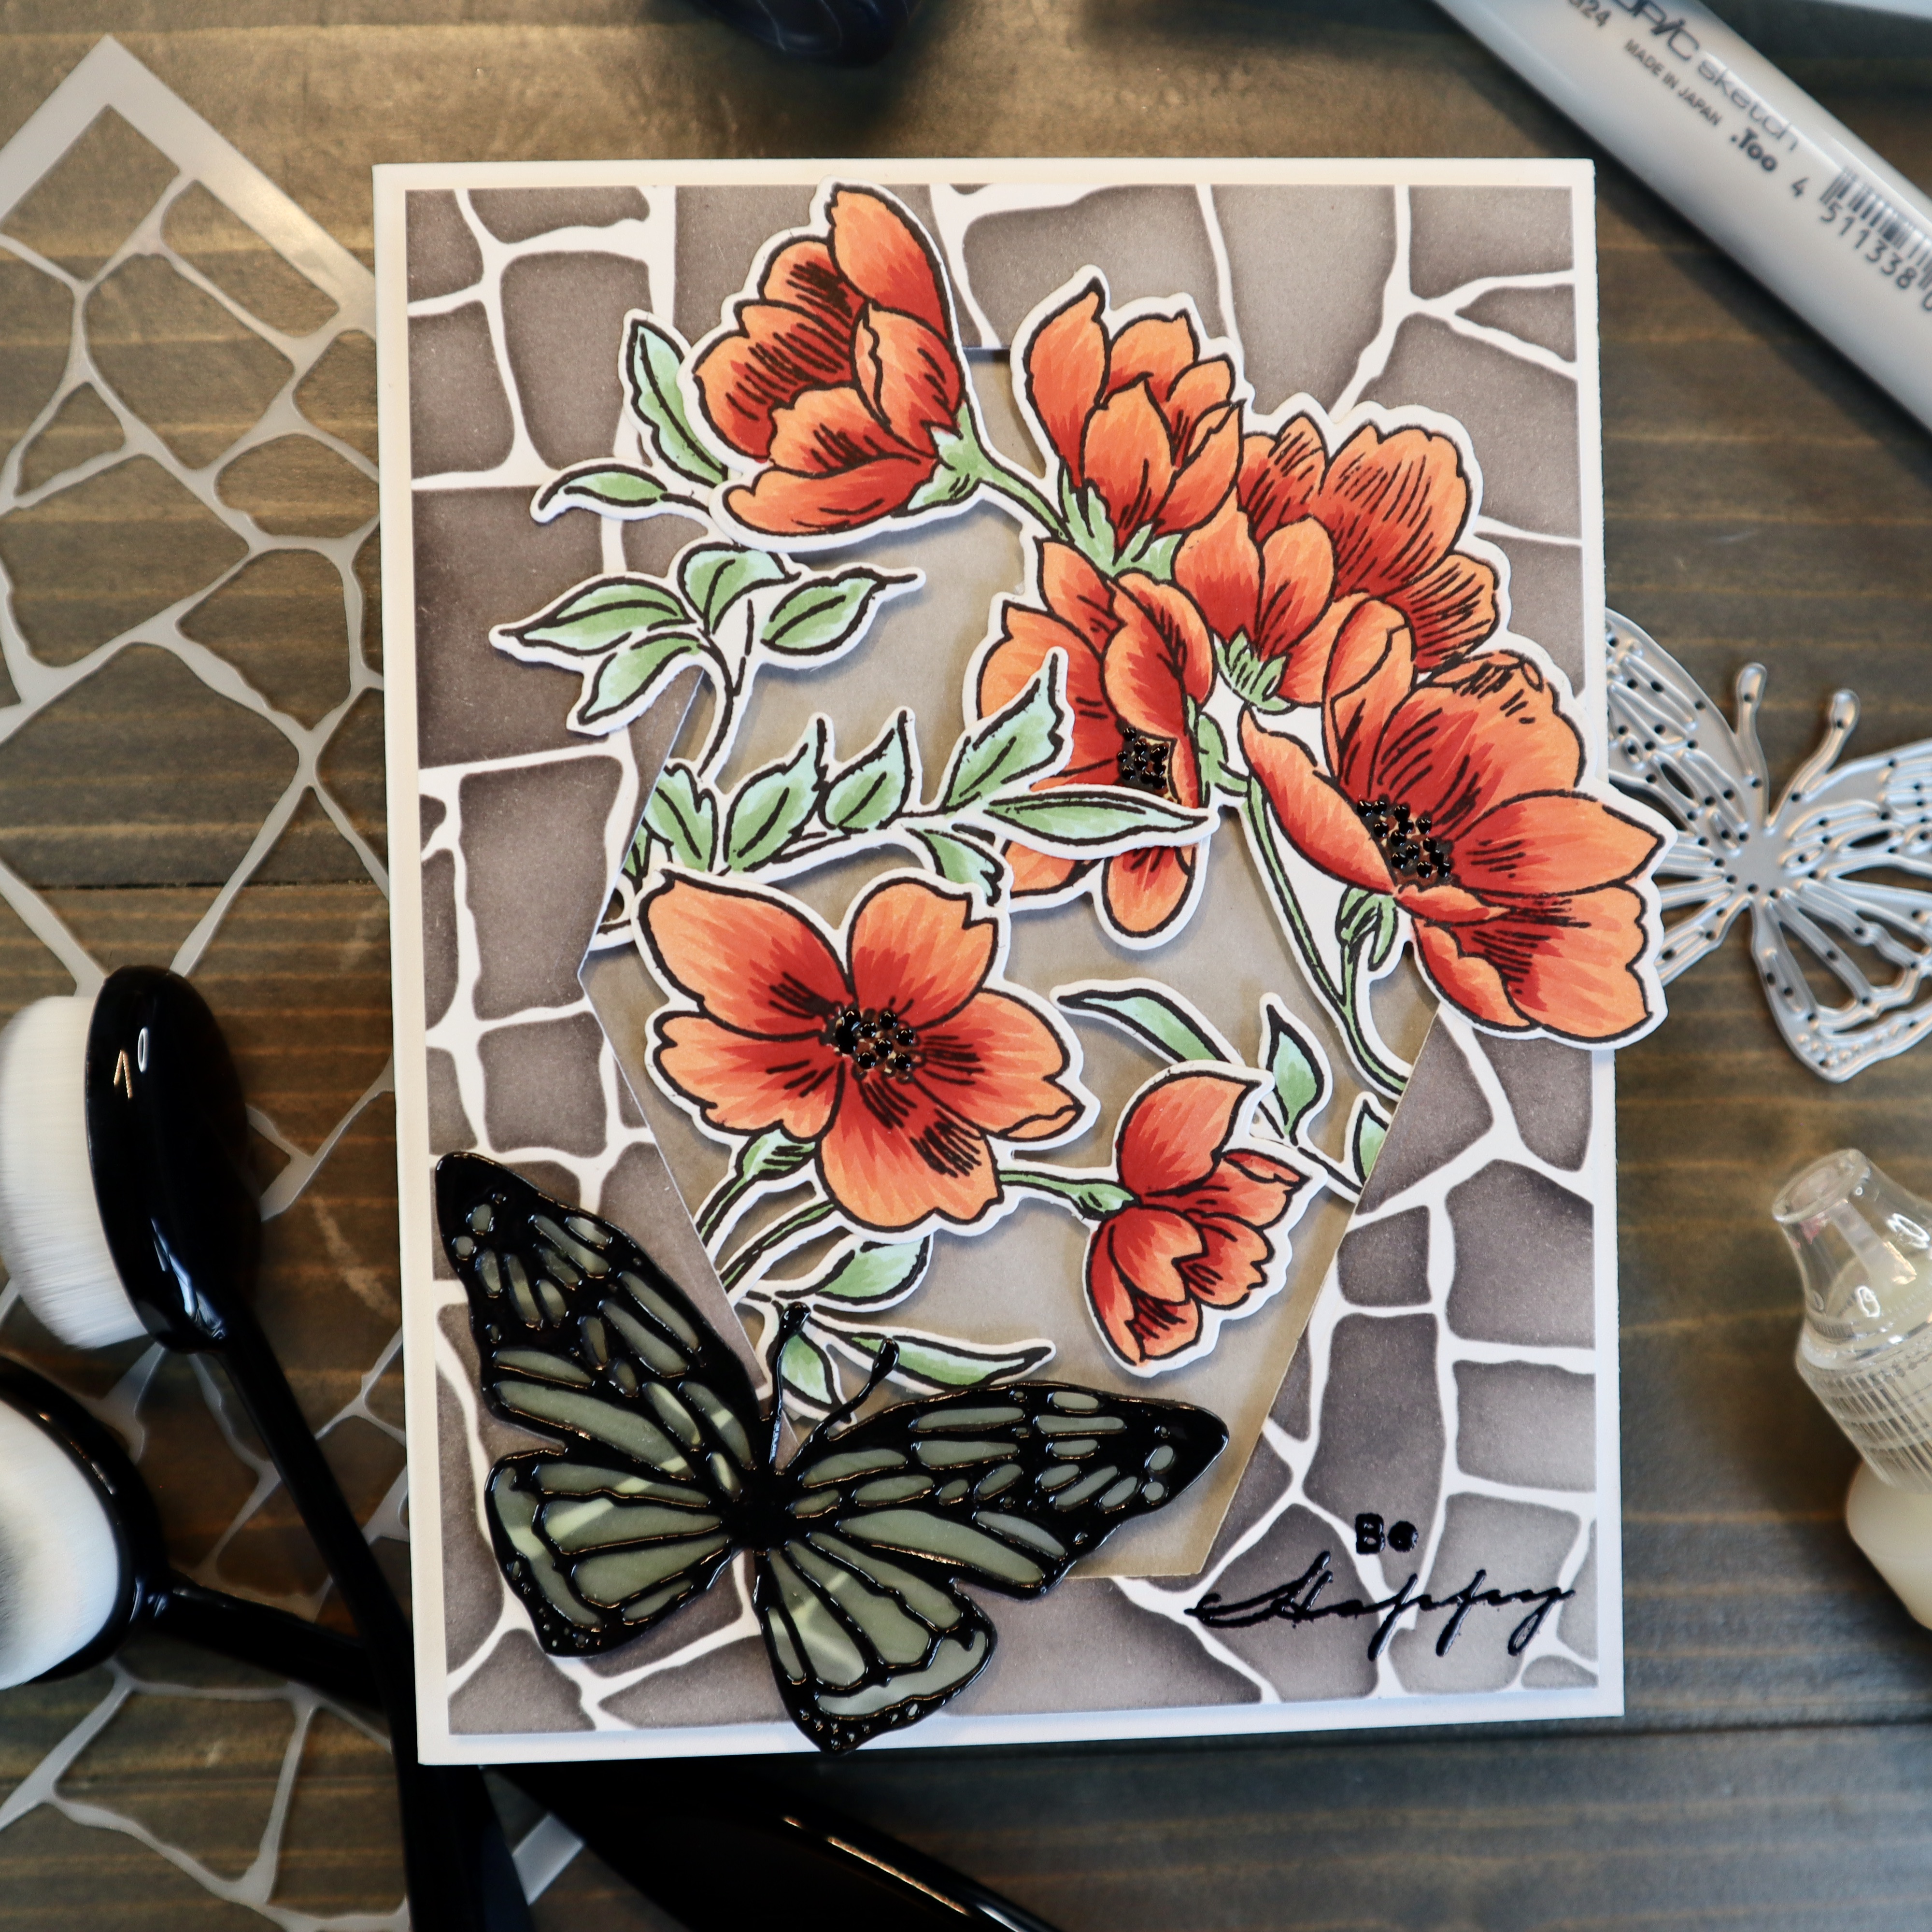