Do you have any left over die cut shapes from past projects? If so, you will want to keep scrolling. I’m using Distress Sprays and shapes left over to create two thank you cards using a new stamp set from Simon Says Stamp Stamptember 2020 release.
Check out my YouTube Channel for the video tutorial, otherwise, keep on scrolling to see how I used Distress Sprays and shapes to create to thank you cards.
Shapes
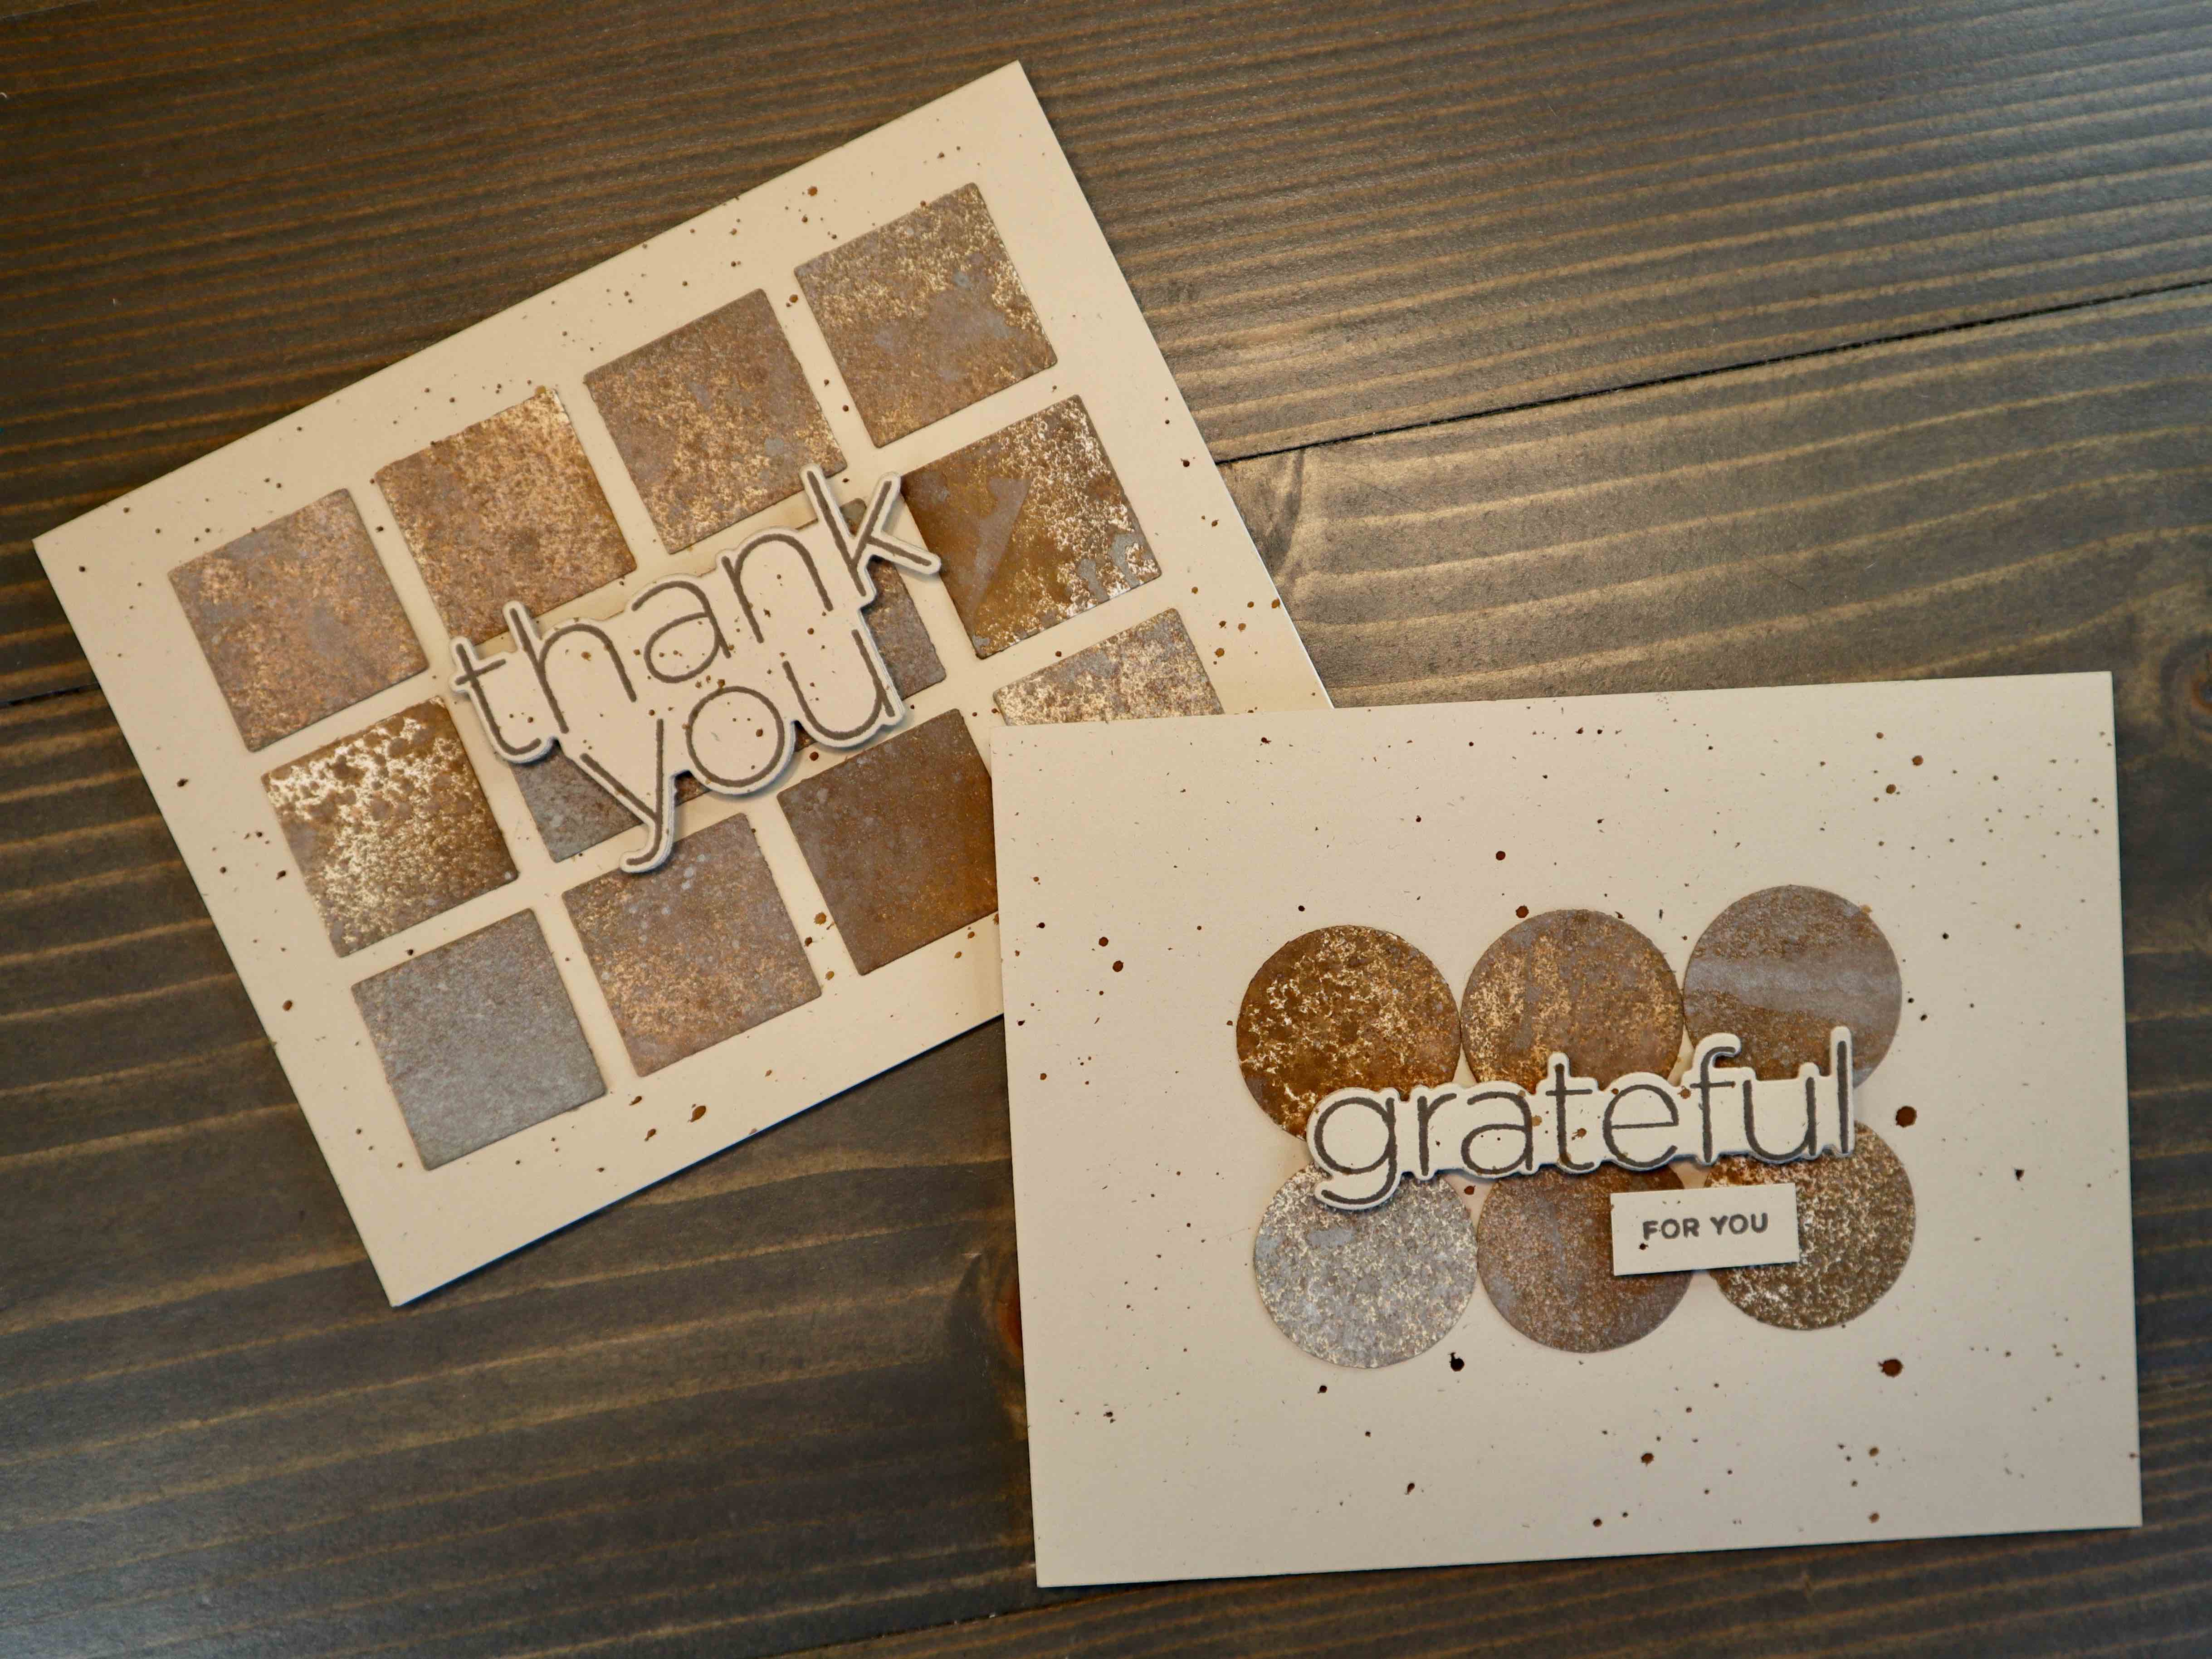
My shapes are left over from a project completed a couple weeks ago (Little Critters Cards). Essentially, the Grid Window and Circular Grid dies (from Mama Elephant) create little windows for small die cuts and messaging. They also create a bunch of small circles and squares – which is what I am utilizing today!
First, lay out circles and squares across your workspace. Next, lightly spray across the batch with selected colors of Distress Spray Stains and/or Distress Oxide Sprays. Keep each spritz random and vary the amount of ink you put down over the batch. This will allow for a wider variety of results.
If desired, use a scrap panel of card stock (I used a watercolor paper panel) to blot off excess ink. I try not to waste too much ink – you can always create more panels! This also aids in moving ink around and filling in any areas needing additional color.
Note – keep in mind the type of card stock you are using. Today, my shapes were cut from Neenah 80lb card stock, so they are quite thin and can only take a small bit of spray before becoming saturated. Generally, when working with my Distress Sprays I am using watercolor paper, which holds up much better and can take quite a bit more liquid.
Allow shapes to dry thoroughly.
Sentiment
Stamp sentiment and die cut using coordinating die. Cut two additional layers for each sentiment and adhere all together using glue of choice.
Stamp and trim sentiment strips as needed.
Also, trim an A2 card panel from same cardstock as sentiment. This will help tie the layers of the card together.
Card Assembly
For both my cards, I elected for a geometric pattern. The first utilizes a grid pattern, with the shapes together (touching at edges), centered on the card.
The second card utilizes a similar pattern, but even spacing between all shapes. I started by finding center, then aligning shapes by eye and adhering using liquid glue.
A spritz of one of the utilized Distress Spray Stains mixed with a little bit of water creates the perfect speckling medium. Pick up ink with one paint brush and use a second to tap and produce a spray of ink over your cards.
With that, these card are finished!
I love the neutral color scheme of these cards, but even better is that I used up some left over bits! I always get a kick out of ‘being more efficient’ and using as much as my supplies as possible.
Hopefully, you are inspirited to use up more of your ‘left over bits’ – tell me, how do you plan on using them up?
For more inspiration using speckled cards, see my post on Watercolor Sunflowers. Thanks for joining me today!
Supplies
Neenah Classic Crest Solar White Cardstock: 110lb for card base, 80lb for die cutting