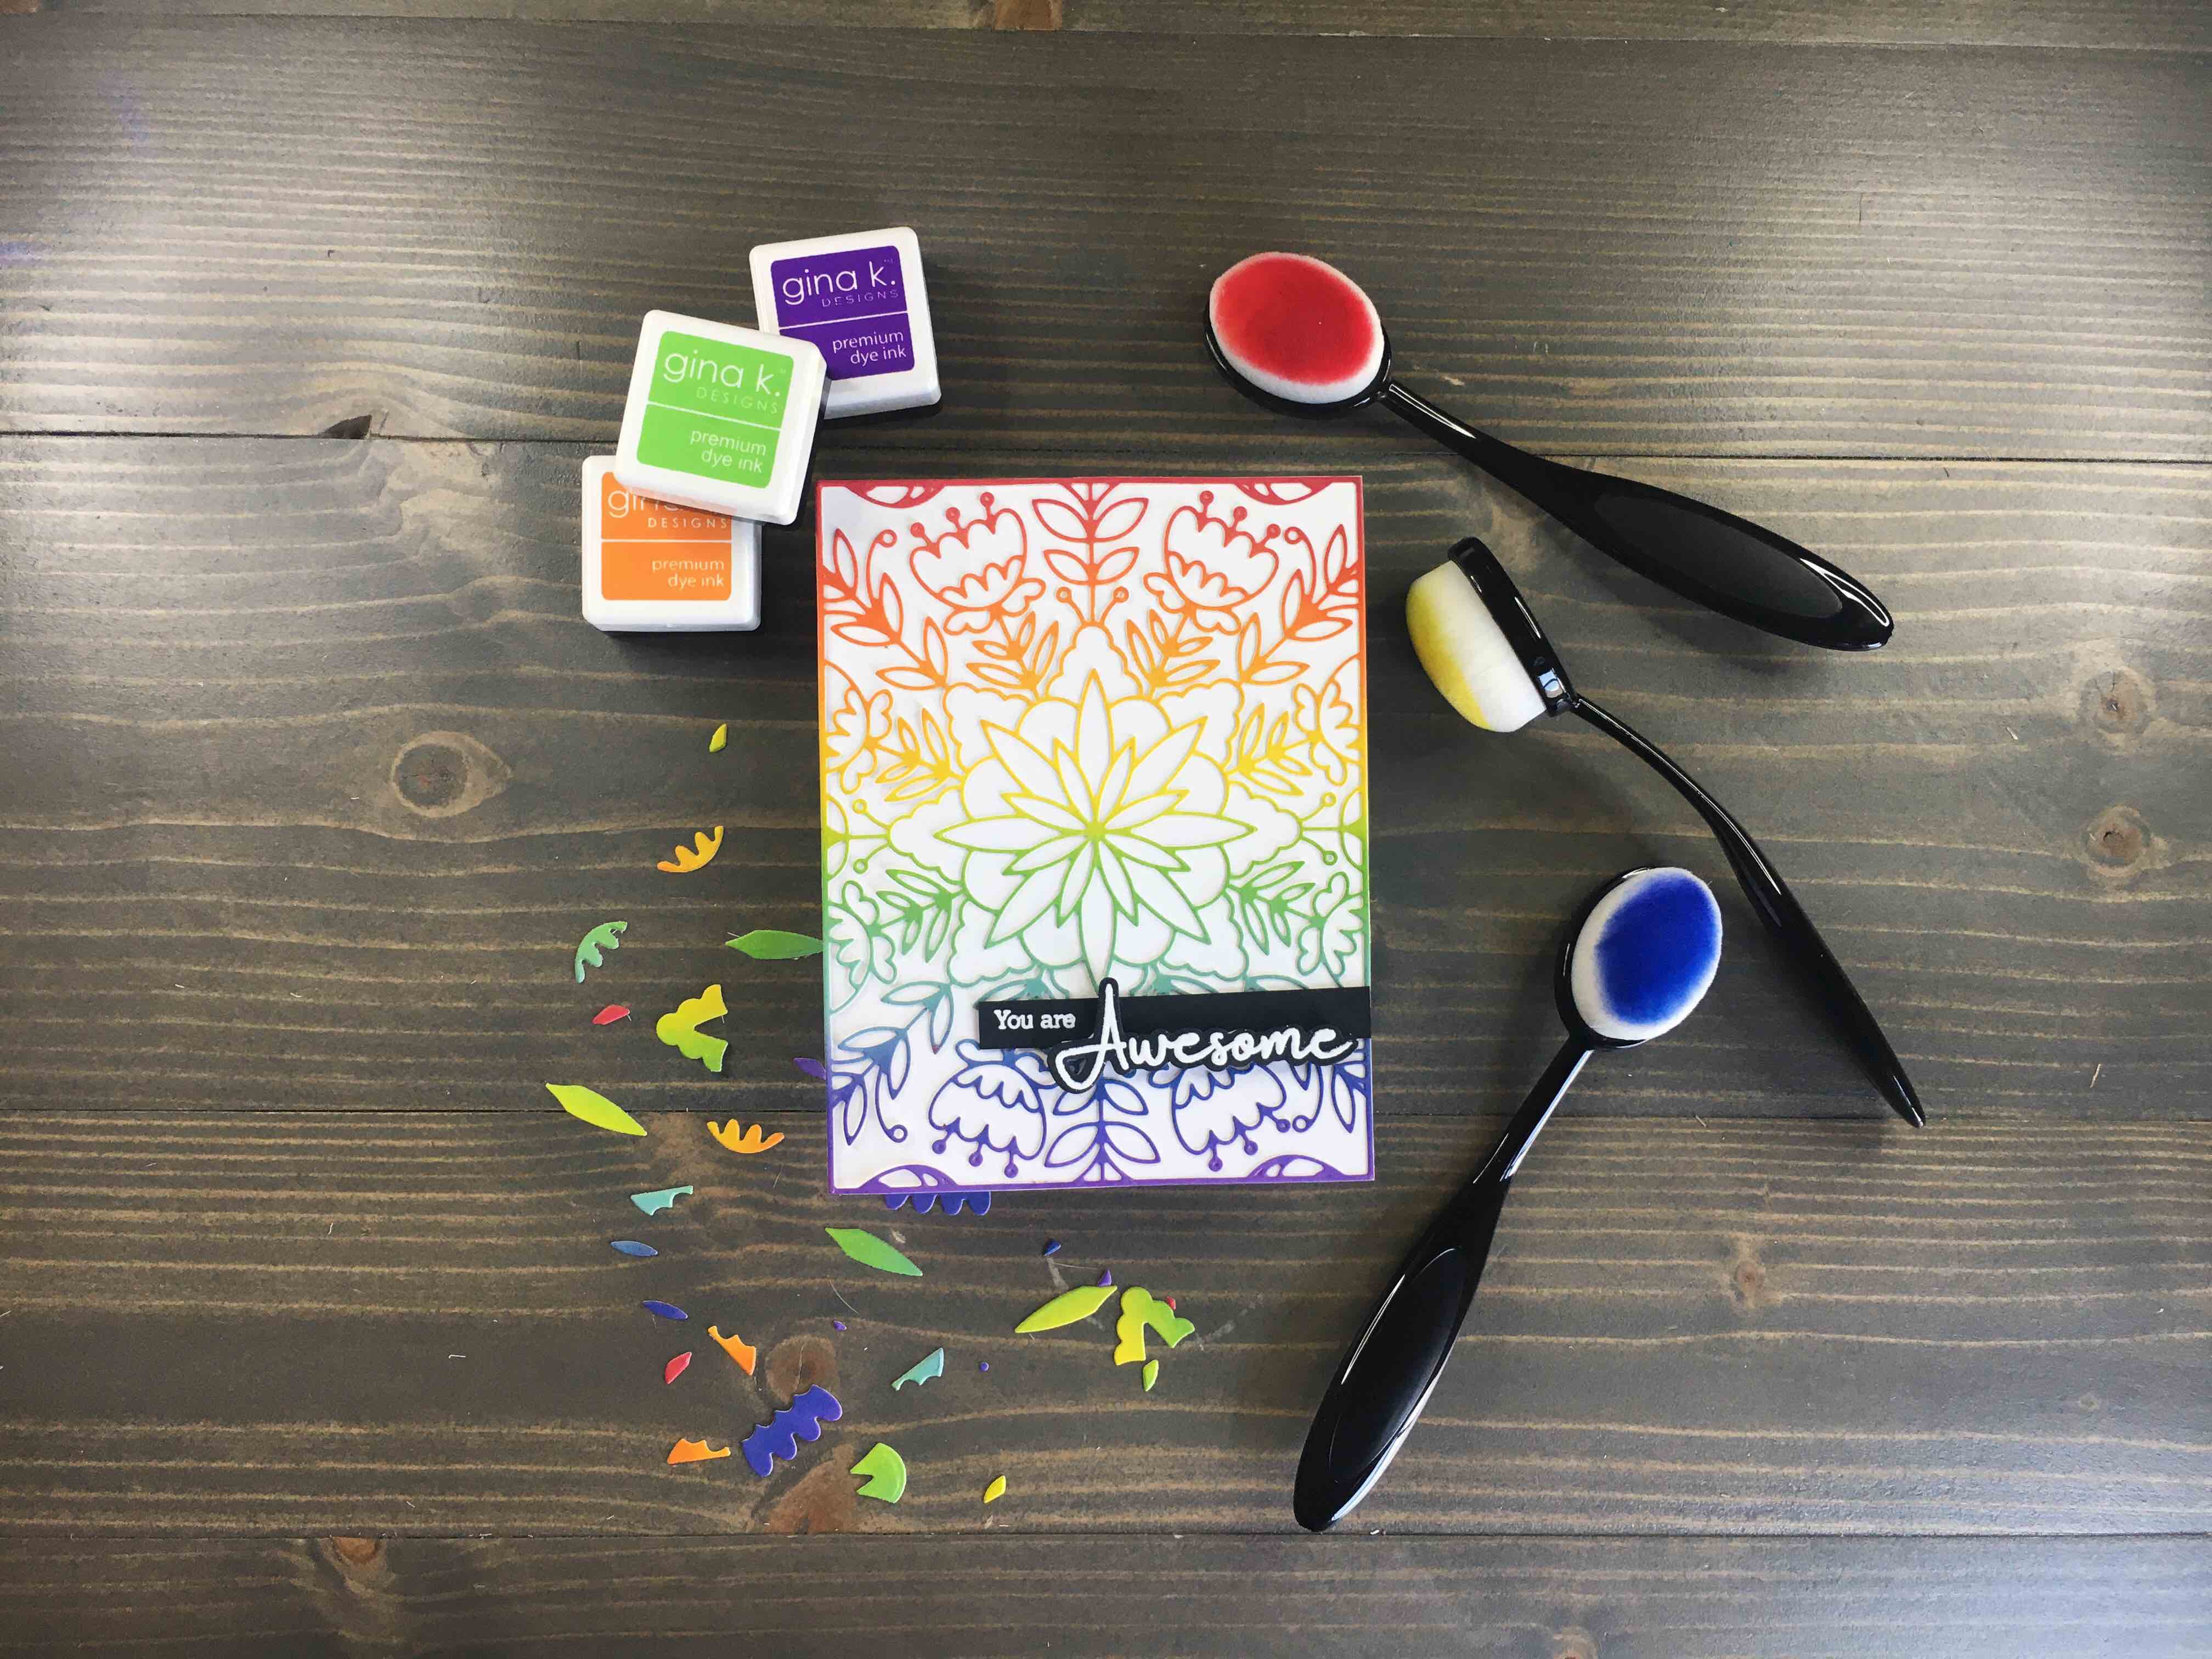
An ink blended card is a great way to customize a card. A similar card design can have an overall different feel to it based solely on its color palette. Today’s ink blended card is full of color, but it could easily have a monochromatic color scheme for a different type of message all together.
Supplies
Gina K Premium Dye Ink: Blue Denim, Cherry Red, Lucky Clover, Ocean Mist, Tangerine Twist, Wild Dandelion, Wild Lilac
Cut a card panel from Bristol cardstock measuring 4 1/2” x 5 3/4”. This is just larger than an A2 card panel. Begin ink blending by rubbing blending brush into ink then using circular motions off the cardstock gently moving onto card panel. Apply additional ink to brush as needed, always re-starting your blending off page. This will help prevent harsh lines in blending.
Use additional brushes as you transition between colors, going back and forth between brushes to aid in blending. Continue moving through colors until your panel is complete.
Die Cutting
Using a low tack tape, secure Folklore background die to card panel and run through your preferred die cutting machine. Note – this is an intricate die and additional shims and multiple trips through machine may be necessary to obtain a complete cut.
Using sentiment background die, cut the ‘Awesome’ background from black cardstock. Keep the negative space to aid in stamping the sentiment onto the die cut.
Stamping & Embossing
Position sentiment stamps on Misti using negative space from ‘Awesome’ die cut as a frame, then placing die cut in opening and positioning stamp above. Place ‘You are’ sentiment stamp on scrap of black cardstock and transfer both stamps to Misti lid.
Run and anti-static pouch over cardstock, then stamp both sentiments using VersaMark ink.
Heat emboss using Ranger Embossing Powder in White.
Trim ‘You Are’ sentiment into a long rectangle, long enough for ‘Awesome’ sentiment to sit atop.
Finishing
Using a spray adhesive, spray back of background die cut, then adhere to A2 card base. Use liquid glue to adhere rectangular ‘You are’ sentiment above ink blended background (place 3/4 down on card panel) and use adhesive shapes to pop-up ‘Awesome’ sentiment. This card is complete!
The bright colors paired with the intricate background definitely make this Ink Blended card stand out! The black cardstock backing for the sentiment helps the message pop, and the script text keeps with the whimsy of the card.
For a full video tutorial, click below to link over to my YouTube channel. For more inspiration on rainbow cards, see my post on Simple Rainbow Cards Using 1 Die.