Today, I have a fun project that highlights the Freestyle Florals & Die created by Mama Elephant. Fairly simple to put together, but a little on the time consuming side. Even so, I had a fun time crafting today. I saw this technique on YouTube, created by Jennifer McGuire. She has a ton of great techniques, check our her blog at jennifermcquireink.com.
I started off by stamping a bunch of flowers and leaves from the Freestyle Florals stamp set. I recently purchased some Catherine Pooler dye inks and was excited to try them out. Today, I used the Spa Collection: Urban Oasis. This collection has four inks: Lemongrass, Rouge, Sage and Queen for a Day.
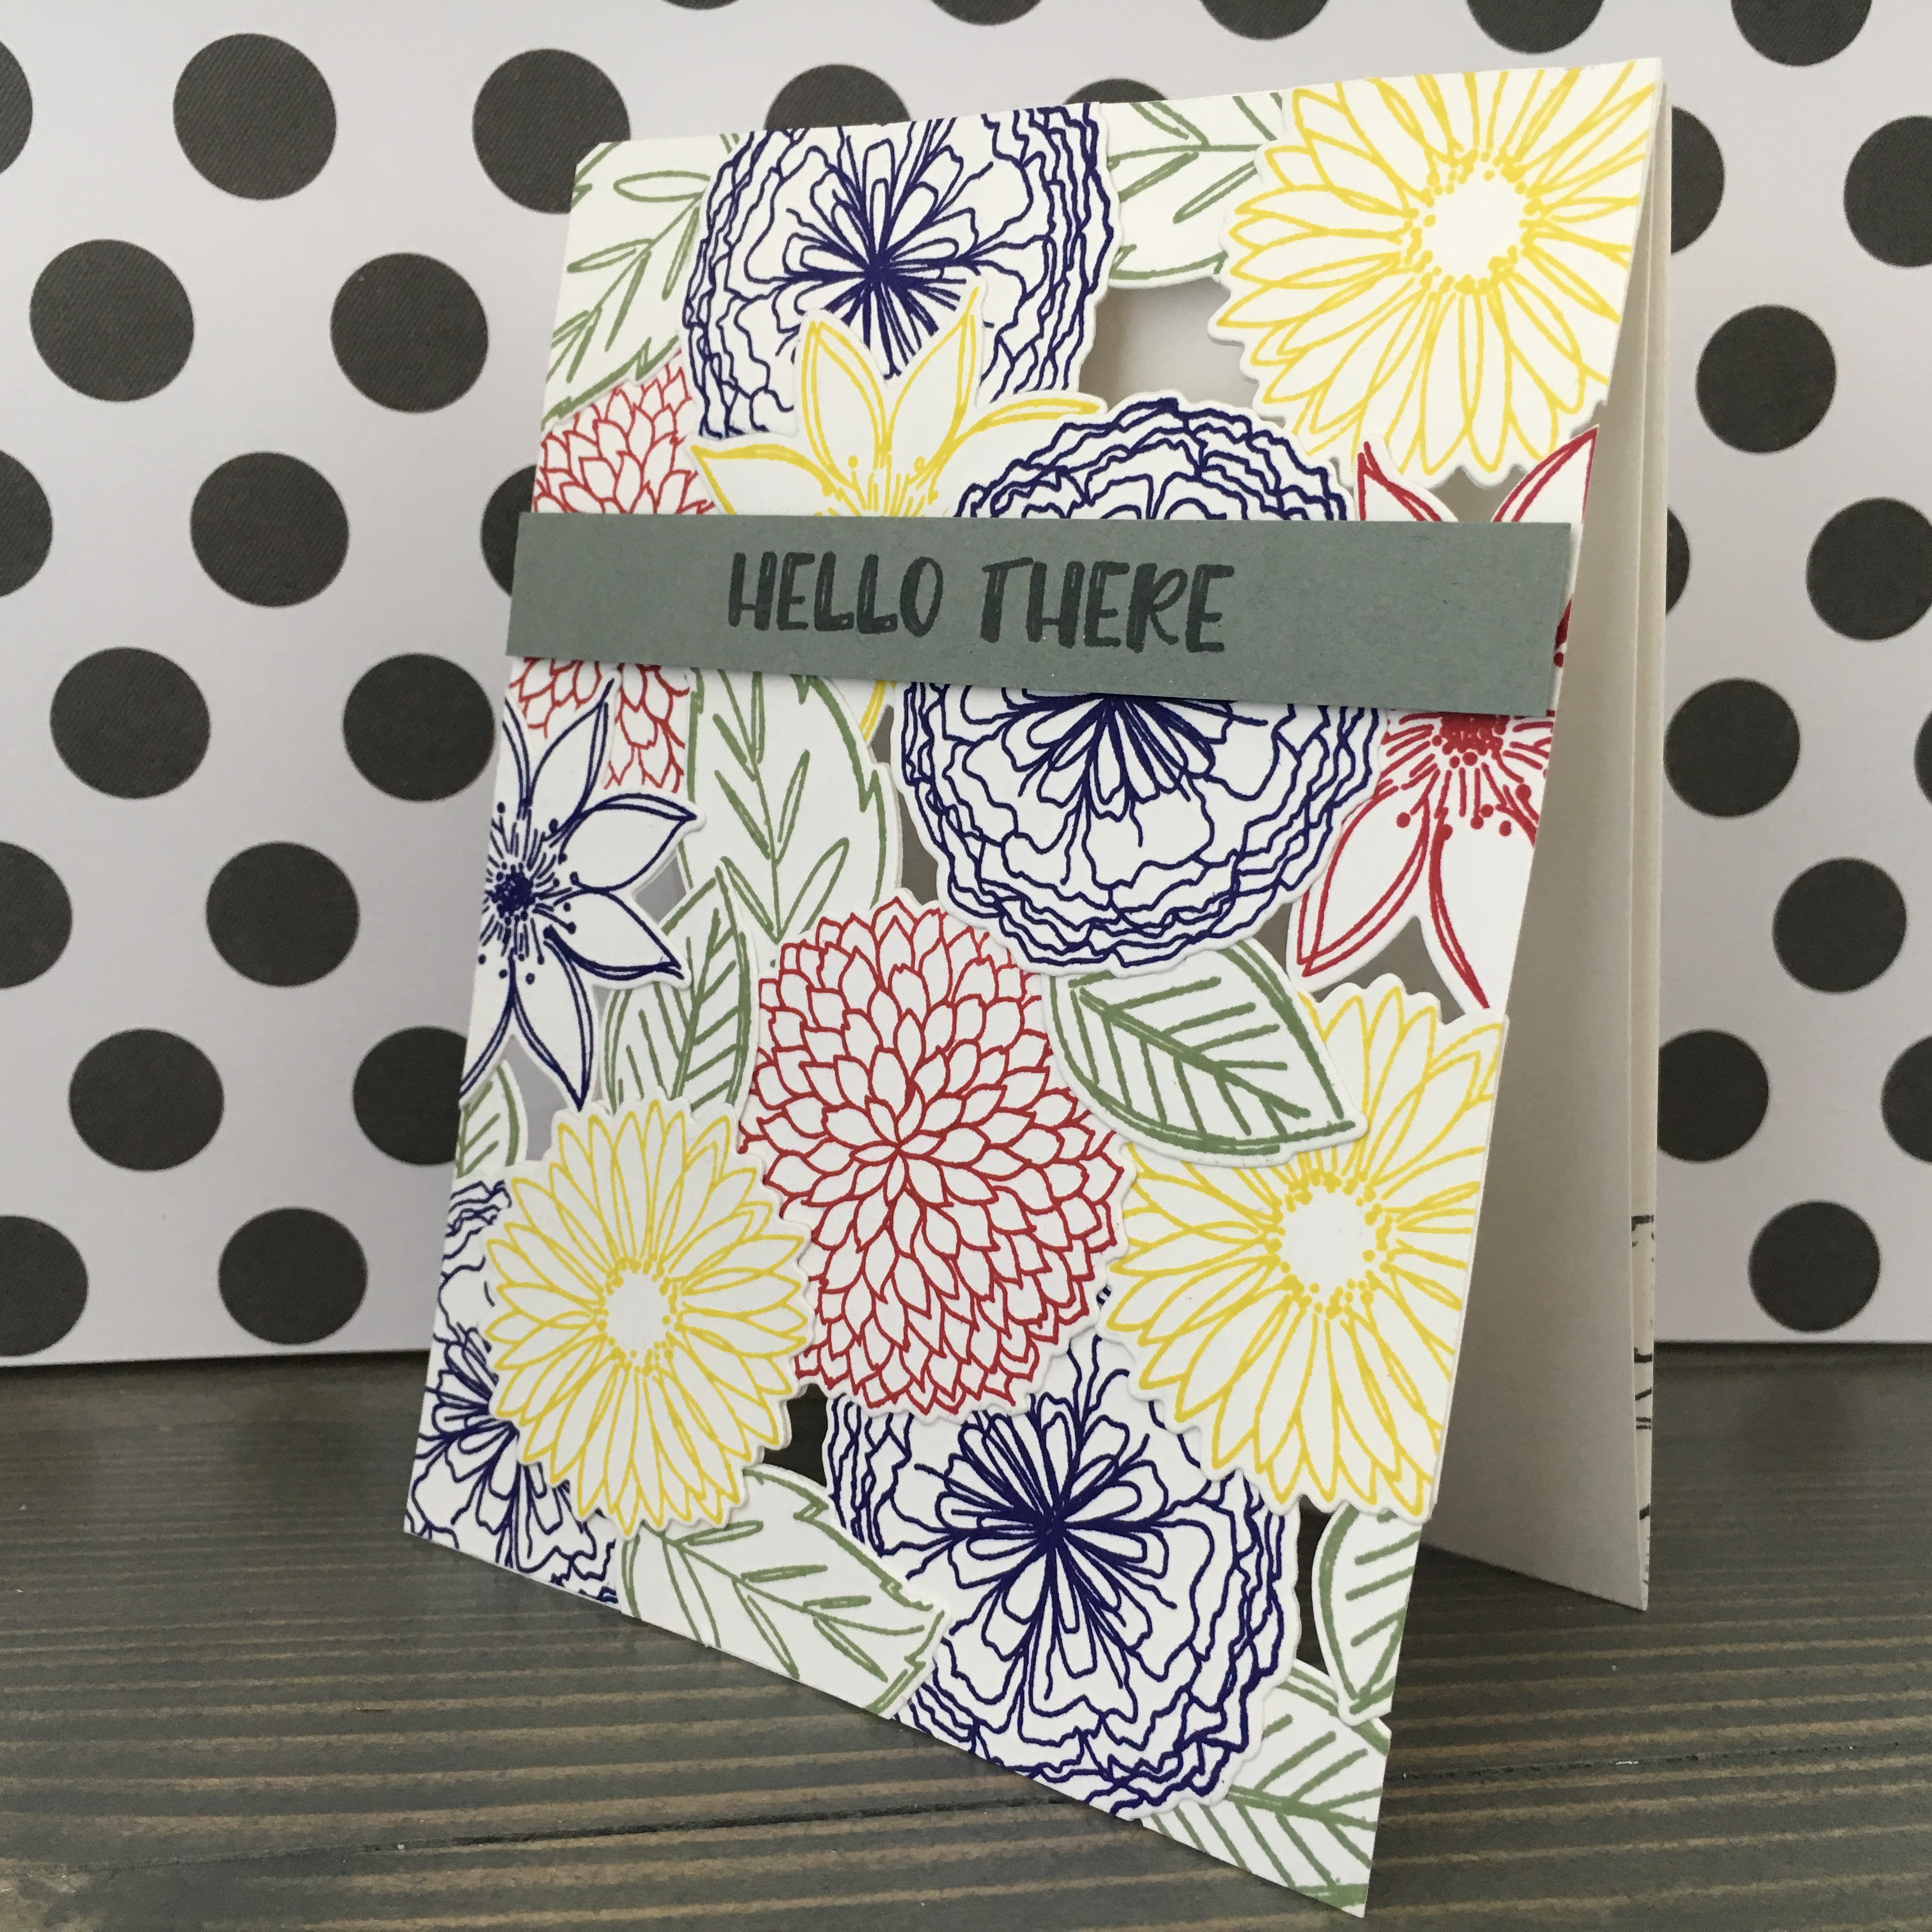
After stamping came die cutting. After returning to my workstation, I laid out an A2 sized mat (4 1/4” x 5 1/2”) to use as a guide while laying down my flowers. I layered the flowers and leaves, adjusting as necessary to allow a small bit of the card below to show through. I focused on keeping the boarder covered, as this gives stability to the card.
After layering is complete, I carefully topped the pile with Glad Press and Seal. I gently pressed down across the flowers, making sure to fully adhere the light tack wrap to all the die cut pieces. I then flipped over the stack and cut off the excess.
Using Gina K Connect glue, I added dabs of glue between layers of overlapping pieces. I also added additional die cut pieces (not stamped) to add stability. Not every die cut needs to be layered with additional pieces, I kept going until I felt the card was sured up and sturdy.
I then moved on to cutting two A2 card bases. I used Neenah Solar White 110lb cardstock (8 1/2” x 11”). I wanted vertical cards, so I made my cut at 4 1/4” (while paper oriented portrait). I used my Scor Buddy to score fold lines at 5 1/2”. Next, I cut one of the bases 1/2” from the fold line. This tab is where I attached my see-through cover, again using Gina K Connect glue.
After the glue dried, I set the opened card on my table and flipped the second card base upside-down, orienting the fold at the bottom, which is opposite the top card base. I then slid the second card base around the bottom base of the top card. The two card bases are now essential sandwiched. I glued the two back covers together, which left a tri-fold card.
I grabbed a scrap piece of Gina K Moon Lit fog cardstock and stamped my cover sentiment from Mama Elephants Garden Frame stamp set. I used another Catherine Pooler ink, Black Jack, which I felt complimented the color scheme perfectly. Using Scotch Foam Tape, I adhered the sentiment to my card front.
I wanted another sentiment on the middle panel lined up in the same spot as the card front, so I pulled out my stamp platform and placed my sentiment stamp on top of the stamped cover sentiment. I picked up the stamp with my platform, then opened the card, careful not to move its position. I was then able to ink and stamp on the middle panel.
To add interest on the innermost panel, I used acrylic blocks to mount the three leaf stamps and free stamped them along the bottom. I continued using Black Jack ink for the sentiments and inner leaves, thus keeping consistency in my color scheme.
I love how this card turned out. It’s a fun design that has an impressive look, yet is not difficult to obtain. The Freestyle Florals are stunning layered together, and pair nicely with the sentiments from the Garden Frame stamp set. I’m quite pleased as well with the Catherine Pooler inks. I’ll definitely be using them more. The colors are vibrant and provide clear, crisp images. Overall, a great day crafting! It’s a great day to Keep Calm and Craft On!