The autumn palette and thank you’s go hand in hand. These fall thanks cards are perfect for the season, and fun to create. For the full video tutorial, click below to link over to my YouTube channel. Otherwise, keep on scrolling.
Alcohol Ink Panel
These cards start with an alcohol ink panel. I began by selecting a range of fall colors and applied them in layers, adding drops of Alcohol Blending Solution or a spritz of isopropyl alcohol to aid in ink mobility. The Ranger ink blower was a great tool for moving the color around as well.
Once I was satisfied with the panel, I set it aside to dry.
I finally decided to try out an Alcohol Lift-Ink pad, so I set up my Misti with a stamp from Simon Says Stamp Autumn Greetings set, the dry alcohol ink panel, and a panel of Neenah cardstock hinged above.
Beginning with inking and stamping the alcohol panel, I next flipped down the plain cardstock panel and transferred the ink. I repeated the process multiple times to darken the stamped image.
Now, I haven’t used alcohol lift-ink before, and I definitely need to play around with it more, as my results were not quite what I was hoping for. Never fear – I was able to salvage both the panels, and just transitioned my card plans a bit.
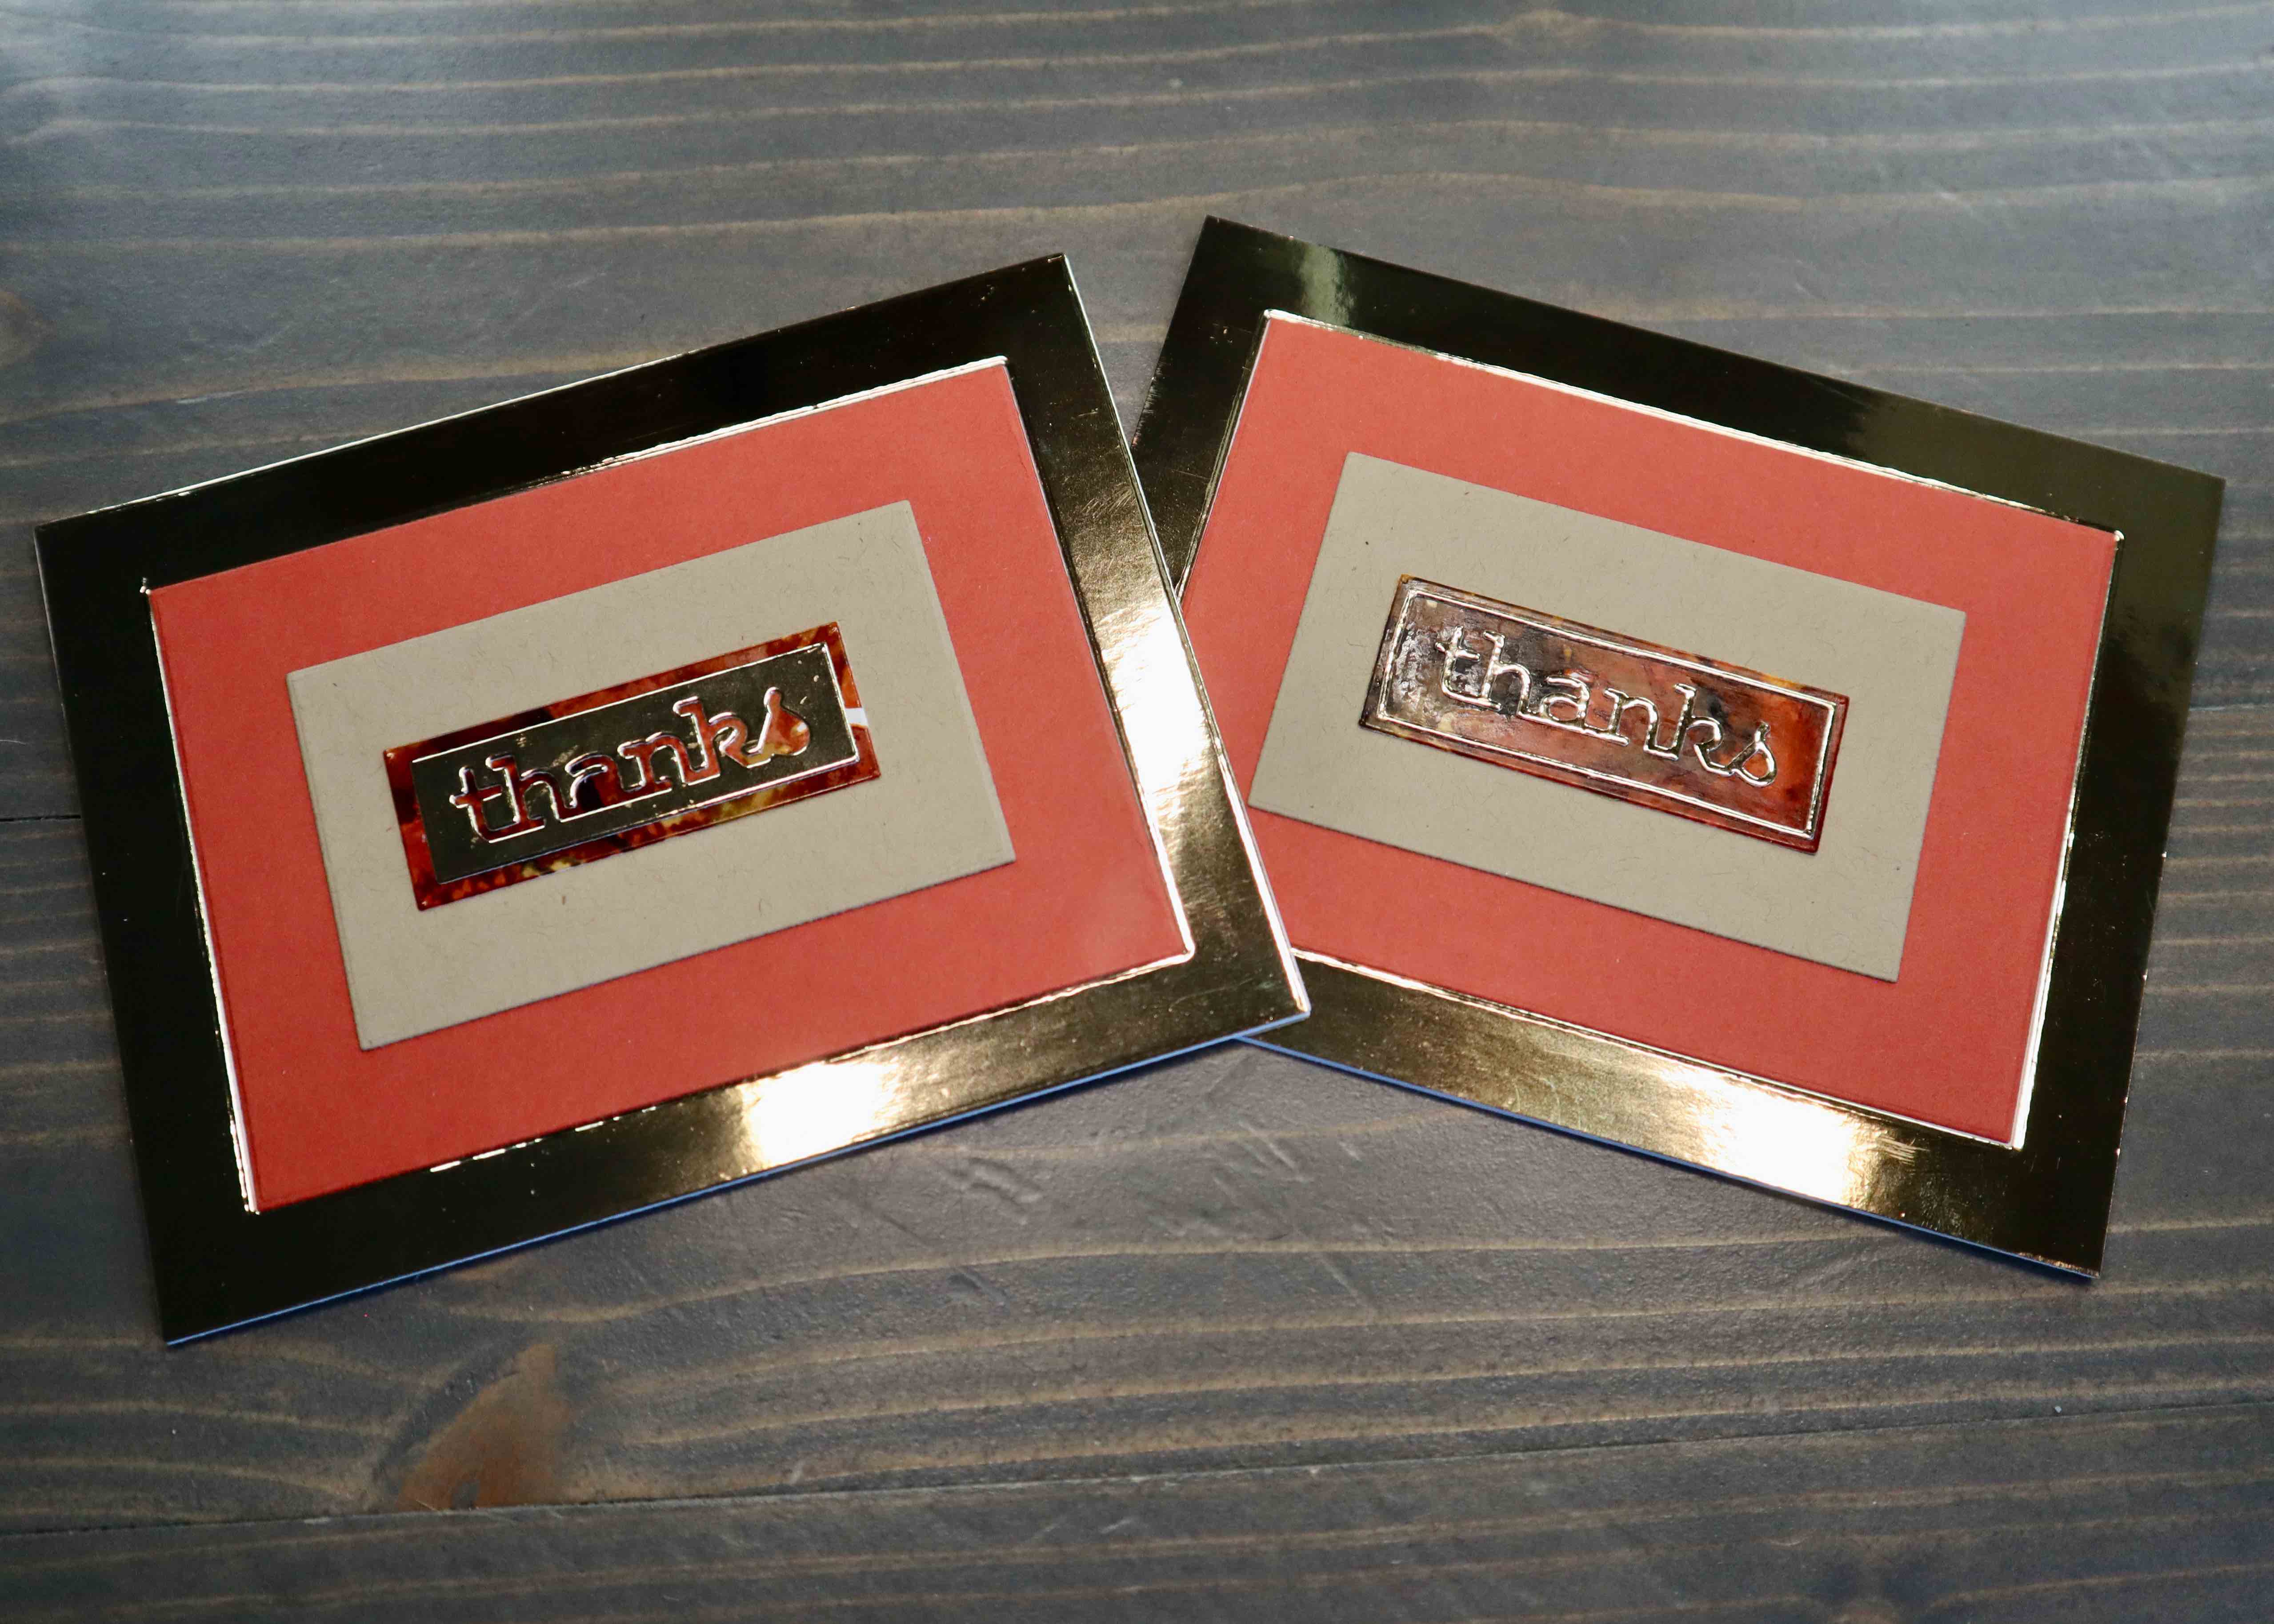
Card Assembly
Starting by taking the Thanks Frame die, I die cut two sentiment backgrounds from the alcohol ink panel. Next, I cut one sentiment from gold mirror card. This was sufficient to create two cards as I used the negative space for one of the cards.
This sentiment is small, approximately 3/4” tall by 2 1/4” long, so I next cut some additional panels to frame the sentiment using Waffle Flowers A2 Layers dies and My Favorite Things card stock in Kraft and Tangy Orange, in addition to a final layer of the gold mirror card.
To finish, Distress Collage Medium was the prefect liquid glue to adhere everything to an A2 card base.
With these two fall thanks cards complete, I turned my attention back to the stamped panel.
Bonus Card
Pinkfresh Studios Ornate Banners dies completed this card quickly and easily. Using the same card stock and stamped panel, I cut three panels which I layered onto a card base using more Distress Collage Medium. With that, my third card was complete.
As I already mentioned, I’m going to play around with the alcohol lift-ink pad some more. As any new technique, there’s a learning curve I need to get myself around. I’ll share my findings when I feel I’ve got it under control!
Thanks for joining me today, if you would like more inspiration using alcohol ink, Click Here or Here.
Supplies
Neenah Classic Crest Solar White Cardstock: 110lb for card base, 80lb for die cutting
My Favorite Things Card Stock: Kraft, Tangy Orange