Watercoloring can provide gorgeous results, yet is often a daunting technique to some. Today’s tutorial pairs Jane Davenport’s watercolor brushes with an embossed background and the results are phenomenal. A die cut sentiment finishes off this Happy Birthday watercolor card.
Supplies
Neenah Classic Crest Solar White Cardstock: 110lb for card base
Canson XL Watercolor Paper
Gina K Cardstock in Lemon Drop and Moonlit Fog for die cuts
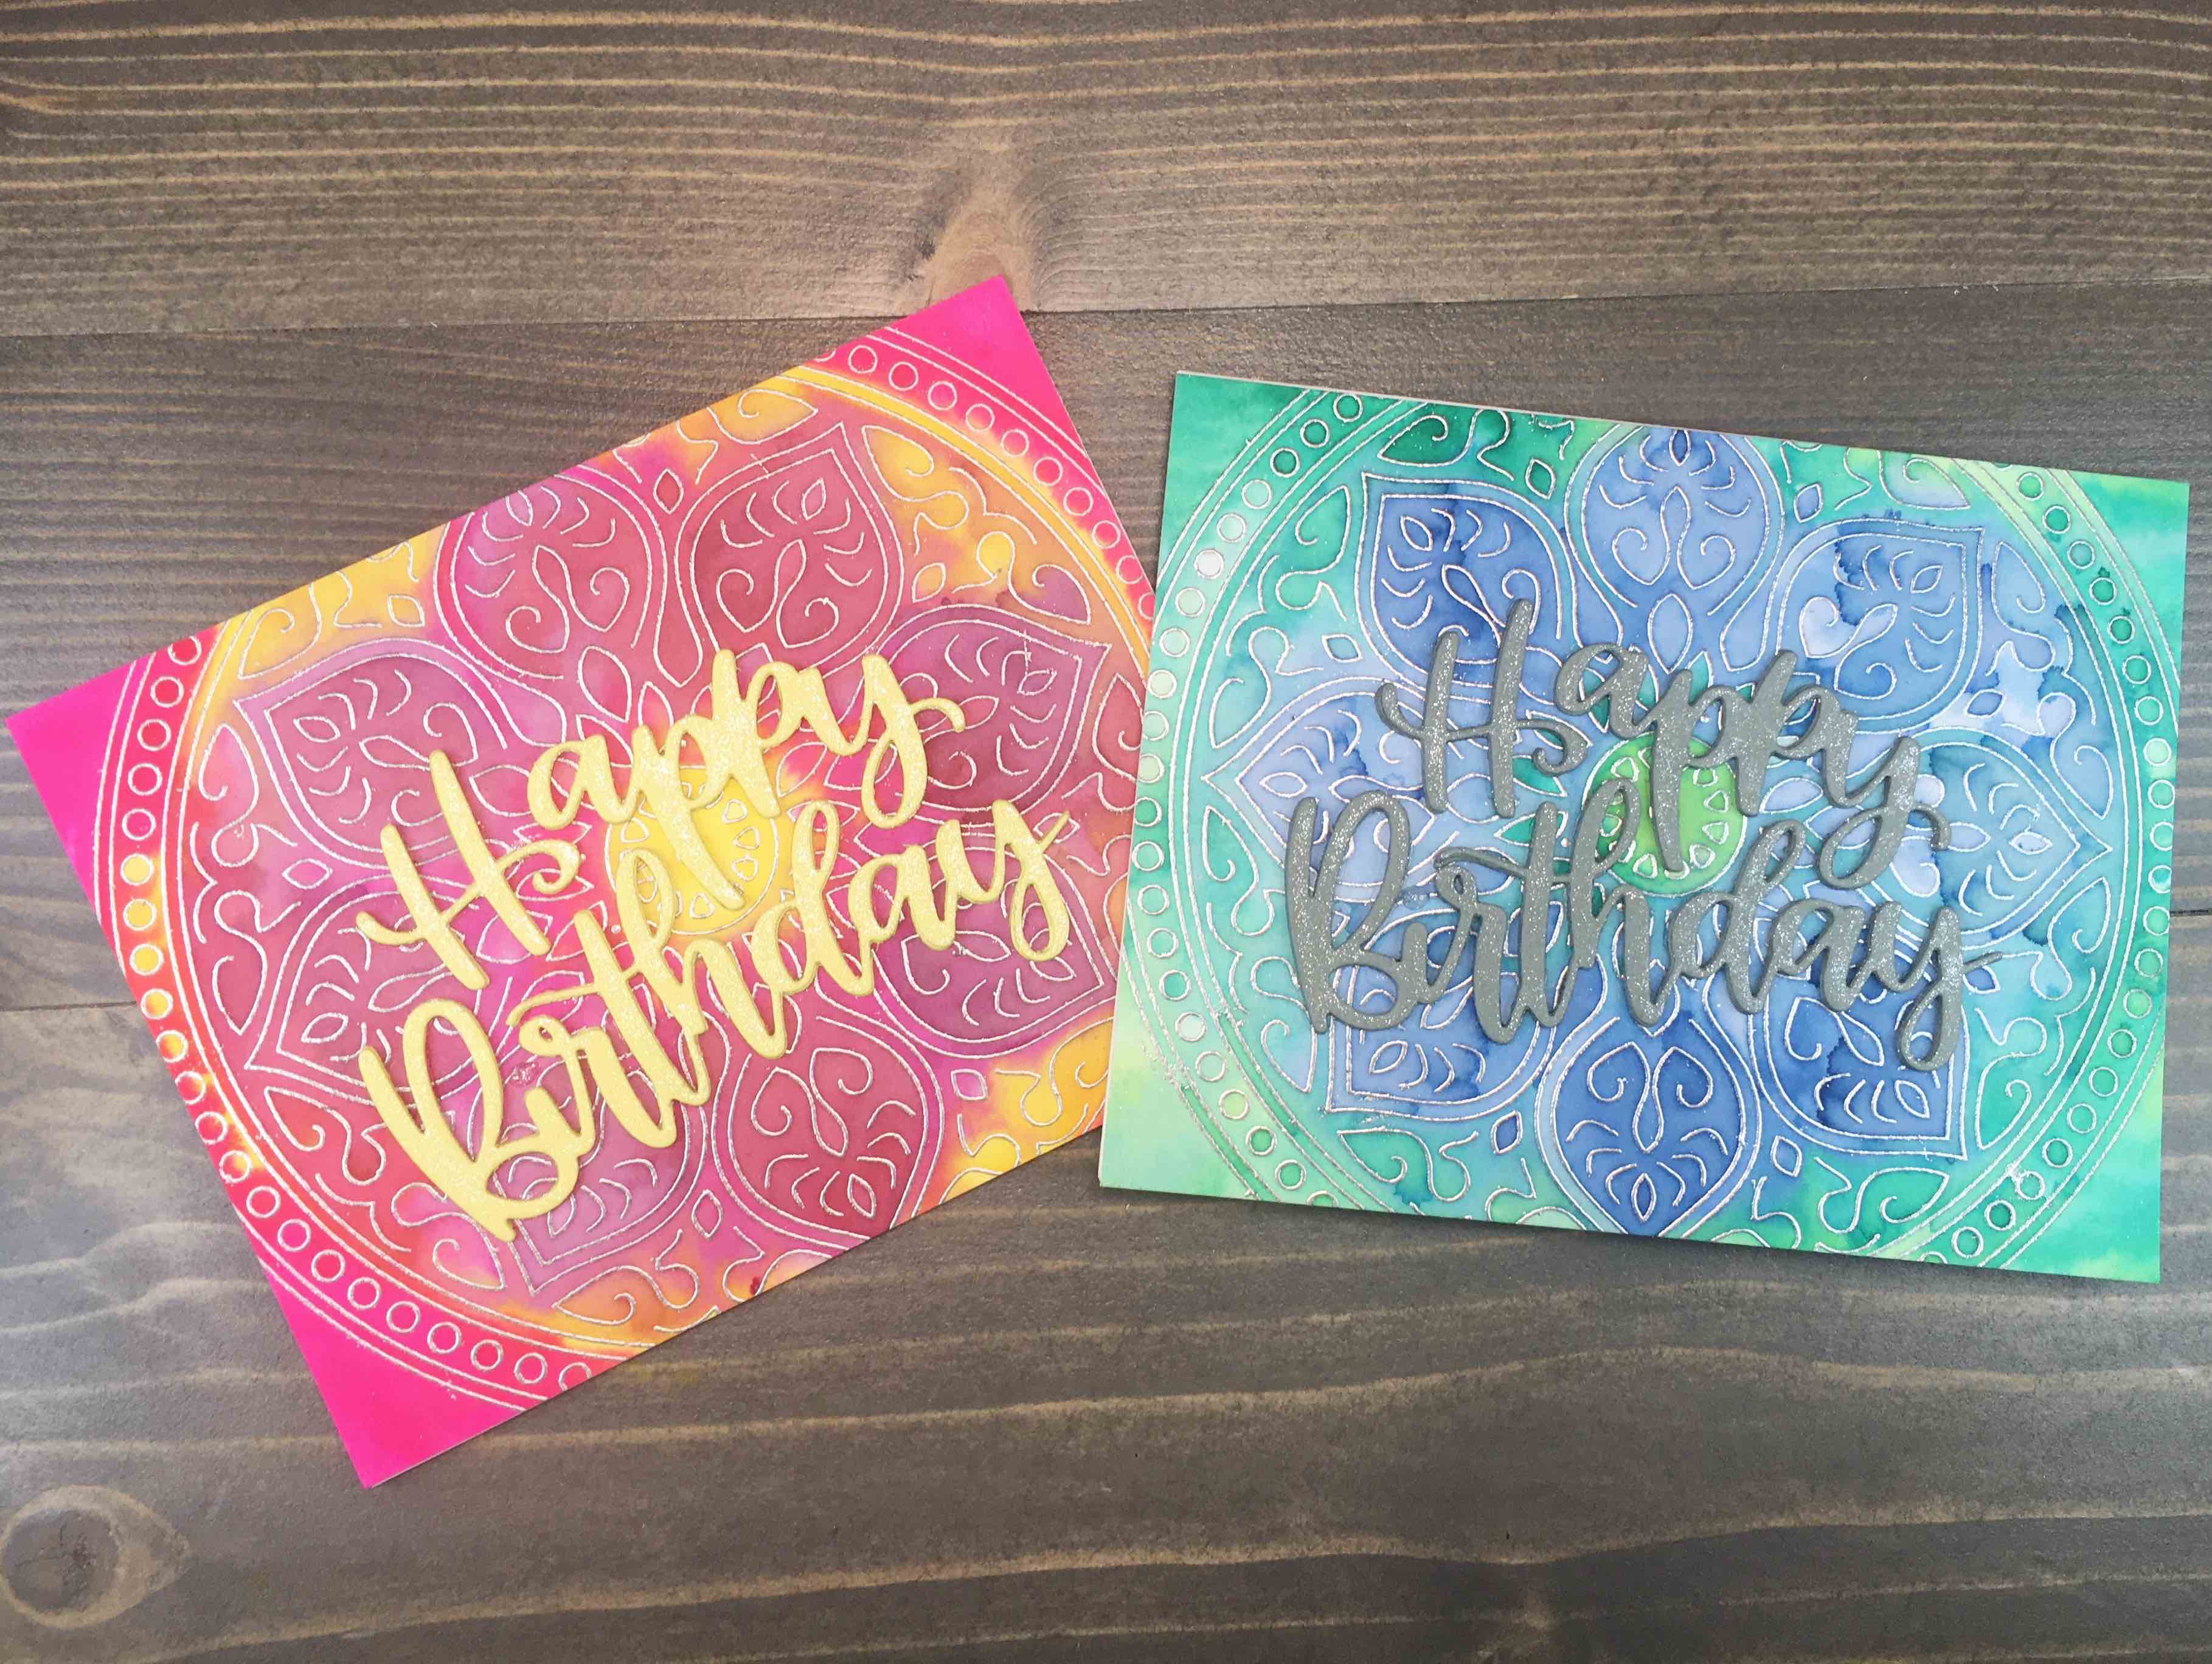
Prepare watercolor paper using anti-static powder to maintain crisp and clear embossing. Repeat stamp selected background image using VersaMark ink using a stamp positioner. I generally repeat stamp 3x when heat embossing. Pour selected embossing powder over watercolor panel and tap off excess. Set using an embossing heat tool.
Once cool, lightly spritz panel with water, then begin watercoloring using Jane Davenport Mermaid Markers. These markers are essentially water brushes filled with watercolor ink. The colors are beyond vibrant and a fantastic go-to for quick watercoloring.
Loosely apply ink to panel, lightly misting with water to aid in color movement. For today’s panels, I utilized three colors per panel, keeping cool colors and warm colors together. This aids in preventing the over blending of colors, which often turns to brown, or ‘mud’.
Precision painting is not the goal here. Allowing the colors to mix and fill the panel on their own is what creates the interest for this card.
Allow panel to dry thoroughly before trimming to fit an A2 card base. Adhere to card base using double sided tape.
Sentiment
A solid color sentiment is preferable for this card design as the background is busy enough on its own. Select coordinating cardstock for your sentiment and die cut three sets per card.
Layer the die cuts, adhering with liquid glue. This stacked sentiment will give the sentiment a bit of girth so it stands out among the background. Use liquid glue to adhere sentiment to card.
A light shimmer on the sentiment will tie it in with the shine from the embossing, and the Nuvo Shimmer Pen adds the perfect amount. To bring back the tittle for the “i”, add a drop of Nuvo Crystal Drops in Moonlit Fog.
Note: I rarely try to keep track of the tittles (dots for ‘i’ or small punctuation) when die cutting. I elect to add a new tittle via Nuvo Drops, small gems or small sequins.
These bright Happy Birthday watercolor cards are gorgeous, and are a fairly quick project (minus drying time for watercolor panel). I love the interest the watercoloring brings, and the Mermaid Markers make this step even easier, requiring no additional clean up. Their vibrant colors are breathtaking, and the markers themselves last over time.
For more inspiration on watercolor cards, Click Here to see my post on an Easy Watercolor Card.