I love creating alcohol ink backgrounds! Watching how the inks interact with each other is mesmerizing and absolutely gorgeous card panels can be created. Utilize your alcohol ink background with a simple card design in today’s tutorial!
Supplies
Alcohol Ink background – already prepared
Neenah Classic Crest Solar White 110lb Cardstock for card base
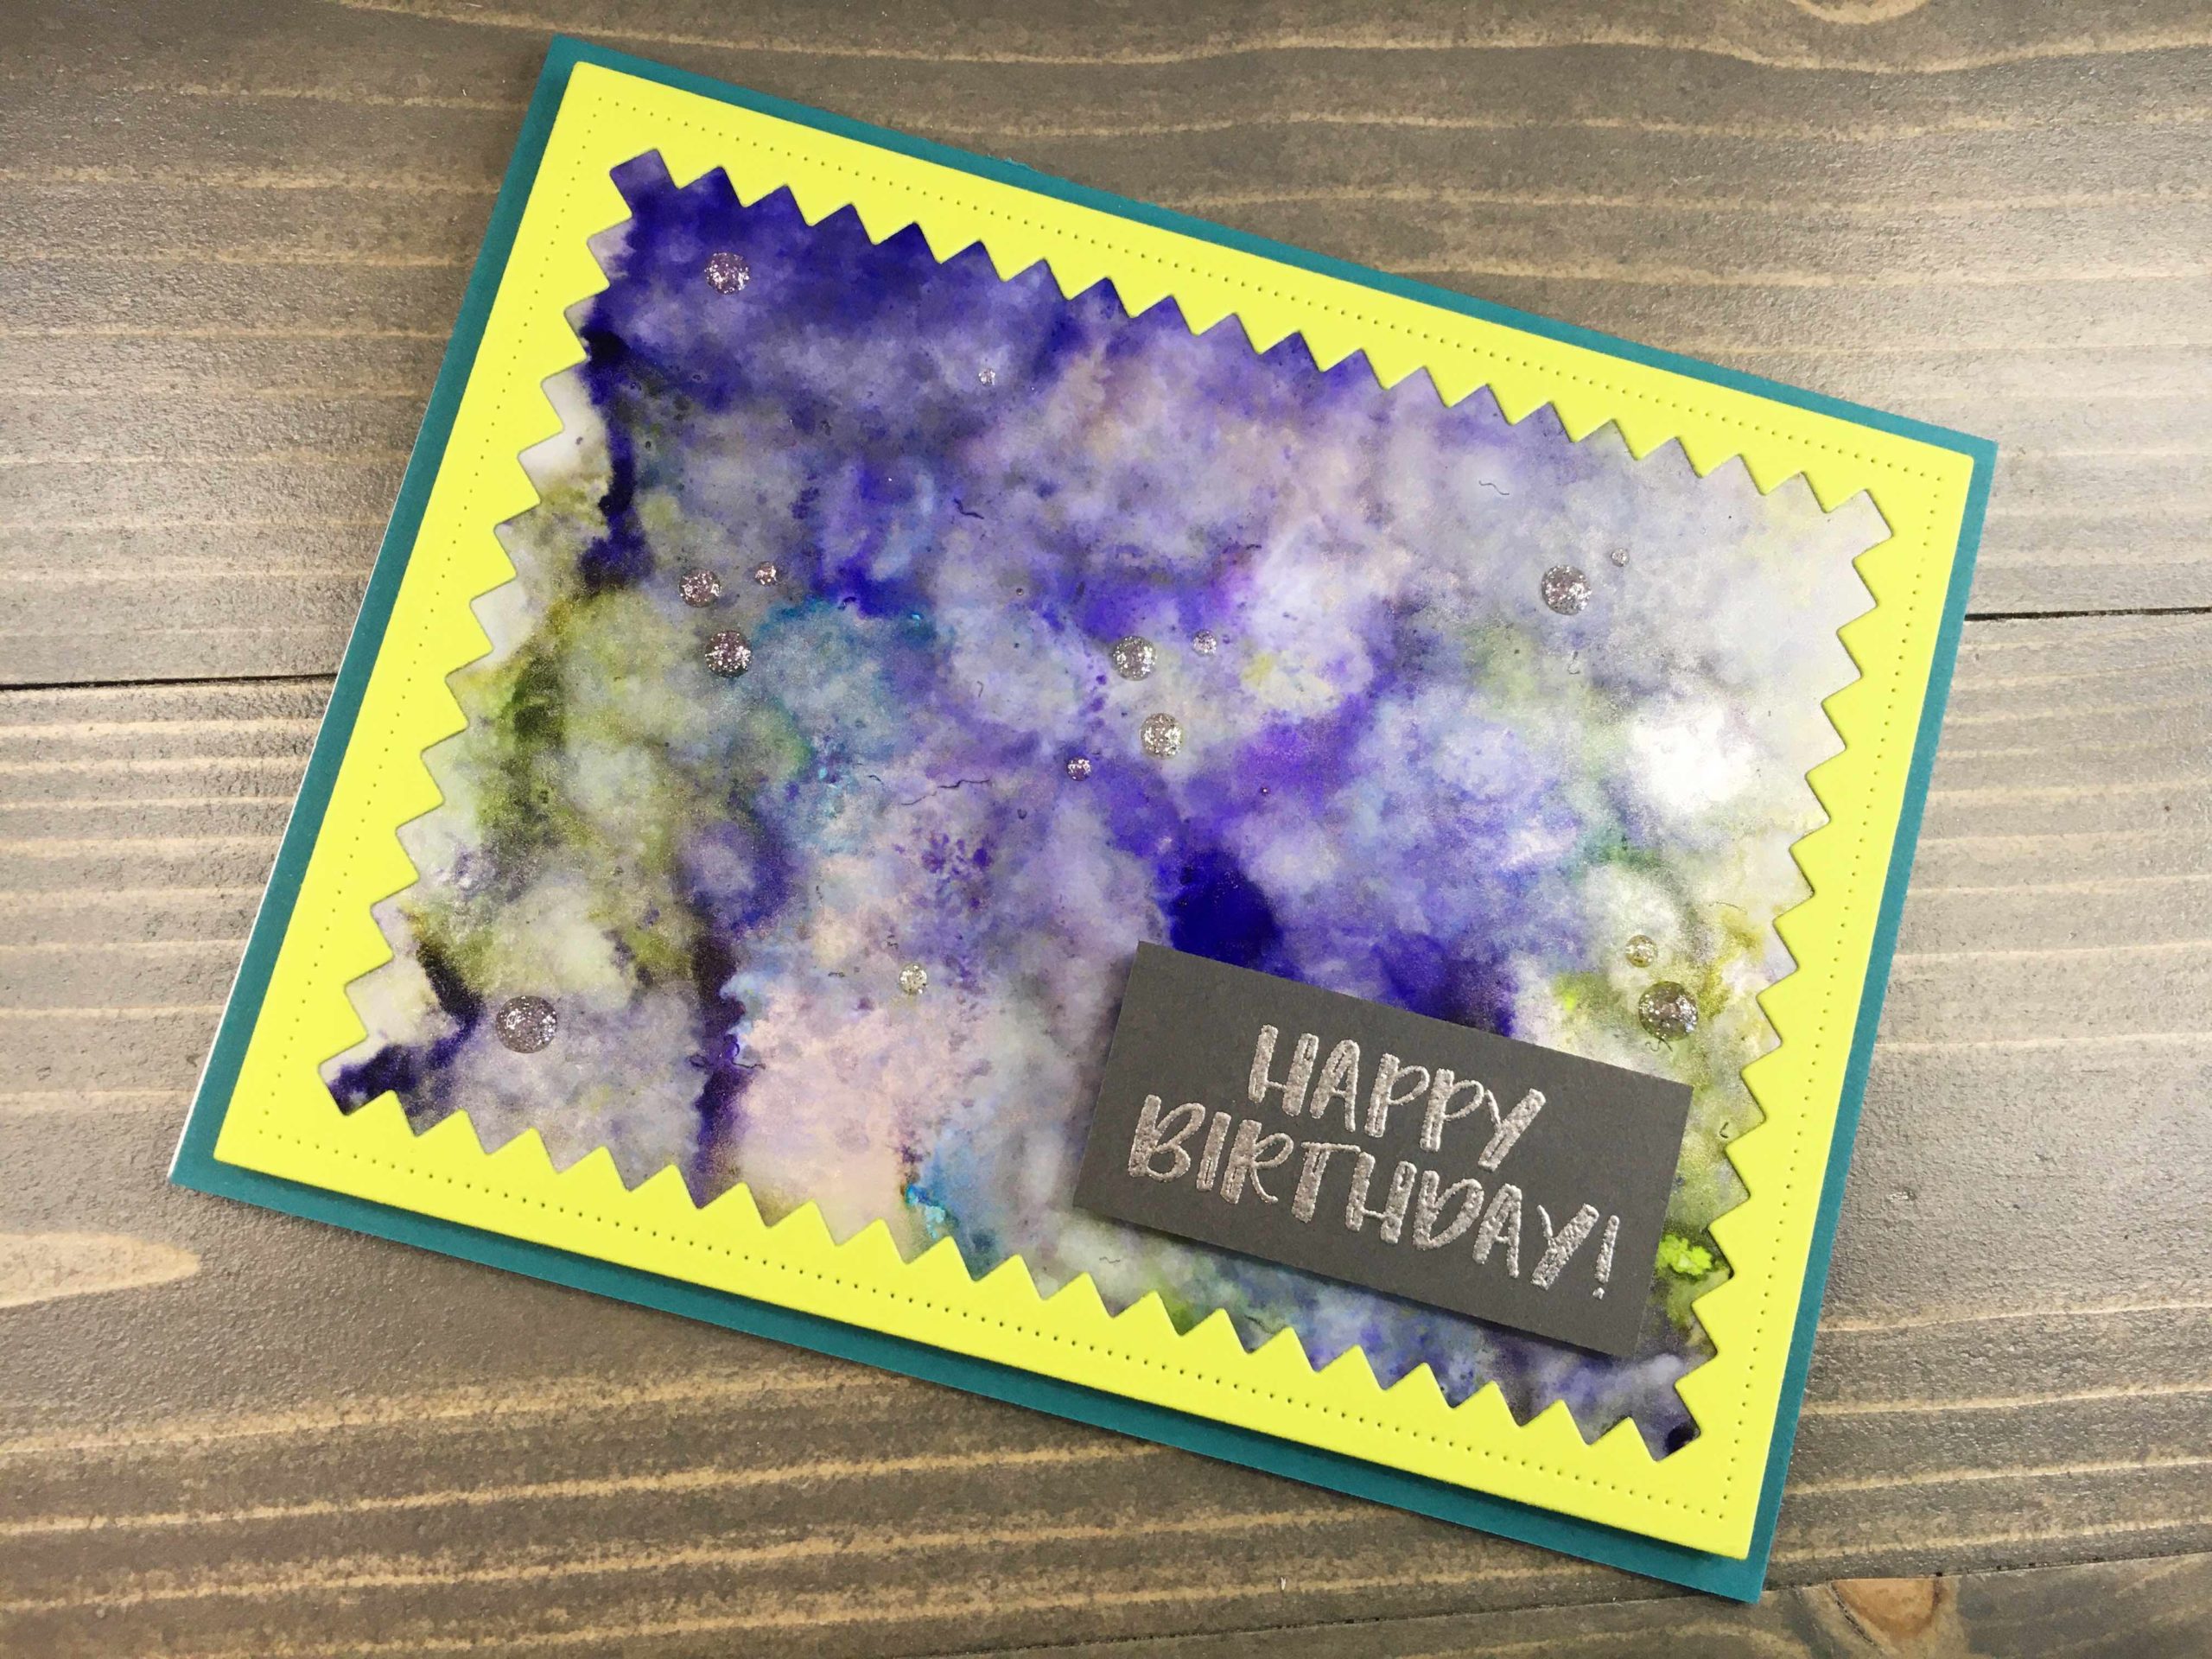
Using a frame die (such as Reverse Pinked, by Avery Elle), cut a panel of cardstock just smaller than an A2 card front. Save the negative space (inside piece) for another project. In a second complimentary color, cut a card panel 4 1/4” x 5 1/2”.
Trim alcohol ink panel to fit behind frame die cut, then adhere using liquid glue.
Cut a piece of craft foam (approx 4” x 5 1/4”) and adhere to back of alcohol ink panel. Adhere stack to larger panel of cardstock, then the entire stack to a card base.
Sentiment
Using VersaMark ink, stamp sentiment onto a scrap of coordinating cardstock. Heat emboss using Ranger Silver Embossing Powder. Trim panel and back with adhesive foam squares. Apply to card front.
Finishing Touches
Lorem ipsum dolor sit amet, consectetur adipiscing elit. Ut elit tellus, luctus nec ullamcorper mat
Add drops of Nuvo Glitter Drops to accent. Allow card to dry thoroughly.
This simple card design is fast to accomplish, yet remains eye-catching as it showcases your alcohol ink background. What better way to show off your panels?! Using minimal supplies is just another plus to this card design.
For more ideas on using an alcohol ink background click here.