Altenew is celebrating their 6th anniversary and I was lucky enough to receive a sweet gift from them for being a valued customer. My gift, which I dearly love, is a customized stamp set titled A Gift for You. This stamp set is the highlight for today’s card tutorial.
I love Altenew products! Their Build a Flower sets are absolutely gorgeous, their coordinating inks are beautiful, and the quality of their products is top notch. Take a look at what they have to offer, there is something there for every type of handmade card crafter!
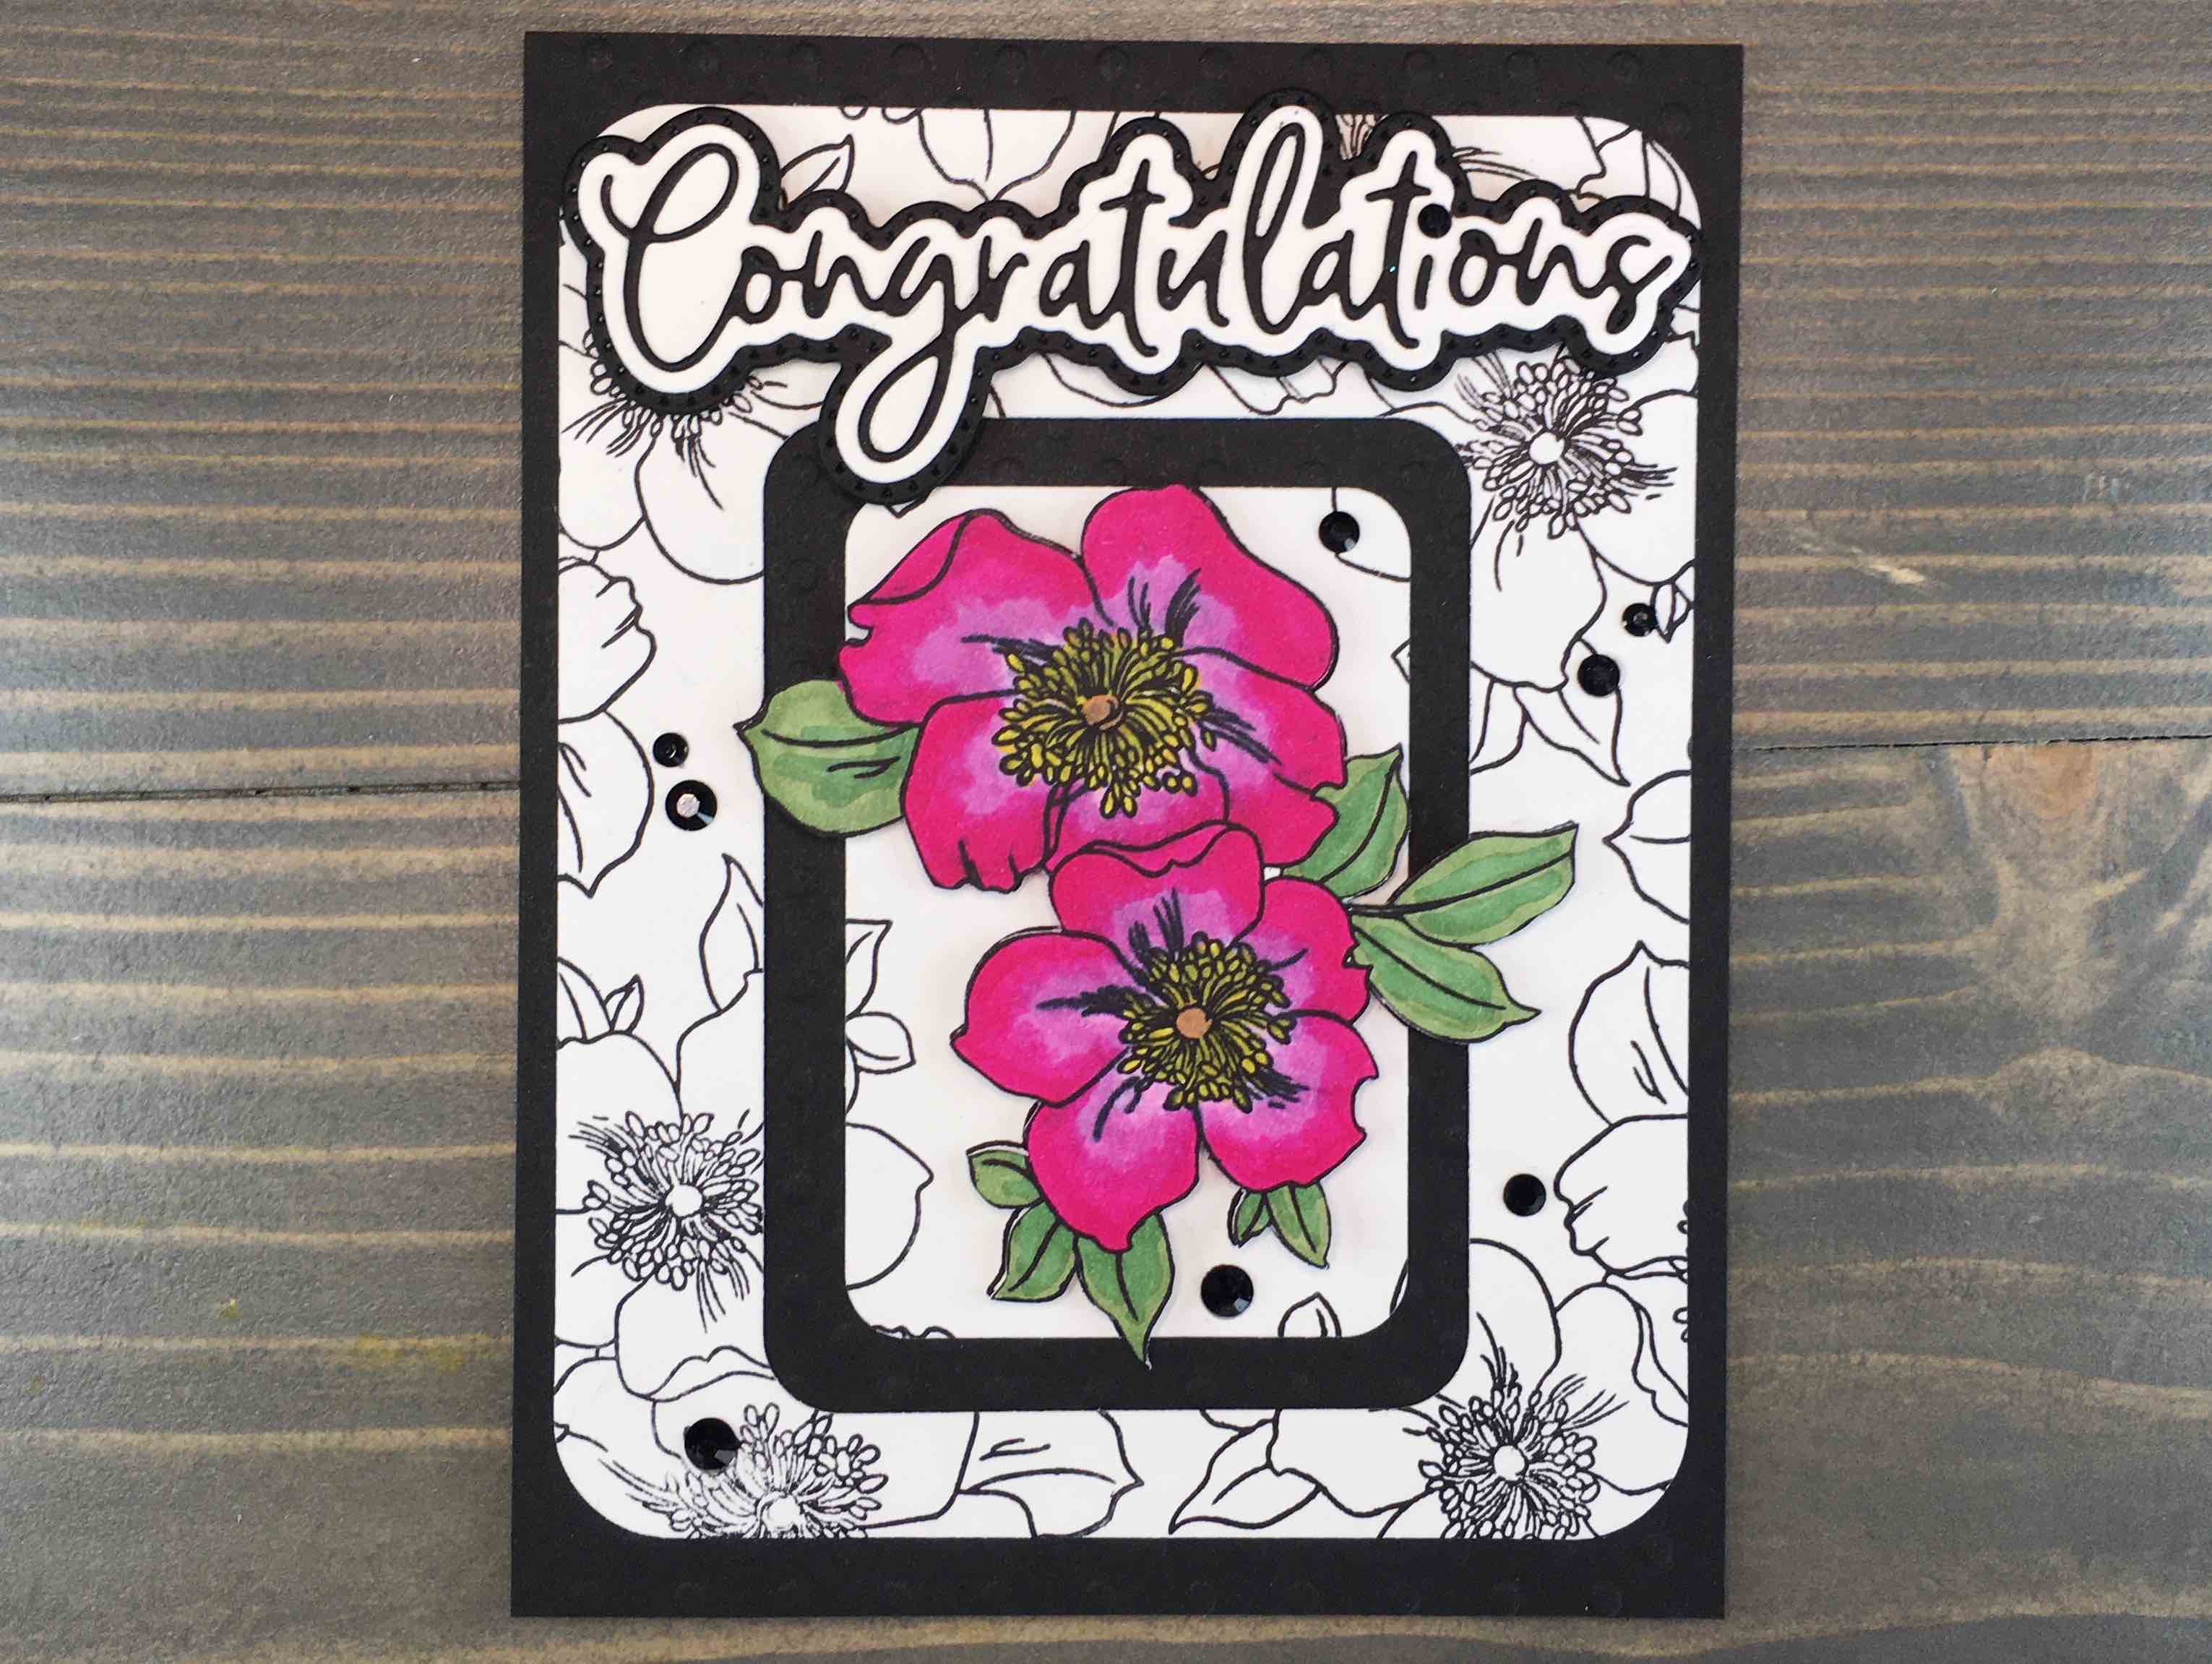
Using a floral image, stamp multiple times over an A2 card panel. Start with a flower image in the center, then fill the panel with images stamped around the perimeter. Make sure to allow stamped images to flow past the edges of the panel. This will be your background panel.
On a separate panel, stamp an additional image for coloring. This will be your focal point.
After Copic coloring (or whatever method of coloring you prefer) fussy cut this flower image.
Die Cutting
Select a pair of framing dies to create a cut-out in your background panel. Allowing your colored image to float above the cut-out will create a perfect frame for your focal point.
Using an embossing folder, impress a pattern onto a coordinating card panel. This will be used to mat the background floral panel.
Align background panel atop embossed mat panel and adhere with liquid glue. Use cut floral image to aid in alignment. Apply double sided foam adhesive to cut flower and after aligning correctly, adhere atop the stack.
Using double sided tape, adhere the stack of card panels and flower to an A2 card base.
Die cut sentiment and mats using Congratulations Honey Cuts from Honey Bee. This set cuts the sentiment and two mats that create a great layered effect. Use liquid glue to adhere all layers together, then adhere to card front using double sided foam adhesive.
Finishing
Liquid glue and a smattering of black gems really finishes this card off great. Little Things has a great selection of gems, and their Ebony Mix is perfect on this card. An alternative that would also look fantastic would be Nuvo Crystal Drops in Ebony Black.
As I received a customized stamp set (Thank You Altenew!!) I was able to stamp the back of my card with a sweet sentiment so the recipient knows I handmade the card.
I love how this card turned out. The bright pink is a great contrast to the otherwise black and white card while the popped up flower and sentiment adds some dimension without causing the card to become too busy. The minimal jewels finishes the card off perfectly.
A big shout out to Altenew on celebrating their 6th anniversary. They are a great company, and I can hardly wait to see what the next six years bring!
For more inspiration on floral cards using stamps from Altenew, Click Here to see my post on 3D Floral Cards.