Creating handmade cards doesn’t need to be difficult! Create a handmade card with an easy, beautiful background by combining only a few easy techniques and supplies!
Supplies
Neenah Classic Crest Solar White Cardstock: 110lb for card base and die cutting
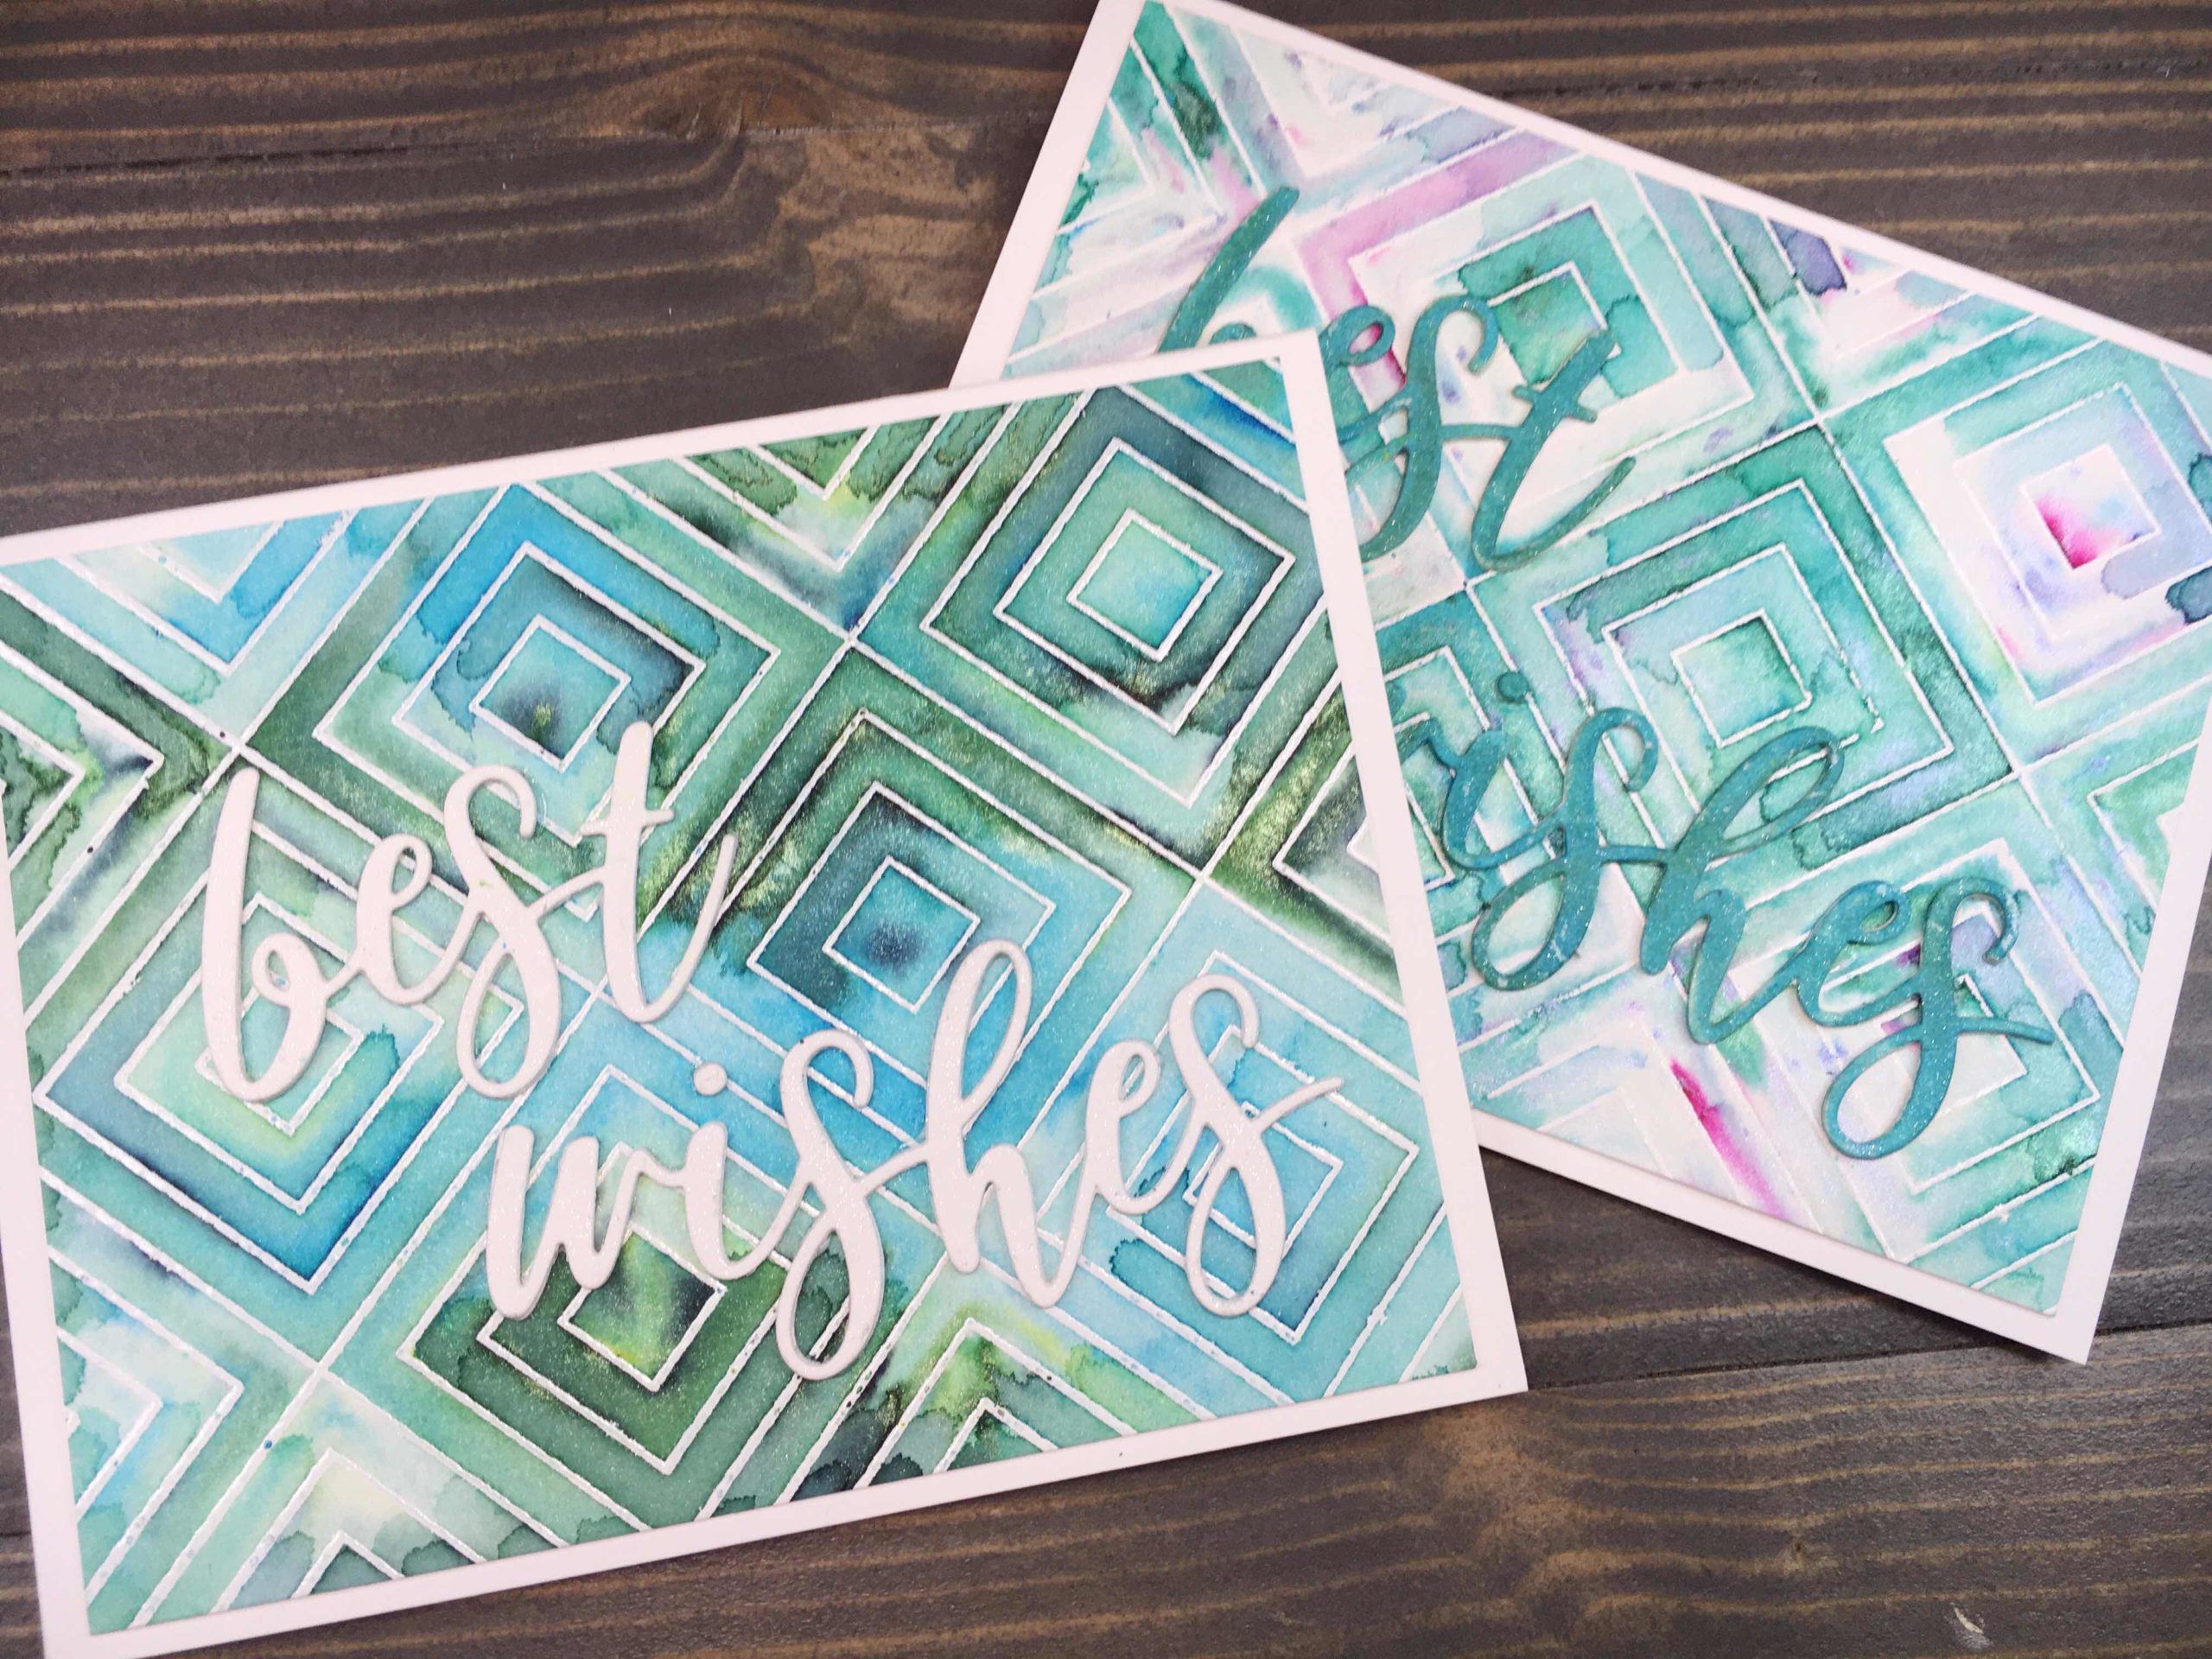
Begin by stamping a background stamp onto the smoother side of your watercolor paper using VersaMark ink. Coat wet ink with embossing powder of your choice and set with a heat tool.
Next, tape watercolor panel(s) onto a board. This step is optional, though prevents excess paper curling when water is applied later.
Using Nuvo Shimmer Powder, lightly tap the bottle to drop minimal powder onto card. Each color of Shimmer Powder has multiple colors, so I feel selecting only two or three powders gives a great amount of color. For today’s samples, I selected two colors per card.
Spritz card panel with enough water to get movement from colors. Feel free to dab excess water and add more powder and water to achieve a look you are happy with.
For the first card panel, I added additional powder to already wet card, then applied additional water to obtain a look I was happy with.
For the second card panel, I dabbed panel dry before adding additional powder and water. This layered the colors a bit more. Note – dabbing water from panel removes quite a bit of the color and shimmer, so take account for this when removing excess water.
Allow card panels to dry completely.
Sentiment
Die cut selected sentiment from cardstock. Generally, three sets glued together gives good dimension. For today’s cards, I elected to glue two sets of 110lb cardstock in lieu of the three sets of 80lb cardstock I generally do.
For one sentiment, I painted it with watercolor created by dropping some Nuvo Shimmer Powder on my Tim Holtz Glass Mat and adding water. The second sentiment I elected to leave white. Sheer Shimmer Craft Spray spritzed over the top brings great sparkle and adds dimension to the finished card.
Finishing
Trim card panels to selected mat size (5 1/8” x 4”).
Using double sided tape, apply a frame of tape along the back of each panel. Pull corner edge of each backing strip and fold over, creating a small flap (do not pull entire backing strip off). This allows you to wiggle your card a bit before fully adhering it to the card base. Once card is placed where you want it, pull tabs while securely holding panel in place. Press down firmly as each backing strip is pulled from the center of your card panel and card base.
Use liquid glue to adhere sentiment to card and you are complete!
This easy, beautiful background is perfect for simple card designs. Pair it with a die cut sentiment and you are set! I love the ‘Best Wishes’ message as it can be customized into so many different card types: Birthday, Graduation, Retirement, etc. The hardest part of creating this card is waiting for the wet panel to dry!
I hope you try this technique out. You will be amazed at how amazing the Nuvo Shimmer Powders are. Click Here or Here for more inspiration showcasing their gorgeous attributes!