Die cuts are fantastic for bringing interest to an otherwise boring concept. Simple additions, I love utilizing them in my card designs.
Card 1
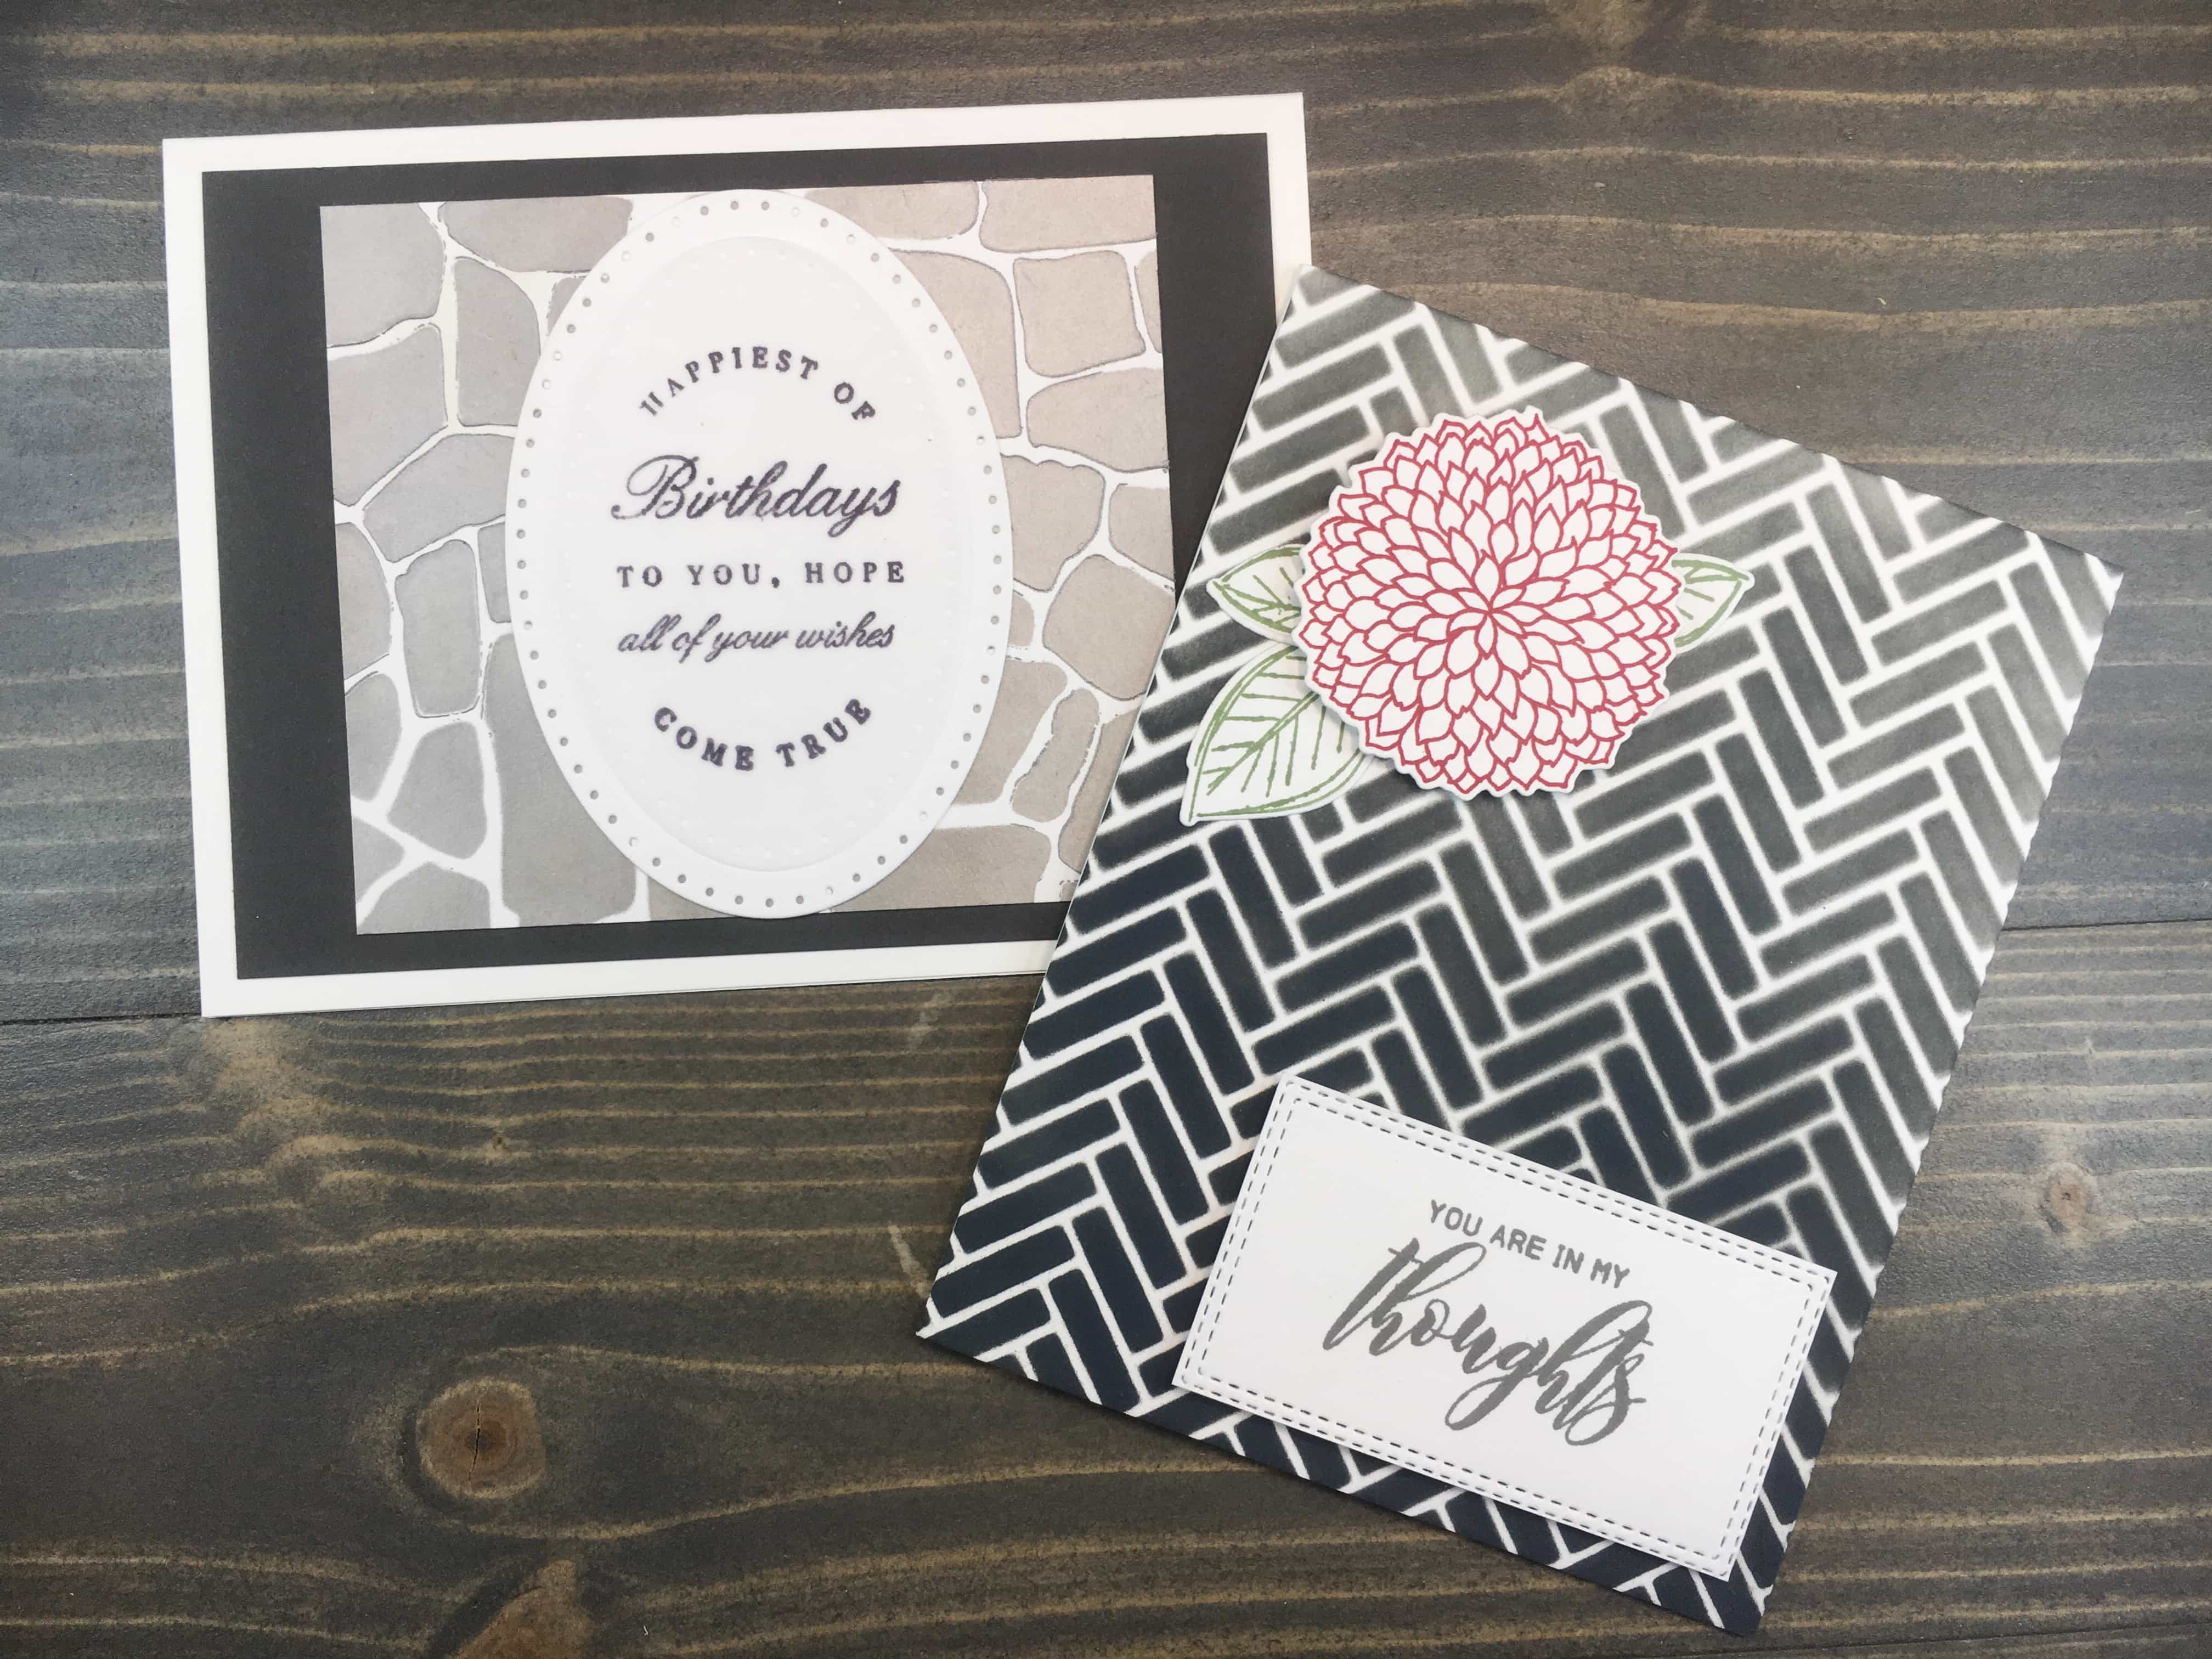
Today’s card starts with a panel created using Black Soot Distress Oxide ink and Altenew’s Broken Chevron stencil. After ink blending over the stencil and adhering it to an A2 card base, I pulled out my stash of left over die cuts to see if anything would work with the chevron pattern.
To my luck, I found a flower and leaves perfect for the job! The die cuts originated from Mama Elephant’s Freestyle Florals set and had been stamped using Catherine Pooler Rouge and Sage inks.
I adhered the leaves to the card panel using Gina K Connect glue, and the flower using mini foam squares. Using Lawn Fawn Just Stitching Double Rectangles, I die cut a rectangle from white cardstock. This die set does not cut rectangles completely, just the stitching. To create a sentiment panel I trimmed around the stitching to create a full die cut.
I stamped a sentiment from Altenew’s Wispy Begonia set using Gina K Stormy Sky ink. I adhered the panel to a bit of craft foam, then to the bottom corner of the card, across from the flower and leaves.
This card balances well, and the simple die cuts pair nicely with the busy background. The classic colors bring sophistication while the script prevents the card from becoming too formal.
Card 2
This card takes a background using Nuvo Embellishment Mousse in Gunmetal Grey applied over Altenew’s Stone Wall stencil.
This medium has a slight three dimensional effect which adds interest. I trimmed the panel to 4” x 3 1/2” along with a second panel of Gina K Slate cardstock trimmed to 5 1/8” x 3 7/8”. Using some oval dies from my stash, I cut an oval from white cardstock, and a smaller oval from vellum.
Using KaiserCraft Birthday Wishes I stamped a sentiment onto the vellum using Ranger Archival Ink in Jet Black. I carefully dried the ink using a heat tool, careful not to overheat the vellum thus causing curling.
I adhered all layers together using Gina K Connect glue between the ovals, and double sided tape between the rectangle layers and card base.
This card is sophisticated, yet not overly ornate. The script in the sentiment is balanced by the serif font, maintaining a neutral gender sentiment. The grey palette helps keep this card suitable for men.
Using die cuts is a great way to dress up cards, adding interest as side elements, or as the centerpiece of the card. How do you use die cuts? Leave a comment with your favorite ways to use them and we can compare techniques!