There are multiple ways to add foil accents to your cards. Today, I will review four ways to use Deco Foil transfer sheets. Next week, I will cover Hot Foiling, which utilizes hot plates to transfer foil.
Tools
Deco Foil Transfer Sheets – transfer sheets which are used to add foil to paper crafts. It comes in a variety of colors and is easy to work with.
Transfer Gel – a gel used with stencils (or alone) to impart a surface deco foil will adhere to, once run through heat (aka with a laminator).
Adhesive Pen – a felt tip pen filled with adhesive which can be used to apply glue to a surface which foil will adhere to. Great for hand scribed details.
Double Sided Tape – adhesive tape which is sticky on both sides.
Laminator – A machine that applies heat and pressure – used to adhere foil from transfer sheet to paper. I love my Royal Sovereign laminator, it’s quite affordable from from amazon.com.
Parchment Paper – I prefer to use parchment paper as a carrier folder when laminating. It does not react with foil transfer sheets, and protects my machine from materials coming of cardstock passing through.
How to Foil
The basic instructions for foiling are fairly easy. Start by preheating your laminator. I give my machine at least ten minutes to fully heat.
Next, layer your cardstock and foil. Ensure transfer sheet has shiny side up, faced away from surface of cardstock. Place the layered stack in a folded sheet of parchment paper and feed into laminator, fold first.
Note – some people do not place their stack in parchment, but I do so as it protects my machine from spare bits of foil, adhesive, and any other materials that may fall off inside the laminator.
Allow the parchment enclosed stack to move through the laminator at its own speed. Do not try to pull the material through or increase the rate of its progress.
For best results, I run my project through the laminator a second time, turning the stack within the parchment 90 degrees first.
After the second pass, I gently lift the transfer sheet to reveal my foiled image. Done!
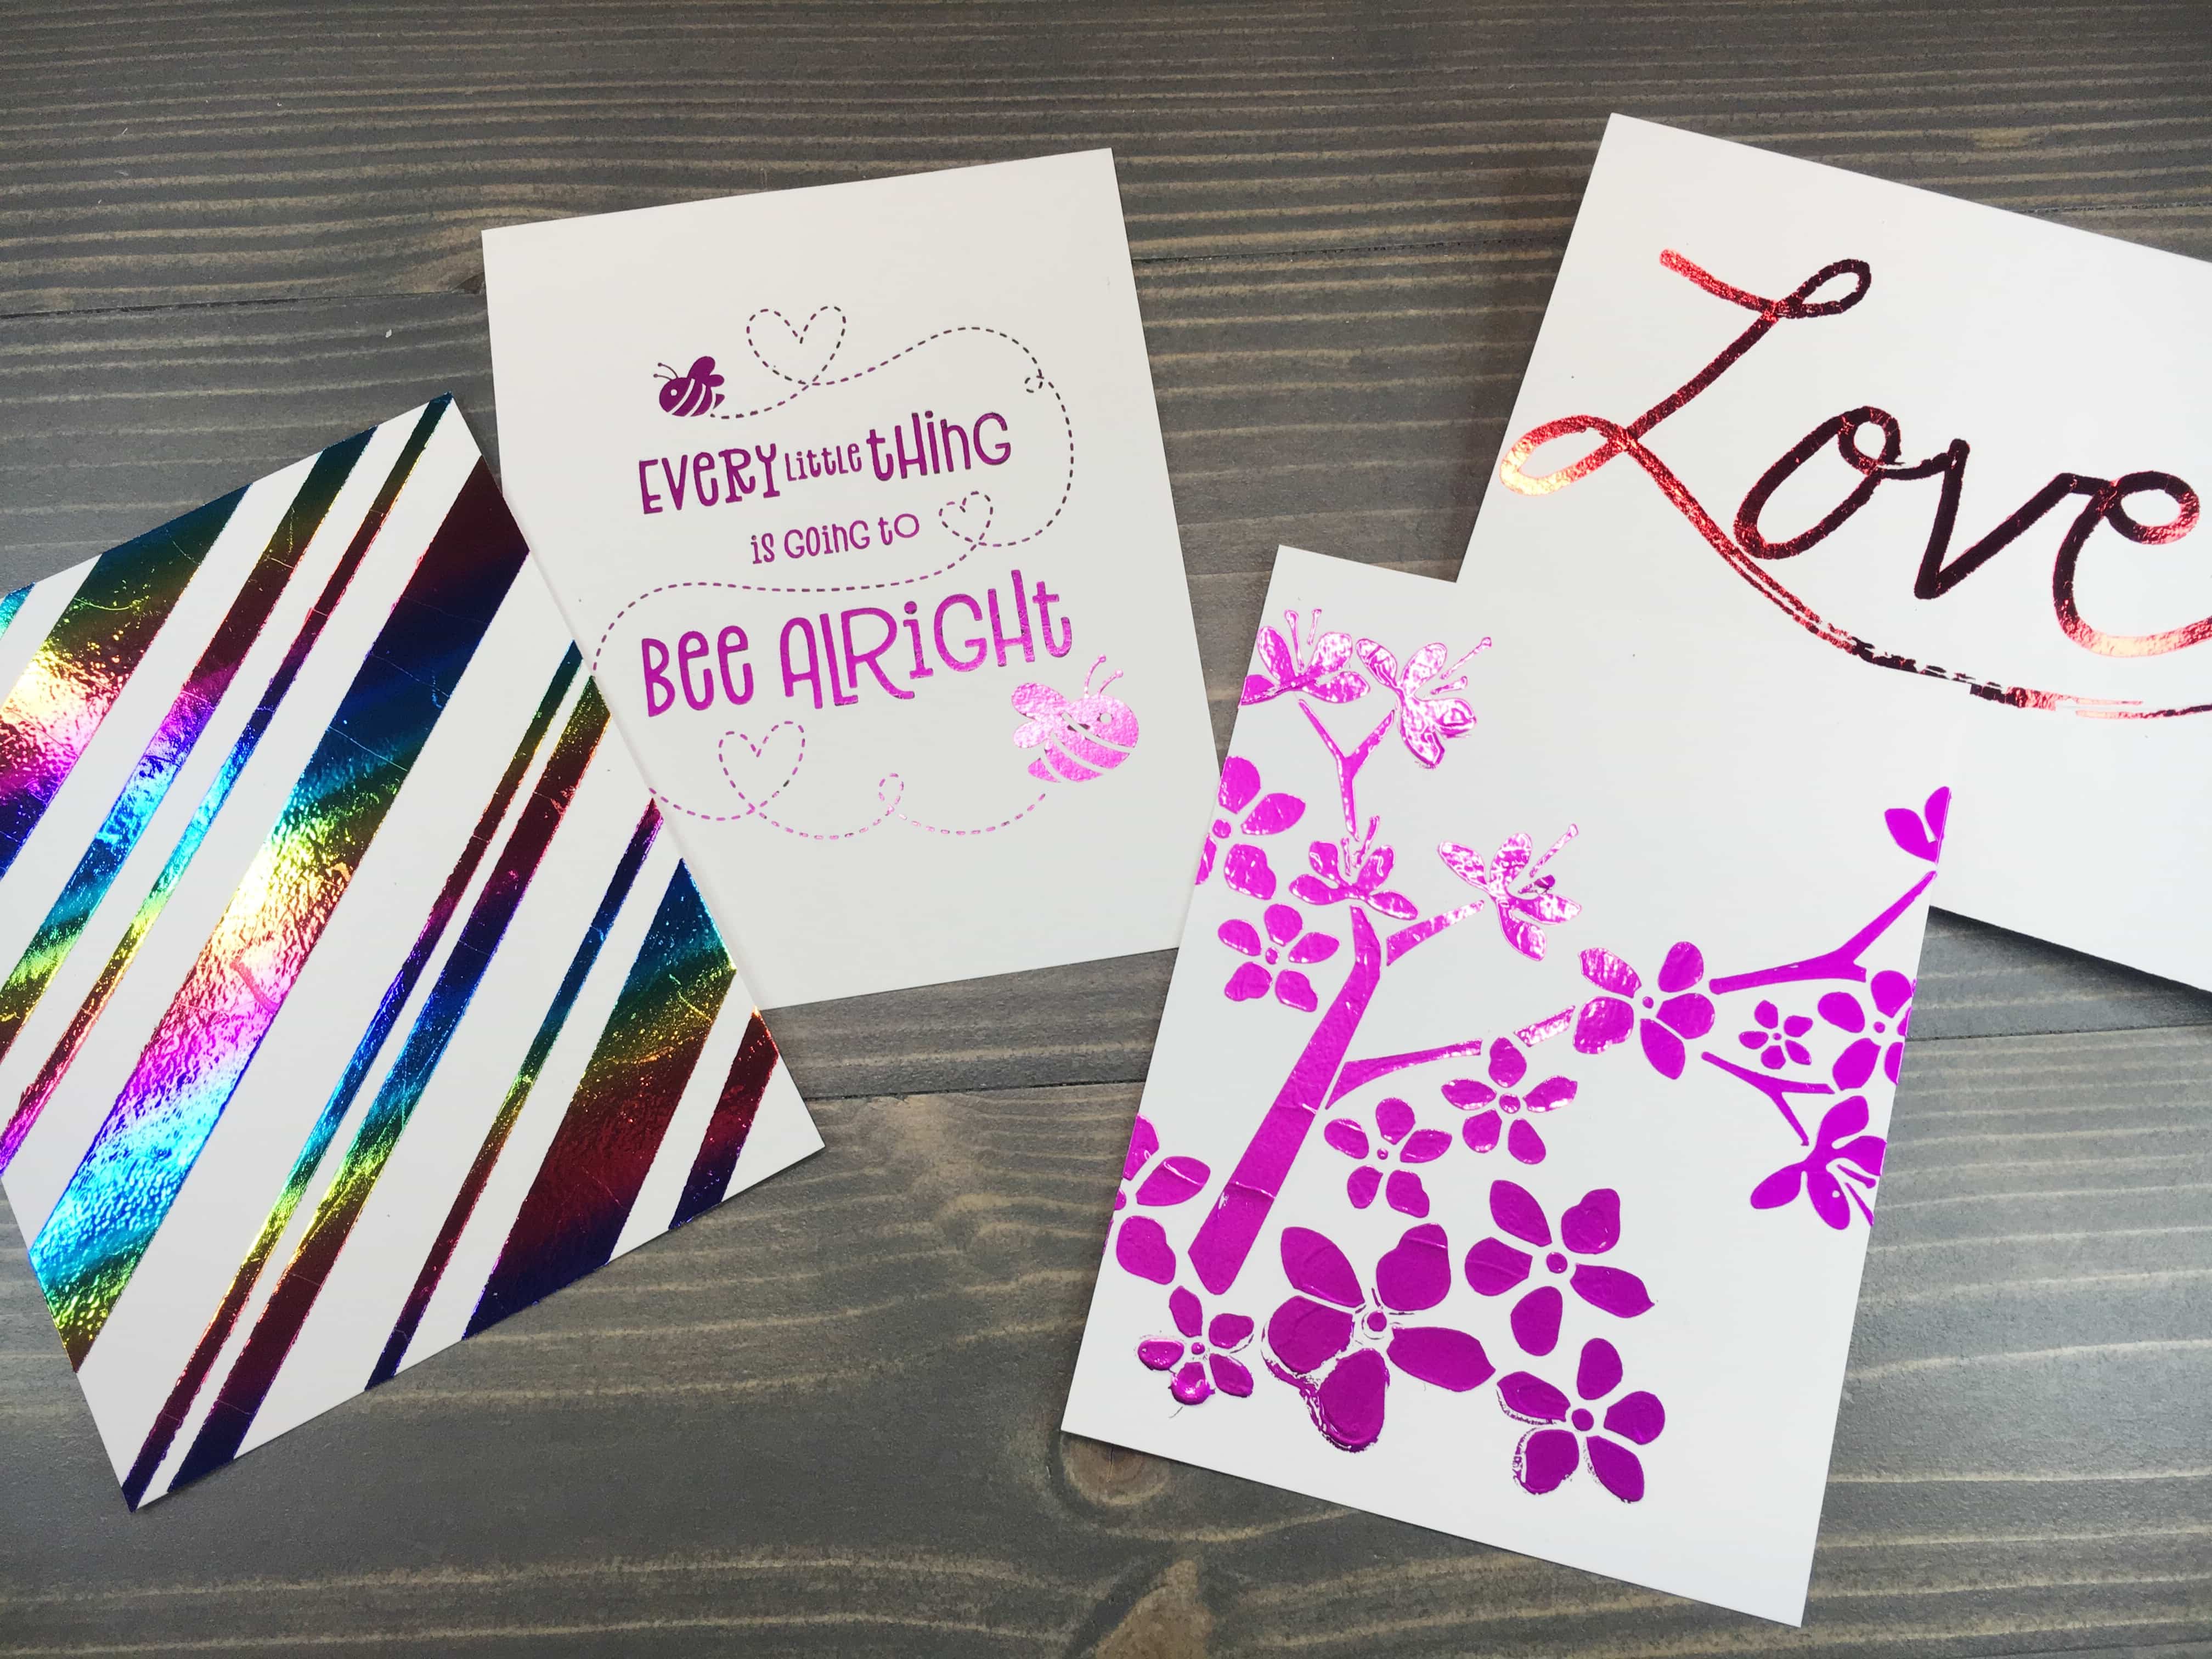
Technique 1 - Toner Foiling
Deco Foil Transfer Sheets adhere to toner printed images without the use of additional adhesives. Merely, apply a sheet of foil over your toner printed image, run through your laminator, and voila! your image is foiled.
Technique 2 - Transfer Gel
Deco Foil Transfer Gel is a medium used pressed through a stencil to leave a decorative pattern on cardstock. After spreading the gel onto your project, immediately remove (and clean thoroughly) your stencil and tools.
Allow the gel to dry completely. When applied, the gel is white – it dries transparent. Once completely dry, layer your transfer sheet of foil on top, place in your parchment paper folder and run through your laminator.
Technique 3 - Adhesive Pen
The Deco Foil Adhesive Pen is a felt tip pen which can be used to scribe your own message or details onto cardstock. Let the adhesive dry for 30 seconds to one minute before applying your transfer sheet foil on top.
Run the cardstock and foil through a laminator, or even a die cutting machine. Heat is not required for the transfer, but pressure will assist in adhering the materials together.
Below, I used pencil to scribe my sentiment. I traced over with the adhesive pen, then foiled.
Technique 4 - Double Sided Tape
Double sided tape is a great way to create your own design for transfer sheet foil. Merely apply the adhesive to cardstock, ensuring to fully press tape onto material. My example today utilizes three different sizes of adhesive tape. For best results, I run a bone folder over the adhesive.
After removing protective covering over second adhesive side apply foil on top. At this point, I flip the project over and again use a bone folder over the adhesive from the back, ensuring full adhesion while preventing damage to the foil coating.
As with using an adhesive pen, heat is not required, but I feel I get great results when I still run the project through my laminator.
Adding foil is a fun, and easy way to add a pop of interest to your cards. It does not require expensive equipment, nor is it difficult to apply. Give it a try, and see what fantastic results you come up with!