Welcome! I have a lovely card today that draws its interest from layered die cuts and easy ink blending. I love to layer easy techniques to create stunning results. Today’s card is a 6” x 6” square. As I only have 8.5” x 11” cardstock, I cut one 6” x 6” panel, and one 6” x 6.25” panel (of which I scored a line at 6”). Using strong liquid glue on the tab (I used Distress Collage Medium), I adhered the two panels together, thus creating my folding card base. I set aside the card base to dry while I started ink blending.
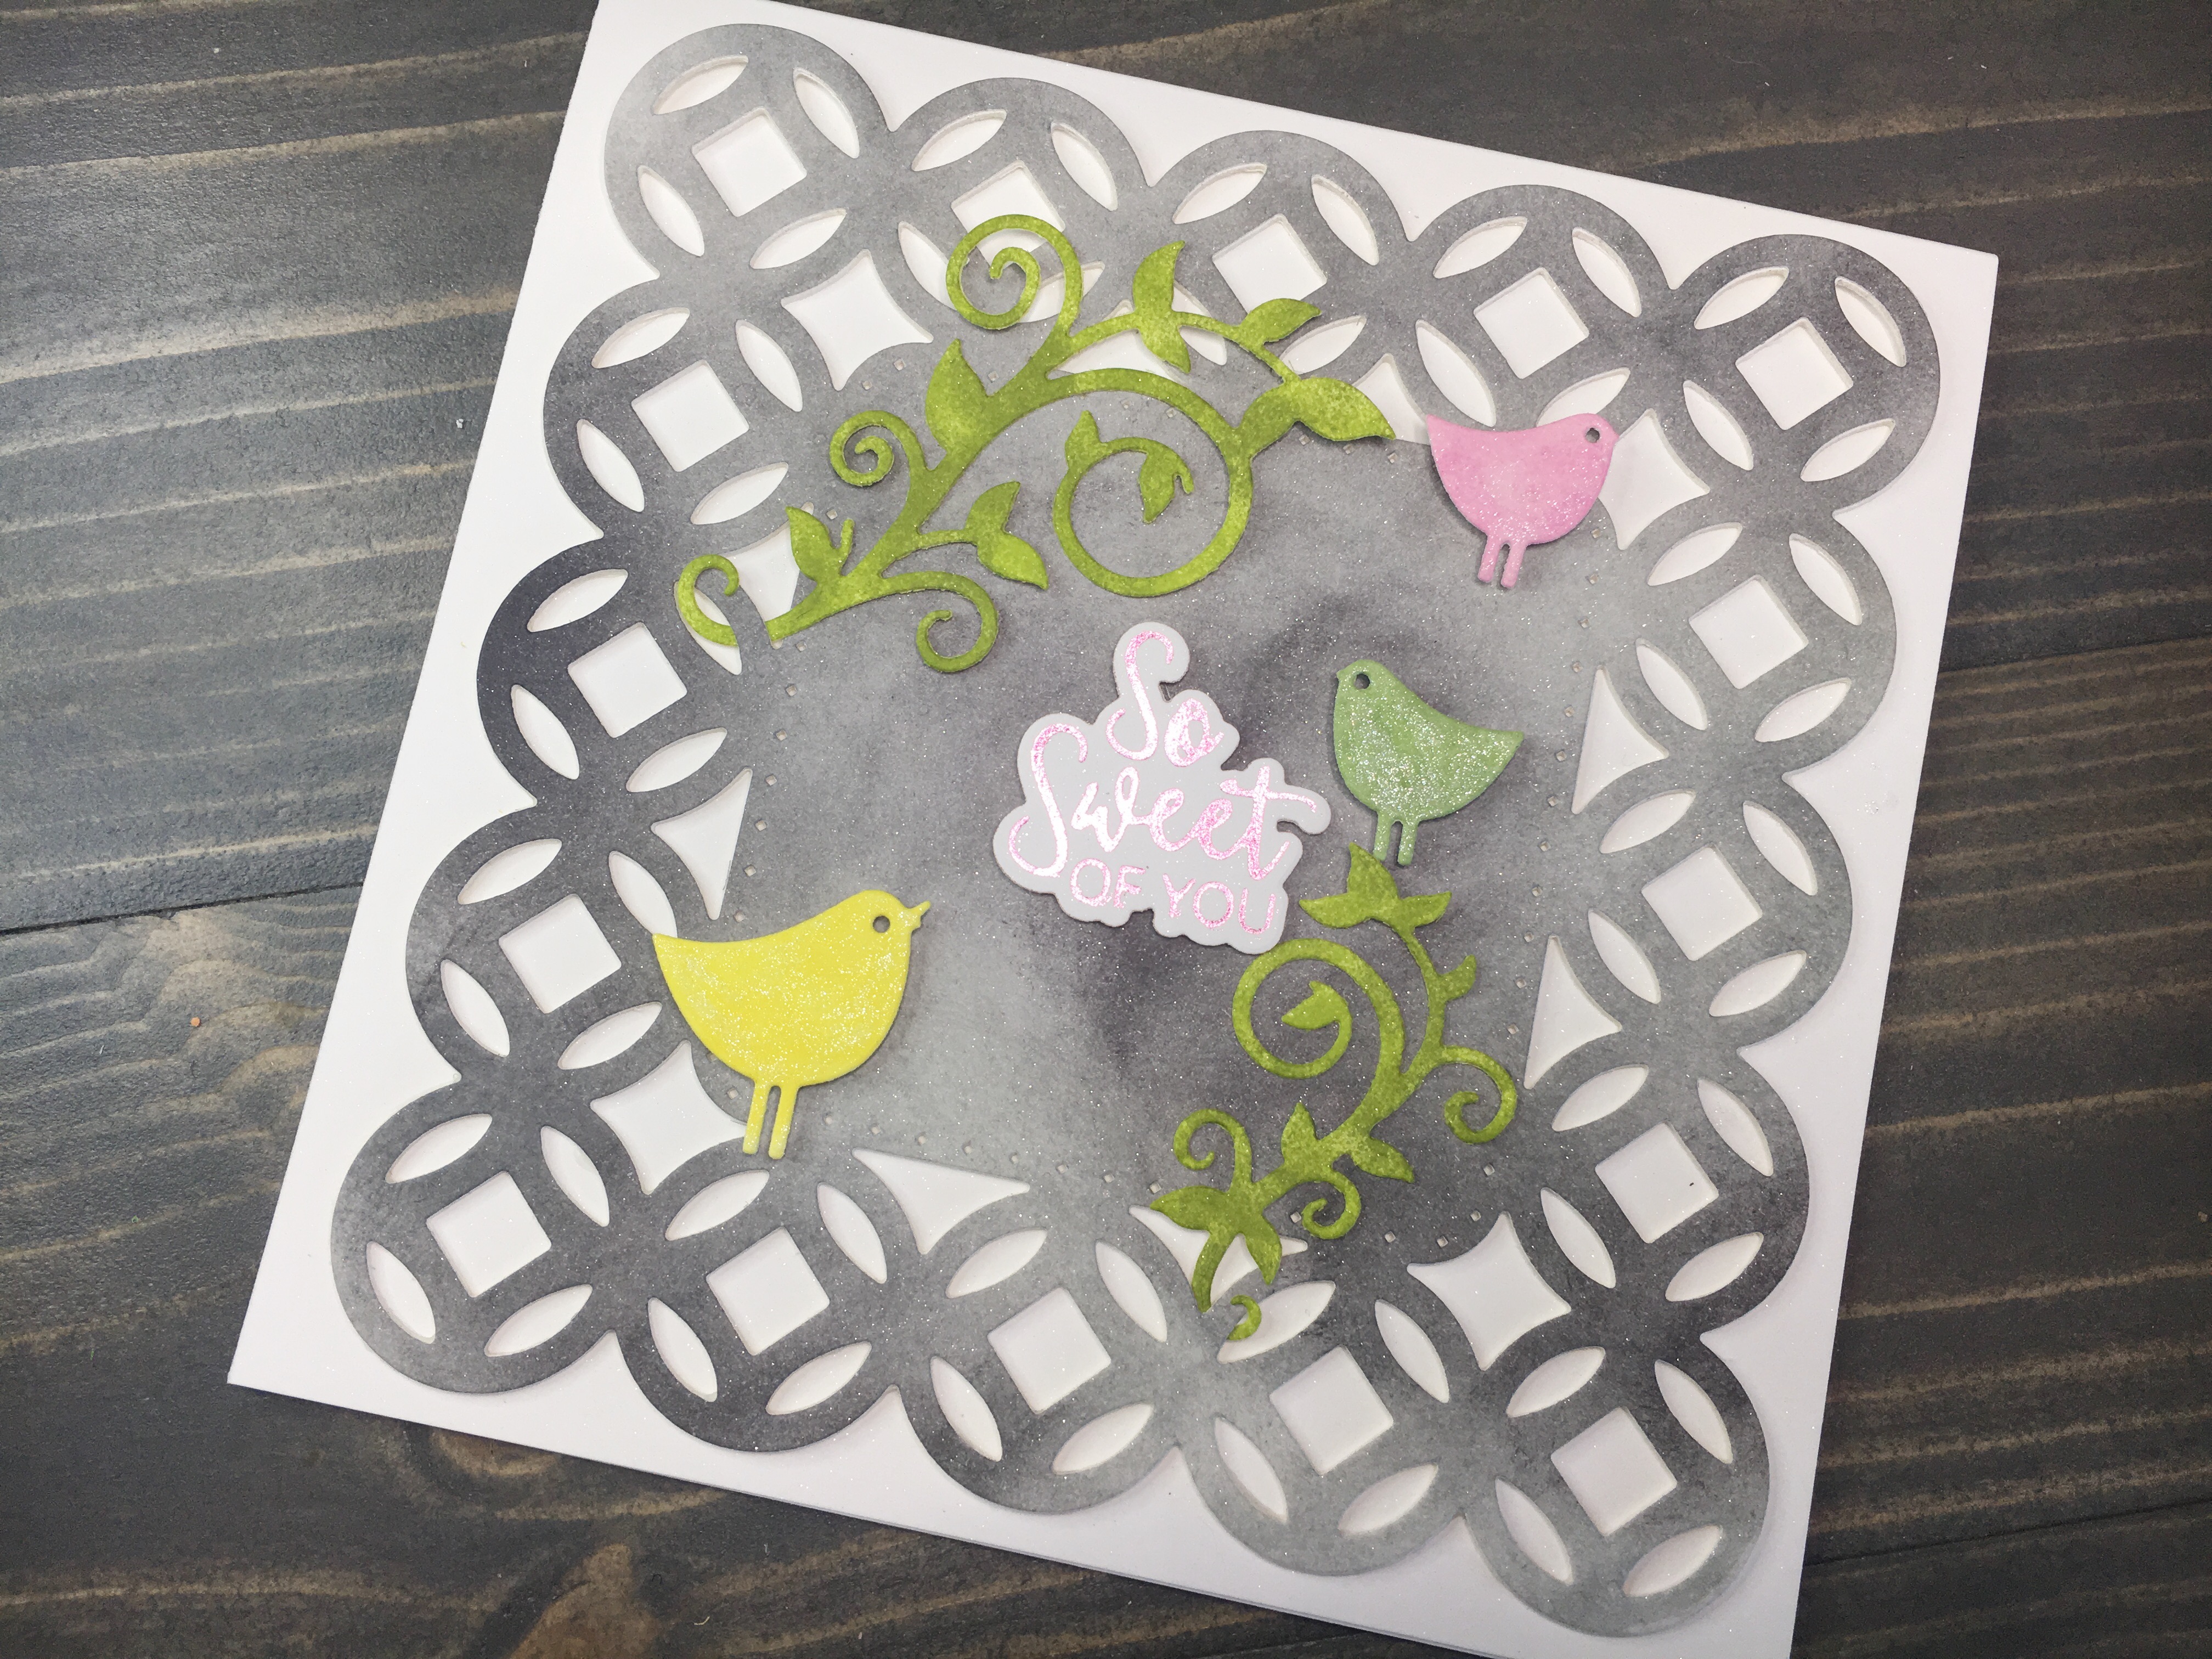
On a 6×6 panel cut from Neenah Solar White 80lb cardstock, I ink blended three grey colors from Altenew (Silver Stone, Industrial Diamond and Pure Graphite) using a mini ink blending tool. I kept the blending loose, mainly focusing on color variations rather than smooth transitions in color.
Once I was happy with the blending, I used the Circle Contempo Decorative Accents die from Spellbinders and die cut the panel. I cut two additional die cuts from unlinked sheets of the same cardstock. I glued the two extra die cuts together and set aside. Note, I will glue the inked die cut to the stack later in the project.
Taking scraps of additional cardstock, I ink blended additional groupings of color. I utilized a light and medium shade from similar color families and followed the same technique as before, only blending with mini sponge daubers (from scrapbook.com) instead of blending sponges. I also ink blended a larger panel with a different selection of greens. See images for specific colors used.
After the ink was dry, I die cut from the panels using more dies from Spellbinders, this time the August 2018 Small Die of the Month set. I subscribe to Spellbinders Small Die of the Month club, and though I was not a member last year when the above mentioned set was released, I was able to purchase the set at a discount because of my current membership. This is a great benefit for club members. Click Here for details on how you can join the club.
Taking the greenery, I tucked the ends into the larger circular die cut, framing the center square nicely. I then glued the grey die cut onto the top of the stack I set aside earlier, then glued the entire group onto my card base. Using mini foam squares, I adhered my sentiment to the center of the card.
To create the sentiment, I utilized a scrap of Neenah Solar White 80lb cardstock and hot foiled using pink foil and a sentiment from the Glimmering Sentiments set, released as Spellbinders Glimmer Hot Foil of the Month for July 2019. This set has five great sentiments for hot foiling, along with dies for each sentiment. Click Here for details on Spellbinders Hot Foil of the Month club. Click Here to see my post explaining how to use the Glimmer Hot Foil System.
Using foam squares, I popped the die cut birds around the center panel of the card. I added some silver shimmer via a Nuvo Aqua Shimmer pen directly to the birds, then spritzed the entire card with Sheer Shimmer Craft Spray.
The end result is a lovely card that is both elegant and eye catching. The subtle shimmer and foiled sentiment do not detract from the detailed die cut, which is a stand out feature of the card. Have you tried ink blending before die cutting? What results have you had? Share your experience in the comments and we can compare notes!