I grew up in the craft business, and for as long as I can remember I have loved stamping. After working craft shows with my mother, I would take my earnings and select a stamp or two from a fellow craft vendor. At the time, only rubber, wood mounted stamps were available. Over the years my collection grew, along with my love for stamping.
At time passed, stamping evolved. Acrylic stamps came about, as well as photopolymer clear stamps. Today, my collection contains all three, and I adore them all!
Today, we are going to cover stamping basics. The types, how to do it and even how to care for your collection. In addition, there will also be some tips and tricks to help you along your way.
To start, a stamp is basically an inked object used to impress a pattern or mark on another object. For today’s purposes, we are going to focus on crafting stamps, generally used in paper crafting projects.
Types of Stamps - Rubber
Rubber, wood mounted stamps were the first stamps in my collection. They include a piece of formed rubber, a mounting pad and wood block. Today, rubber stamps are still available mounted on wood blocks, but can also be purchased as a cling. An acrylic block or stamping platform can then be utilized to use the stamp.
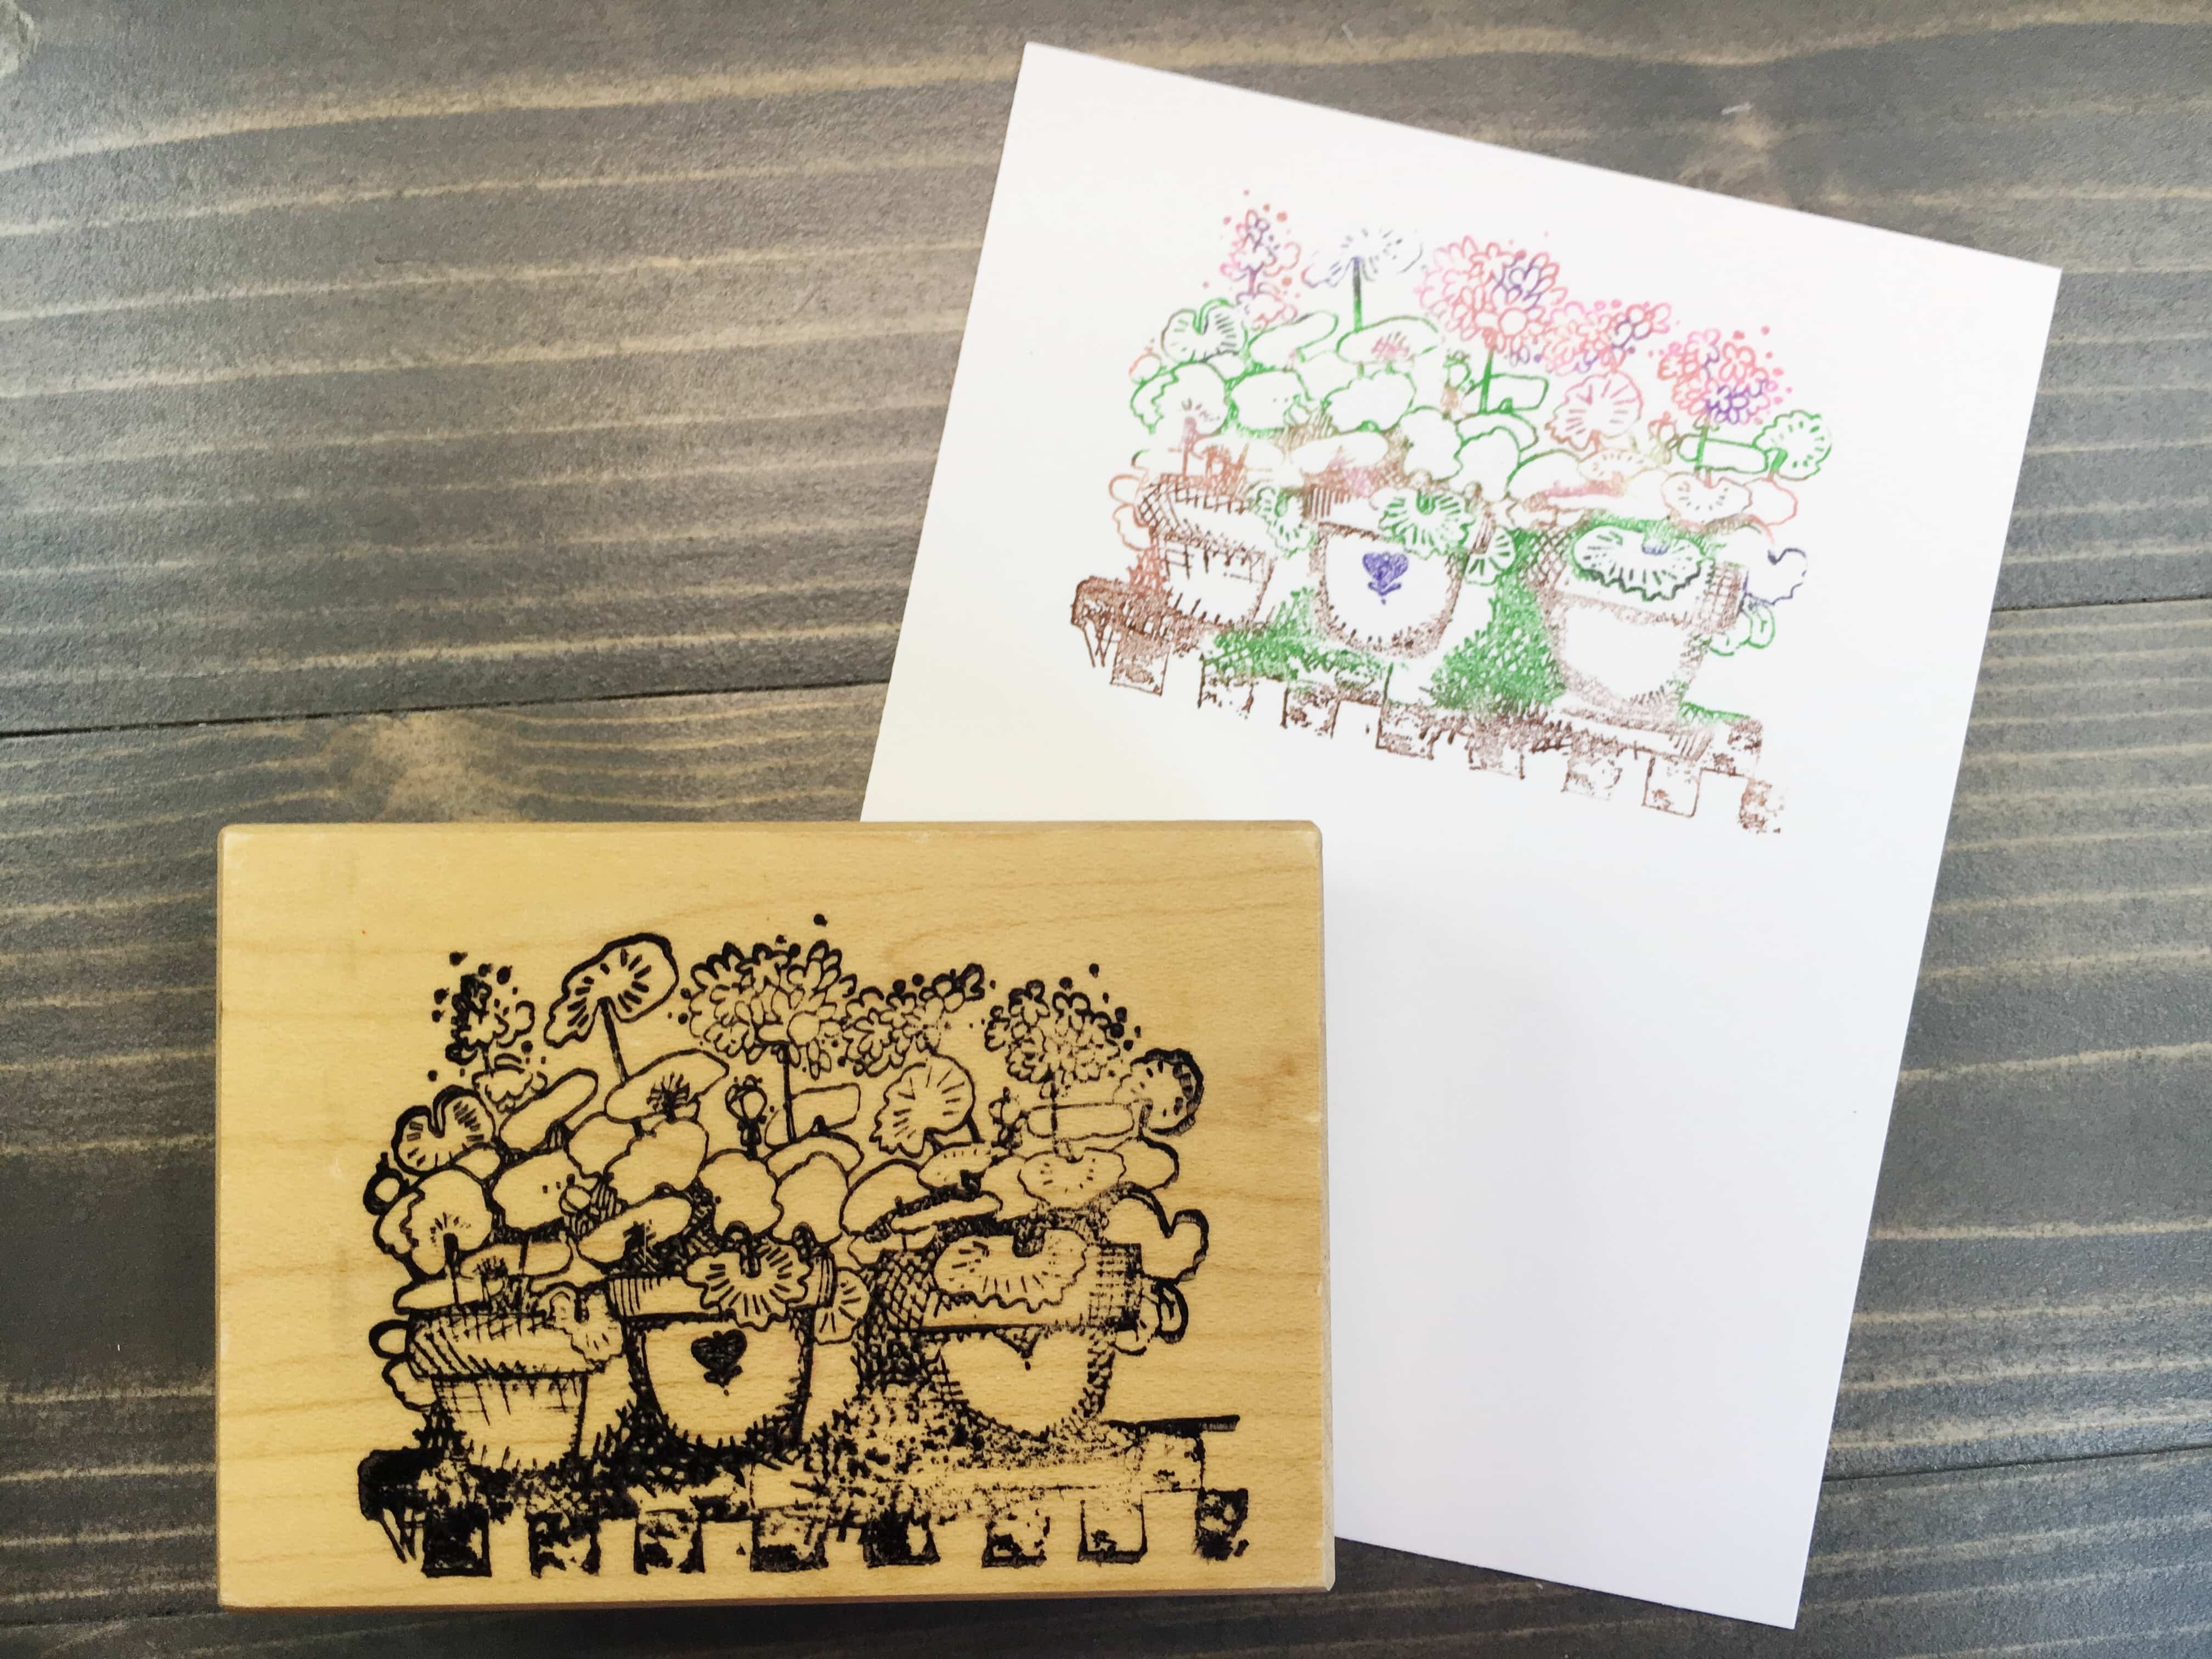
Rubber stamps take ink very well. Background stamps are often found in rubber, as their reliable impression is preferable for larger areas. These larger rubber stamps can be used without mounting as shown below.
Types of Stamps - Clear Stamps
Clear stamps, which when used in conjunction with an acrylic block, can aid in placement of your image. An acrylic block or stamping platform are needed for proper use of clear stamps. These types of stamps do stain with use, but this is expected and does not effect stamping quality. There are two main types of clear stamps: Acrylic and Photopolymer.
Acrylic stamps are cheaper to produce, yet have a few drawbacks. They generally don’t ink as well (ink can bead on stamp, resulting in an unclear impression). The plastic material deteriorates and does not stick well over time as well. A good cleaning can help with the cling properties, but overtime this looses effectiveness. Acrylic stamps can also tear, as the material is more pliable and stretchy.
Acrylic stamps often leave unclear impressions.
Photopolymer stamps are a much higher quality material, but also reside at a higher price point. However, their reliability in stamping outweighs the increased cost. Photopolymer stamps work well with all types of inks, and do not deteriorate over time.
When using clear stamps the first time, I recommend wiping the stamp with a lint-free cloth first. This generally helps condition the stamp so it will take ink better. You can also stamp with a VersaMark Watermark Stamp Pad first, the sticky ink of this stamp pad will help adhere other inks as well.
Stamping
For unmounted stamps, an acrylic block is needed. There are numerous sizes and shapes available (click here or here to see offerings from my favorite online retailers). To start, I recommend getting an acrylic block sized large enough to fit your largest clear stamp. As you grow your collection, select acrylic blocks of various sizes to match your stamp sizes. When stamping, I prefer to select an acrylic block sized just larger than my clear stamp.
A stamp platform, such as the Misti Stamping Tool or Tim Holtz Stamp Platform, are great for improved impressions. With stamp platforms, you can ink and stamp your image multiple times to gain a great impression.
See below for 1st, 2nd and 3rd impressions using a stamp platform. End result is a crisp and clear image.
Stamp positioners can also be used to aid in lining up images, especially when using wood mounted rubber stamps.
Now, let’s stamp!
First: Mount your stamp on an acrylic block or stamp platform.
Second: Apply ink to stamp by gently tapping ink pad over image.
Third: Gently, but firmly, press stamp onto your paper. Apply even pressure then lift stamp directly off paper. Do not rock your stamp or press too hard. You will distort the stamped image if you do so.
Fourth: Clean your stamp!
Cleaning & Care
Cleaning stamps is easy. After stamping, take a damp cloth and gently wipe stamp clean. I find baby wipes work great as well (Kirkland baby wipes from Costco are fantastic as they do not leave lint bits all over the stamp) and a stamp shammy is fantastic too, if you want to invest a few more dollars there.
I am also partial to stamp scrubbers. They are a plastic case with cleaning pads mounted in both the base and lid. Just spritz one cleaning pad with water or a stamp cleaner and scrub your stamp clean. Dry the stamp on the opposite pad and you are done!
I store my stamps in a cool, dry place which is out of direct sunlight. Personally, I store my stamps on the original clear poly sheet they come mounted on. I replace the outer packaging with an Avery Elle Stamp & Die Storage pocket (I use Large and Extra Large pockets). I add a piece of cardstock so I can label the company and stamp set name, and store my sets in plastic storage containers (click here and here for the containers I like).
Stamp cleaners can aid in stains, though make sure you check to ensure you are using a cleaner for the type of stamp you have. StazOn All-Purpose Stamp Cleaner is great for cleaning rubber stamps, but I wouldn’t recommend it on your clear stamps as it can melt the plastic over time, yikes! For your acrylic and photopolymer stamps, Archival Ink cleaner does a great job.
Have Fun & Experiment!
Did you know water-based markers can be used to ink your stamps? This was my favorite technique as a young girl stamping. I could stamp a beautifully colored image just by using water-based markers. These types of markers dry a little slower than traditional markers which give a few minutes to color an image and stamp before drying.
Now that we’ve covered the basics on stamping, get out there and try it out! Sometimes it takes a few tries to get the hang of it, but you will get there. Enjoy the process and embrace the imperfections. Happy Crafting!