Concord and 9th’s Wreath Turnabout makes creating this holiday wreath easy!
Step 1 - Set up Turnabout Stamp
First, I position my cardstock using repositionable adhesive. Next, I place the jig in my Misti Stamping tool flush against two sides of the tool.
After that, I place the stamp positioner on top of my cardstock, aligning the ‘X’ on the positioner to the ‘X’ on the jig. The actual stamp gets aligned on top of the positioner. Once this is done, close the Misti lid. This transfers the stamp to the lid and the positioner can then be removed.
Step 2 - Stamping
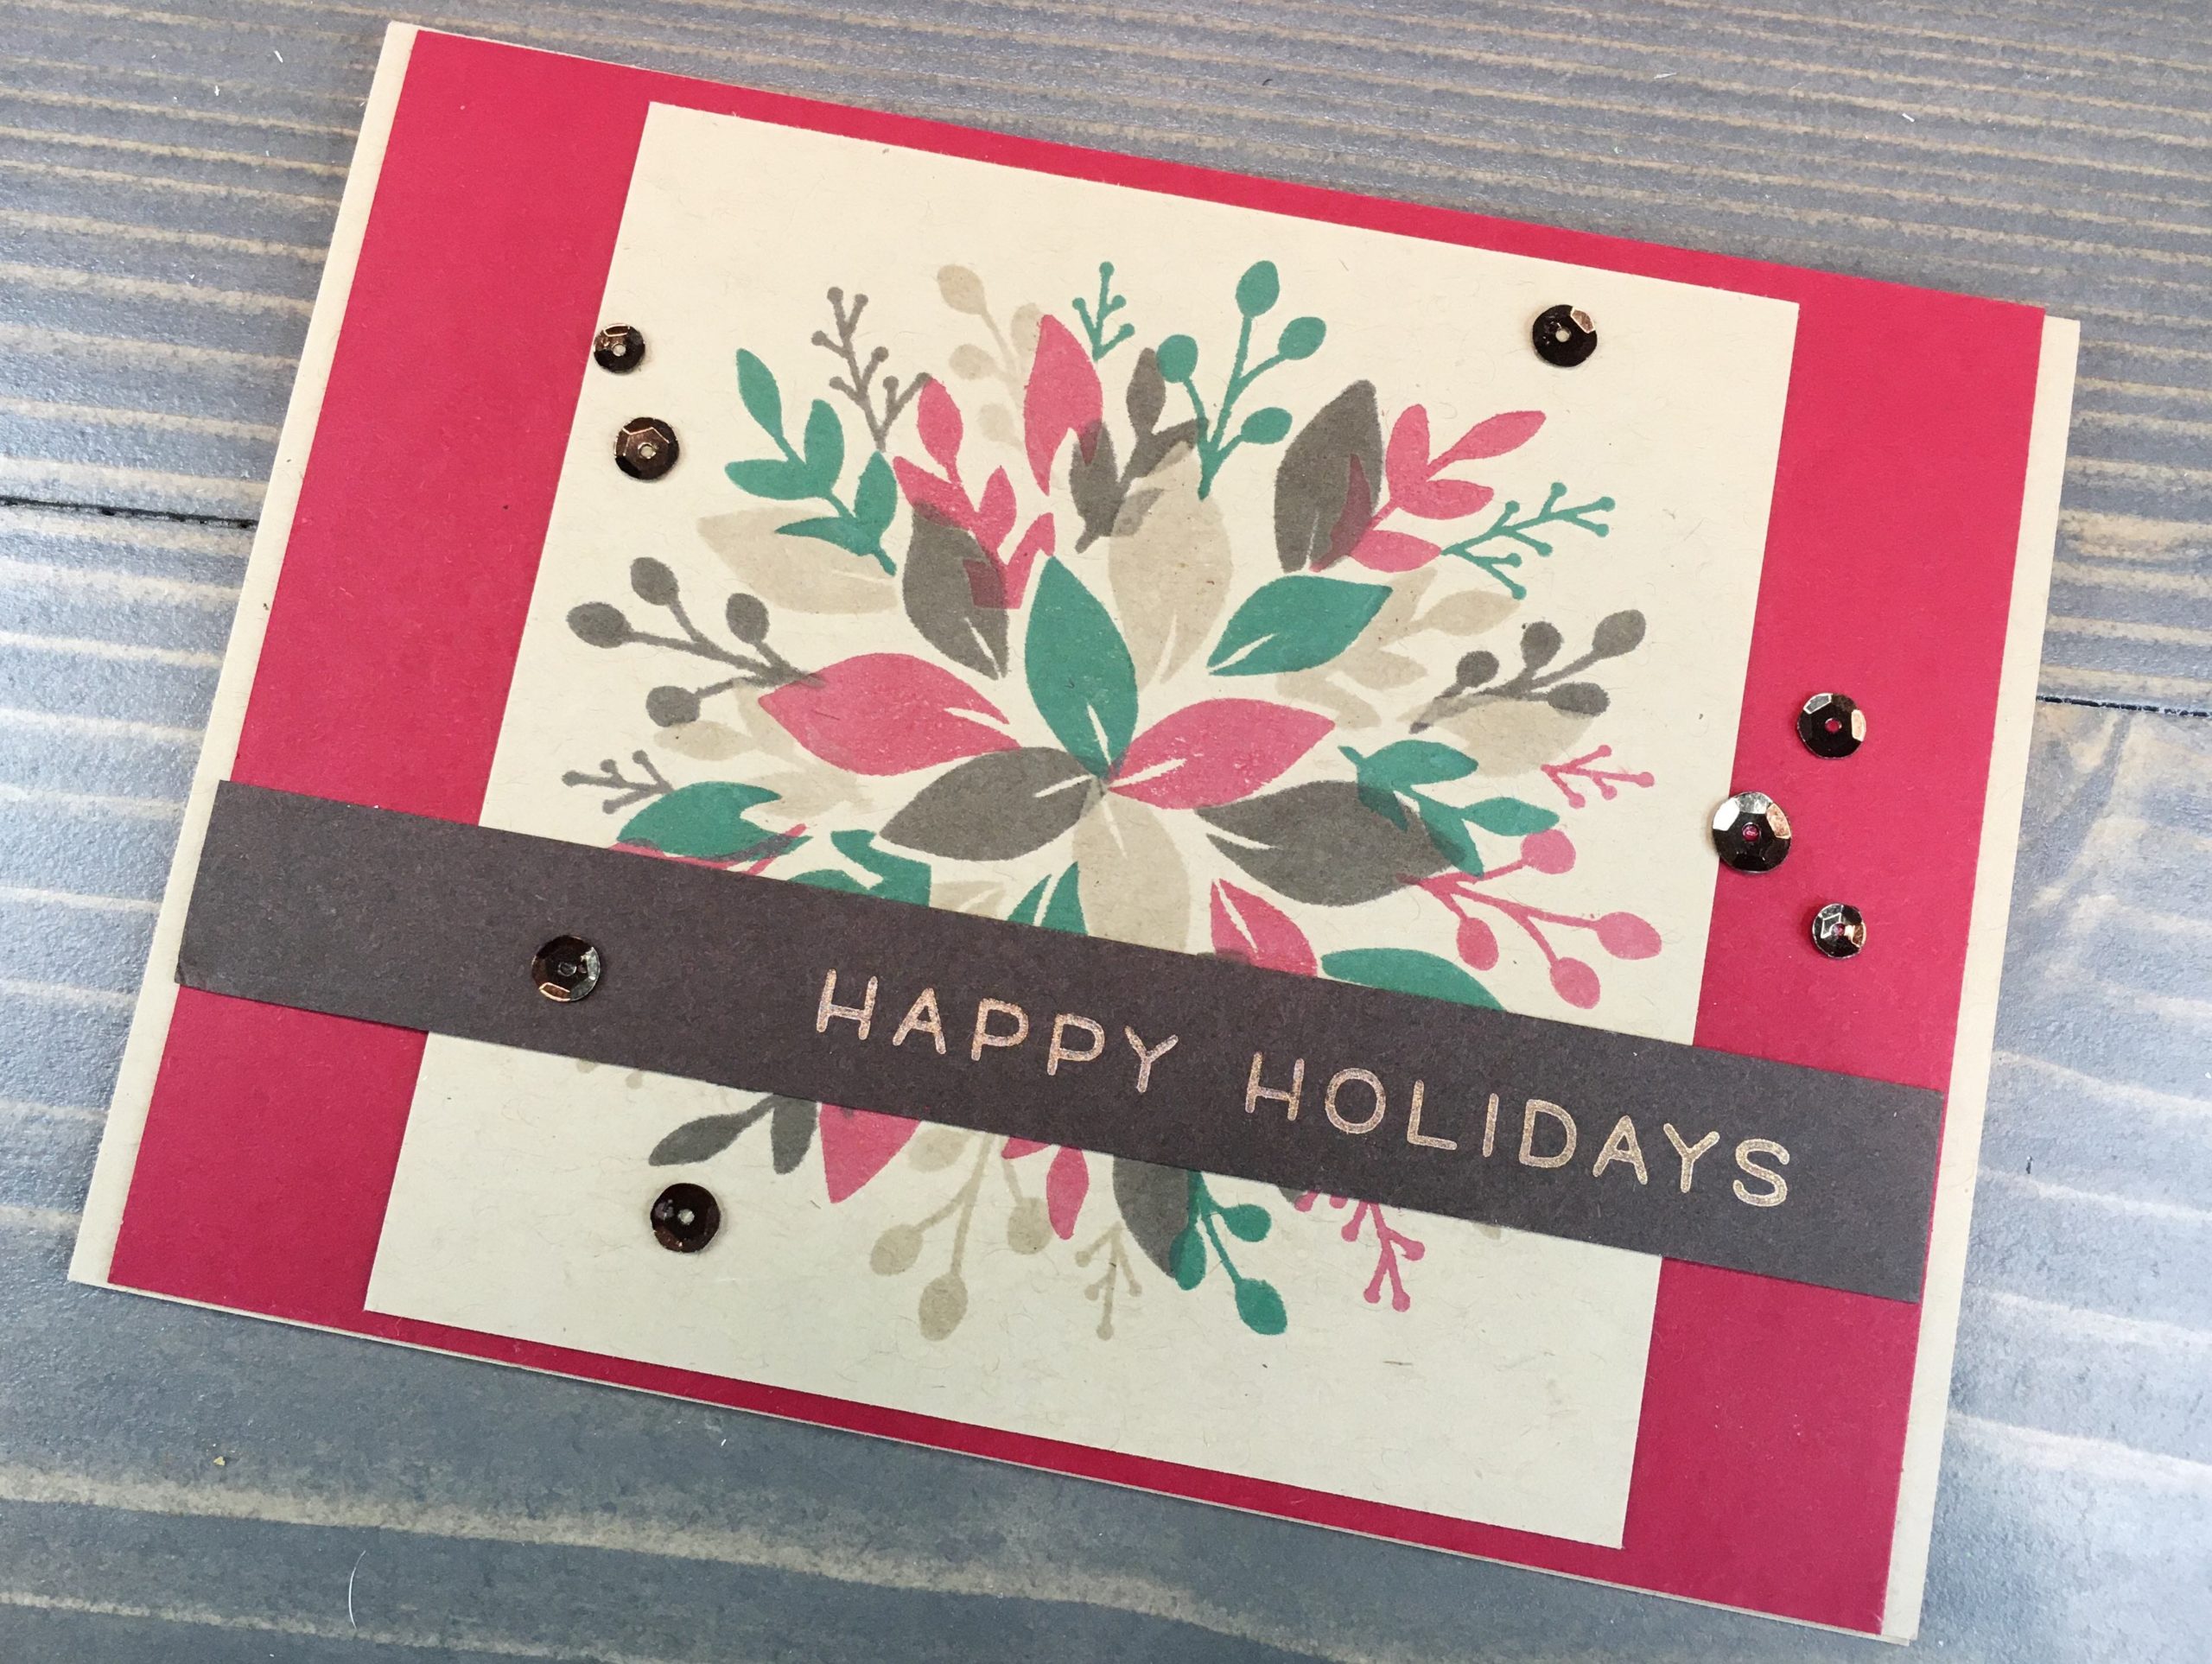
Ink the stamp with your first color – for my card, I used scrapbook.com Cardinal Red. I stamped the image twice, re-inking between. Next, I cleaned the stamp, rotated my jig 1/4 turn and inked the stamp with my second color. This time, stamping with scrapbook.com Pine ink.
Repeat the above steps until you have stamped four colors (Simon Says Stamp Sparrow and VersaMark Watermark ink finished off my colors).
For my sentiment, I used Lawn Fawn Simply Winter Sentiments. Using Delicata Celestial Copper Pigment Ink over Gina K cardstock in Dark Chocolate looked perfect.
Step 3 - Trimming and Matting
I trimmed my card to make a square, approximately 4” x 4”. Adding a mat with a piece of Gina K cardstock in Cherry Red, cut 4 1/4” by 5 1/4”, helped the stamped panel pop. I wanted just a bit of my A2 card base (Gina K Kraft cardstock) to show behind, which kept all elements tied together.
The sentiment fit over the stamped wreath panel and Cherry Red mat, but allowed the Kraft card base to remain unobstructed.
I adhered all layers using double sided tape.
Step 4 - Finishing Touches
A few sequins finished this card off. I selected brown sequins from Studio Katia’s Autumn Fusion set and adhered them using Gina K Connect glue.
I love how this card mixes traditional holiday colors of red and green with brown and Kraft cardstock. A lovely take on a holiday card.