Welcome to my 12 Days of Christmas Cards! Each day, I will have a new card and/or technique for you – hopefully giving you plenty of inspiration for your own card making!
Making your own holiday cards can seem a daunting task – especially when your card list is large. Don’t get discouraged – today’s project uses only a few supplies and yields a handful of cards. I also include variations to help you get your own creative ideas flowing!
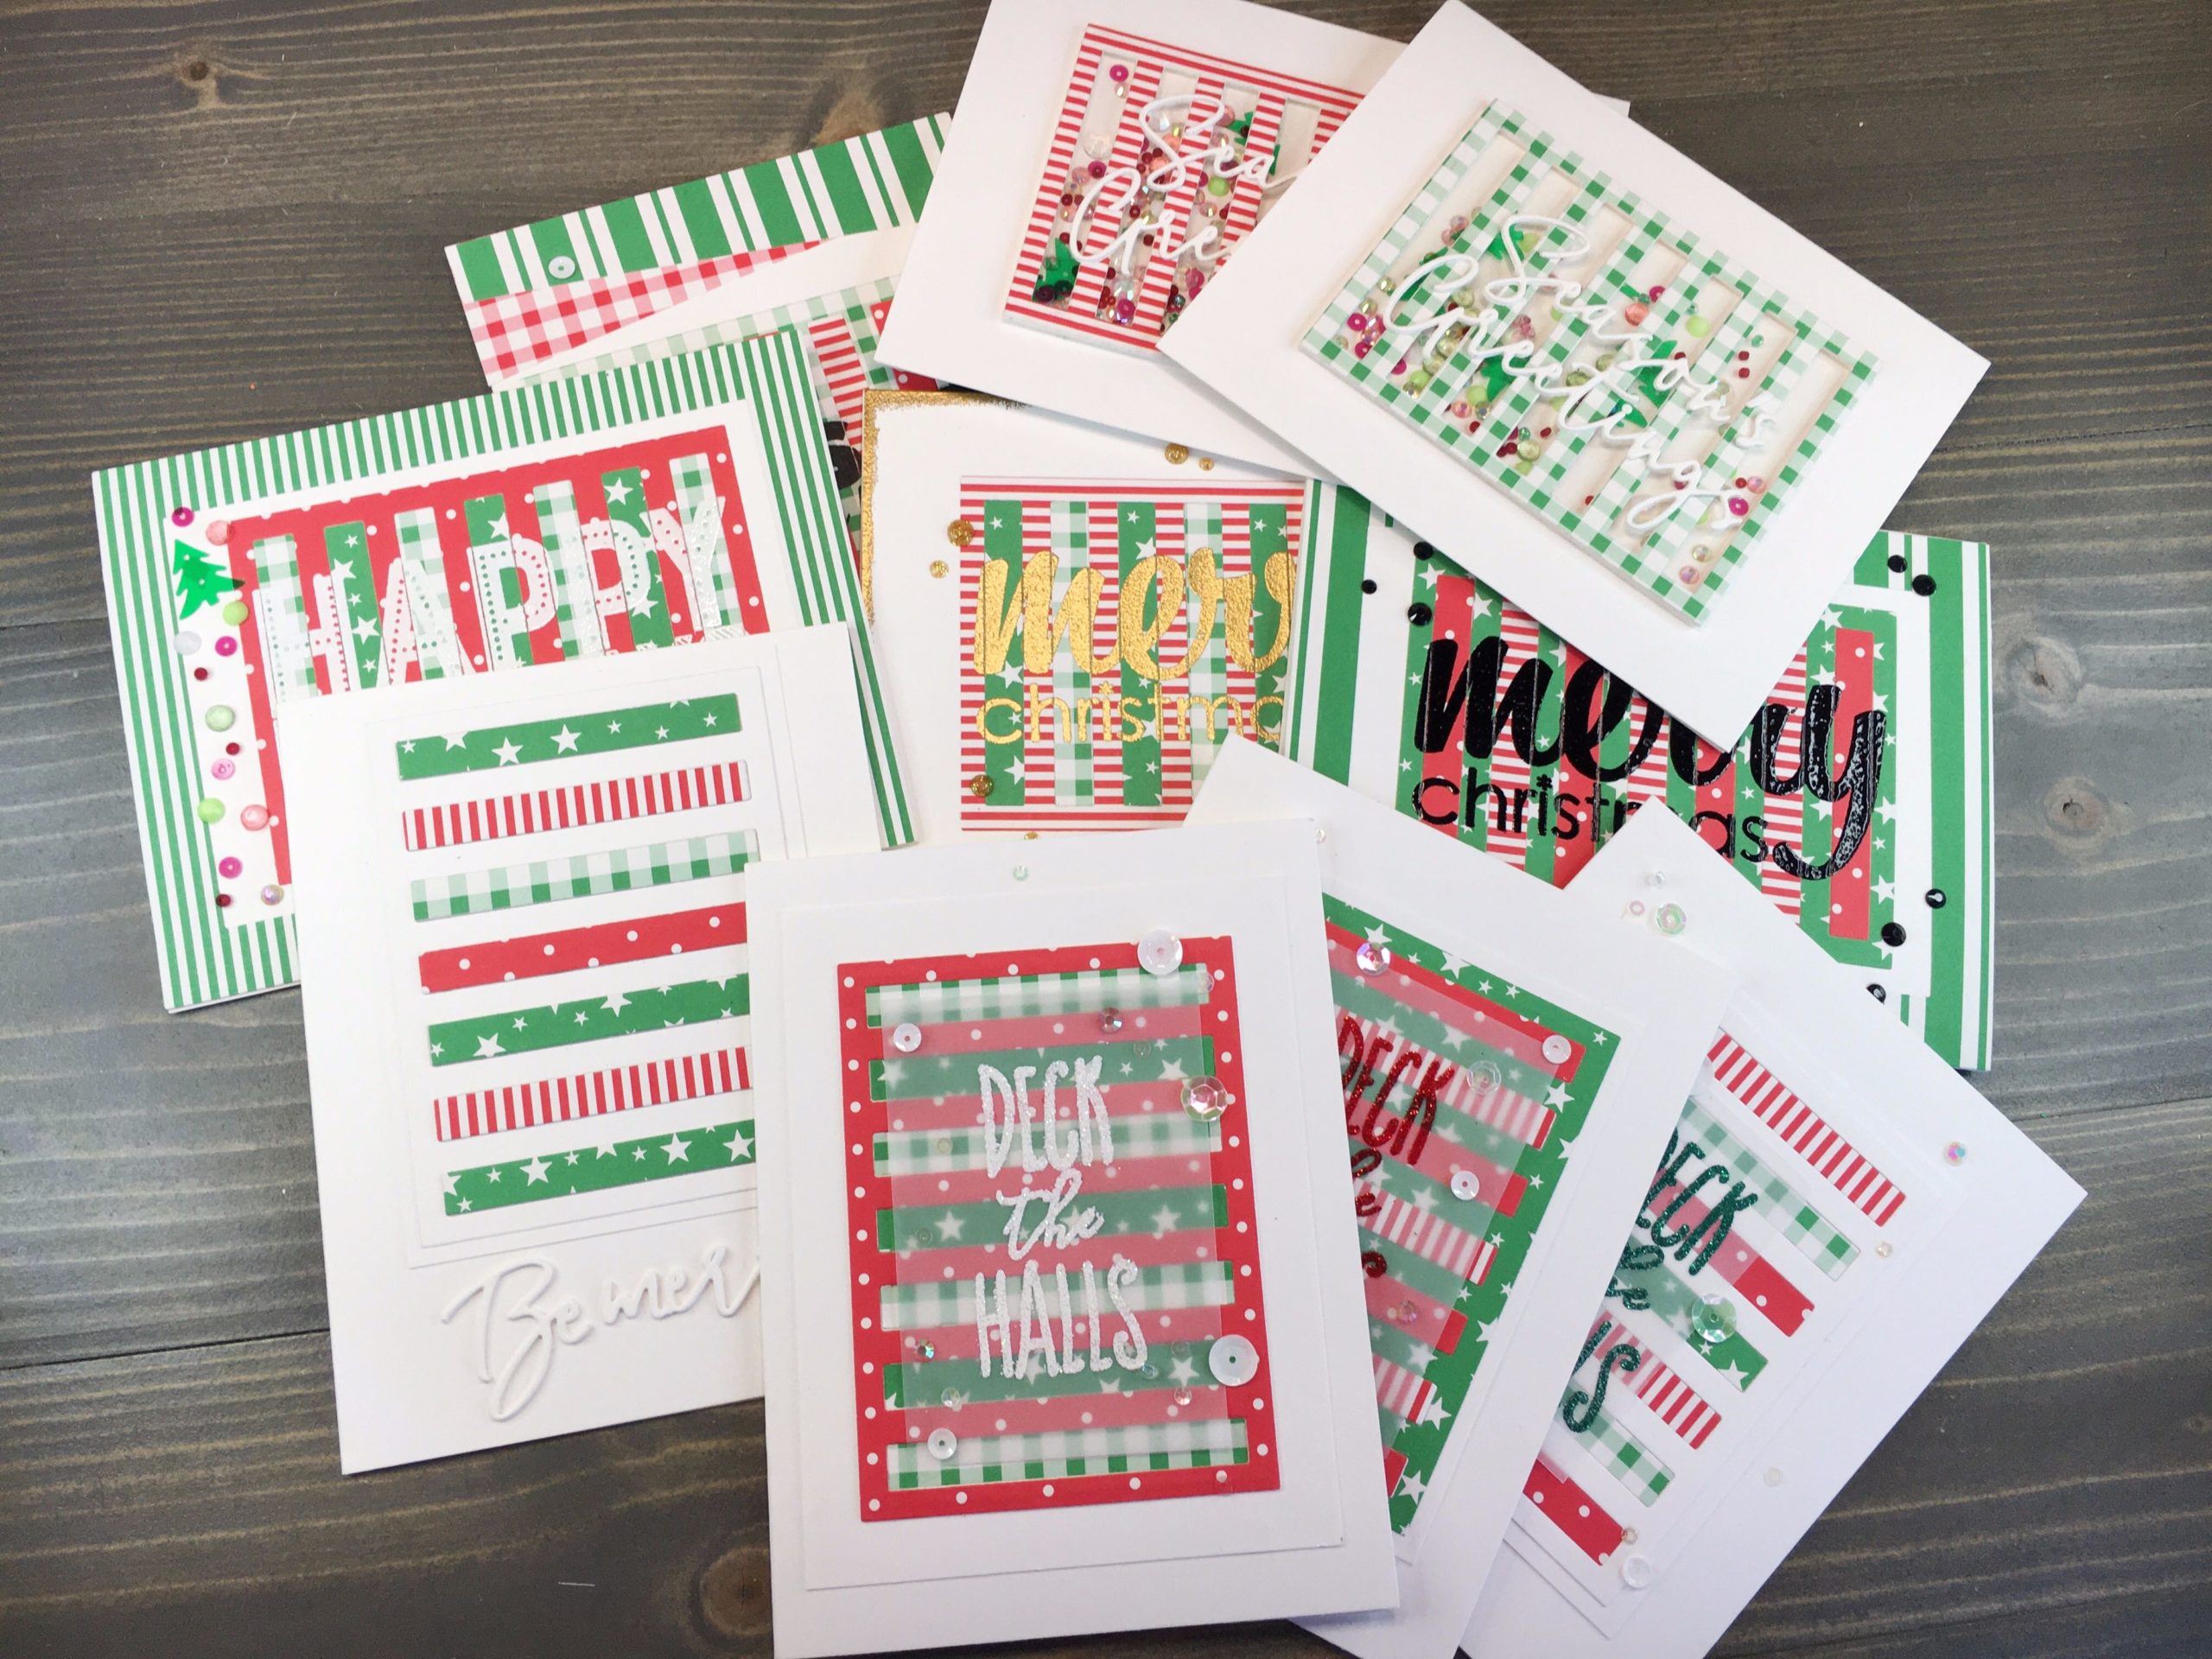
Paper &/or Cardstock: Mat Stacks by DieCuts with a View Border and Matting Papers Bright Prints & Cardstock (6 1/2” x 4 1/2”). For initial die cutting, I selected two patterned red and two patterned green papers.
My card bases are all cut from Neenah 110lb Classic Crest cardstock. Other white cardstock used is Neenah 80lb Solar White cardstock.
Adhesives: Gina K Connect Glue (liquid) & double sided tape.
Embellishments: Sequins, Embossing Powder, VersaMark Ink, Nuvo Glitter Drops, etc.
Die Cutting
First, I started by die cutting two frames from each of my four selected papers, and additional cut from Neenah 80lb cardstock. This yielded eight patterned frames, six white frames and a handful of panel inserts.
Second, using Connect Glue I began adhering frames and panel inserts to card panels. I varied my color pairings (green frame with red inserts and vice-versa, for example) across the card panels so no two cards were the same. I also layered a couple frames and panel inserts with cardstock die cuts for added dimension.
Card Option 1
Taking a flat card panel (meaning no layers of cardstock added to the frames or panels) I stamped my sentiment using Hero Arts Intense Black ink. Using a stamp platform is definitely recommended because multiple impressions are needed due to the slight variations in paper panels.
Next, I cut additional patterned paper on the diagonal and layered at the top and bottom of the card using Connect glue. To finish this card, I added Little Things Swan Lake sequins.
Card Option 2
Taking another card panel, I first stamped a sentiment with VersaMark Ink then heat embossed using Ranger Gold Embossing Powder. Next, I dragged the edges of the card panel across my VersaMark ink pad, then through the same embossing powder. Finally, after heat setting, my card panel had a great border. Adding Nuvo Glitter Drops in Honey Gold finished this card wonderfully.
Card Option 3
For another take on the above card design, I added a frame created from an additional patterned paper die cut using a couple dies from Waffle Flower A2 dies set.
A sentiment from scrapbook.com Big and Bold Holidays was perfect for this card. I heat embossed it using Ranger White ink. As a finishing touch Christmas Carnival sequins from Buttons Galore were perfect.
Card Option 4
This card started the same as Option 3, but instead of embossing a sentiment in white I used Ranger Black Embossing Powder.
I wanted this card to be a tri-fold, so I cut two A2 card bases. Next, using double sided tape I adhered the card panel to one A2 base. Then, using Connect Glue I adhered the top of the second card base to the bottom of the first card base.
Finally, layering a pair of patterned paper scraps on the middle panel of the bifold card brought some interest. I stamped a sentiment from scrapbook.com Christmas Wishes using Hero Arts Intense Black ink.
I left the inside of the card blank for a handwritten letter.
To finish this card, I added Ebony Mix black jewels from Little Things.
Card Option 5
This card is a simpler, more sophisticated card. Starting with a white frame filled with red and green inserts, I adhered it to a cardstock panel. This was then adhered to my card base, justified toward the top.
Using Pink Fresh Studio’s Classic Holiday Words dies, I cut three sets of ‘Be Merry’ using my die cut machine. I glued the layers together using Connect glue, then adhered the sentiment below the white frame.
This sophisticated card is perfect without any additional adornments.
Card Option 6
I had three frames remaining, each filled with colorful inserts. These I adhered (using double sided tape) to the center of card bases.
Using Concord & 9th’s O Christmas Tree stamp set, I selected a sentiment and stamped it onto Vellum using VersaMark Watermark ink. I heat embossed using Wow! Embossing Powder in Green Glitz. Finally, I repeated the process two more times, using Red Glitz and Sparkling Show powders.
After trimming down my vellum sentiments, I adhered liquid glue behind the lettering before adhering to my cards. Adding Swan Lake sequins from Little Things finished off these cards.
Card Option 7
At this point there were two colorful frames remaining. These I did not add inserts to. Instead, I added an additional white cardstock backing. This was followed by clear film and an additional white cardstock frame.
If you haven’t guessed already, my last two cards are shaker cards!
Using Scotch Foam Tape, I created an outer frame behind my frames, making sure I left no gaps for sequins to escape. I poured a small pile of Christmas Carnival sequins by Buttons Galore onto the card base. Next, I removed the backing tape and adhered the frames above the sequins.
For a sentiment, Pink Fresh Studio’s Classic Holiday Words dies worked excellently. Six sets of ‘Season’s Greetings’ with layers glued to create two sentiments worked great. Finally, I adhered the sentiments above the shaker windows, also using Connect glue.
So, there you have it – a whopping 10 cards from a few sheets of 6 1/2” x 4 1/2” patterned paper, a few sheets of cardstock and various dies, stamps, and embellishments. Hopefully this has your imagination going on how you can batch multiple cards utilizing a few staple supplies from your collection.
Check back tomorrow for another holiday tutorial, as we continue our 12 Days of Christmas Cards series!