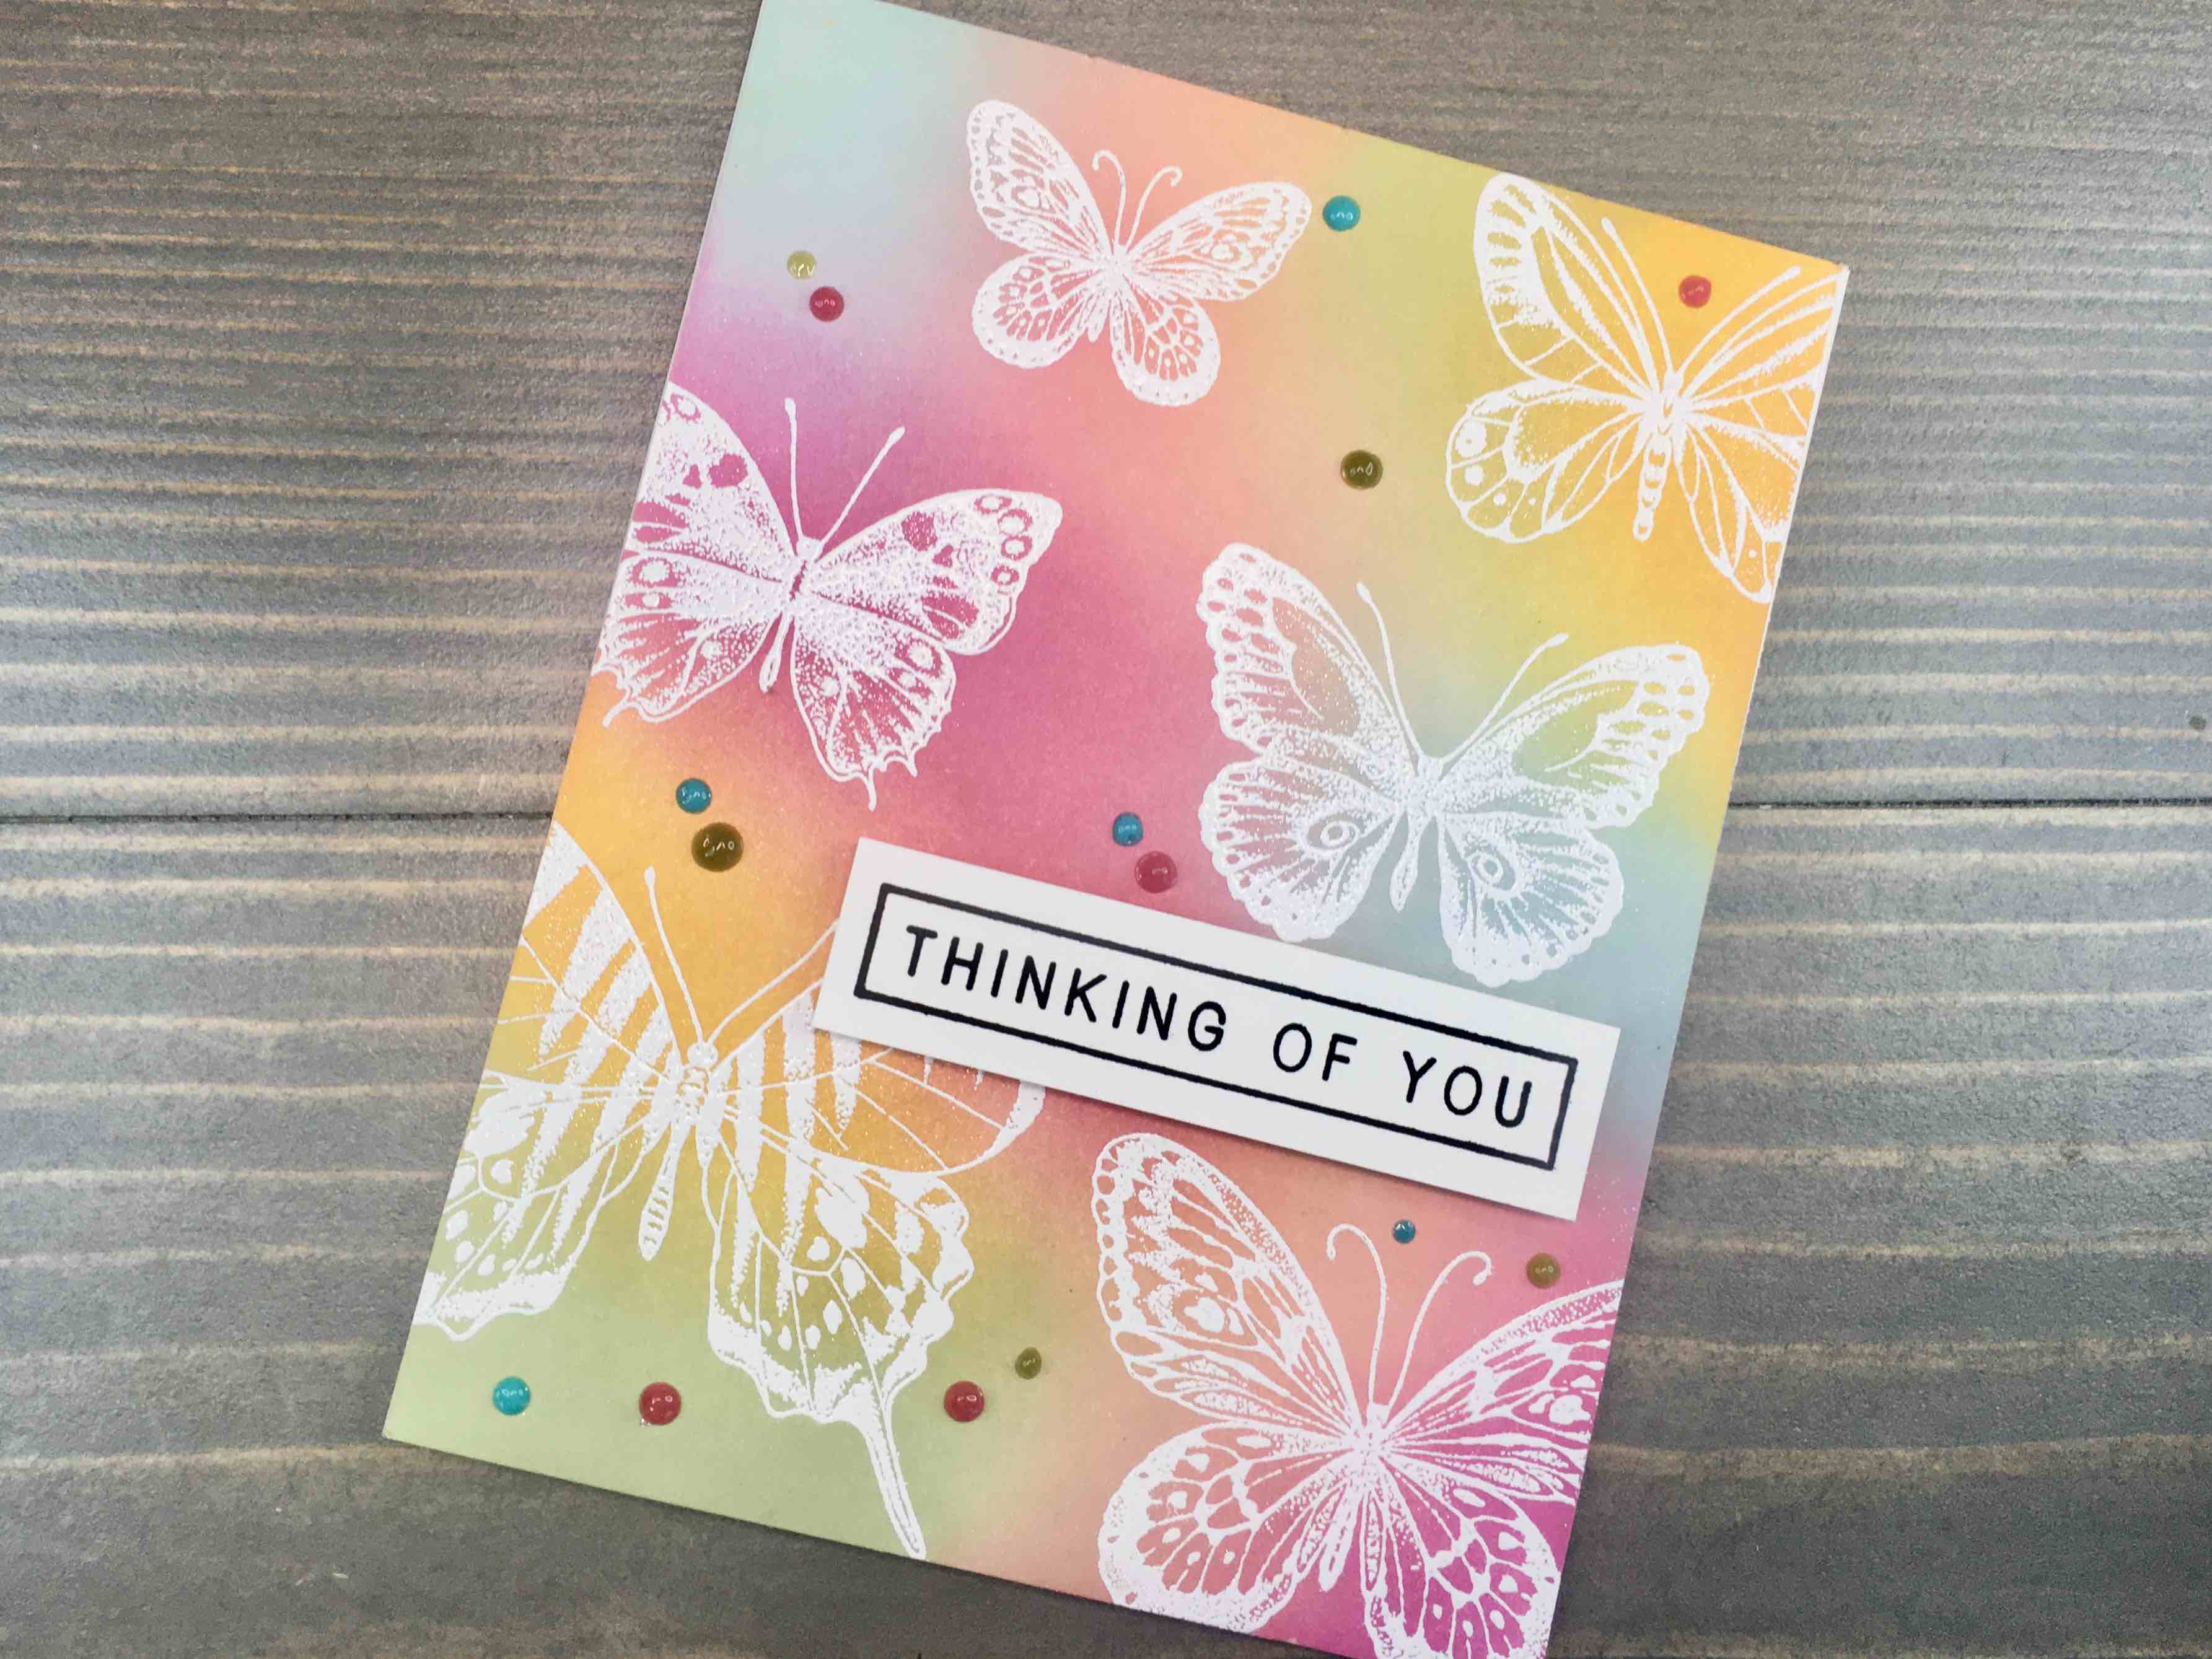
Speed is the name of the game, and today’s quick ink blended butterfly card is where it’s at. One stamp set, five ink colors, some heat embossing and a couple optional extras make today’s project a beauty.
If that wasn’t enough, I’ve created a video tutorial for this quick ink blended butterfly card to cap it all off! It’s something new for me, but I quite enjoyed the process. So, check it out and let me know your thoughts!
Supplies
Neenah Classic Crest Solar White Cardstock: 110lb for card base, 80lb for sentiment
Strathmore Bristol 300 Series cardstock (9” x 12”, 100lb) for ink blended panel
Nuvo Crystal Drops in Caribbean Ocean, Olive Branch, Party Pink
Ink Blending
Using your preferred blending tool, blend using your lighest ink shade. Start your blending motions off your cardstock, and keep a circular motion as you move onto your card panel. Add additional ink as necessary, always starting off cardstock. This method will help prevent harsh lines in your blending.
If using one blending tool for all colors, clean thoroughly before moving onto next color. Repeat blending steps above, slightly overlapping colors until you are happy with your card panel. Note – for increased blending at overlapped areas, you will need to layer ink in multiple passes.
Allow panel to dry thoroughly.
Note: to ensure your card panel is ready for embossing, place a bit of embossing powder onto your dry panel. If any sticks the ink is still drying. If the powder easily taps off, the panel is sufficiently dry for heat embossing.
Stamping
Using a Misti Stamping tool and optional accessory Creative Corners, align card panel inset from edges. Place selected butterfly stamps across panel, overhanging edge in multiple areas.
Once stamps are aligned and transferred to lid, thoroughly treat panel with an anti-static pouch. Next, ink with an embossing ink, apply embossing powder, and finally set with a heat tool.
Stamp sentiment onto a scrap piece of cardstock and trim.
Card Assembly
Using double-sided adhesive, glue card panel onto A2 sized card base. For added interest, apply shimmer to embossed butterflies using Nuvo Aqua Shimmer pen. This brush-tip pen is great to adding a subtle shine to accent specific areas of your cards.
Adhere sentiment to card using double-sided foam tape.
Finish card by adding Nuvo Crystal Drops in colors coordinating with ink blended panel.
This quick ink blended butterfly card is fairly simple, and a fast project. The longest aspect is the required drying time, and that can be sped up with a heat tool. Bright, summer colors are great for today’s project, but other colors schemes paired with different stamps would create a dazzling card as well.
If you have time, check out my video tutorial. It’s something new I’m learning, and I would love your feedback on it. What worked, what would you like to see, what did I miss…any constructive criticism is very much welcomed.