I have a couple family members with birthdays coming up, and it just so happens their names both start with ‘K’. This coincidence screamed monogram cards to me! So today, I’ve a fun project using one of Altenew’s Mega Alphabet dies.
In addition, I’m still having fun with my new Kuretake Gansai Tambi watercolors so I’ve brought you another way you can utilize watercolors, outside of traditional painting.
Preparation
I hate waste. Especially when it comes to craft supplies. Therefore, I’m always looking for ways to utilize as much of my materials as possible. Using monogram dies is an easy way to use both the die and the negative space.
Starting off with an A2 sized card panel (Neenah Classic Crest 80lb cardstock, cut to 5 1/2” x 4 1/4”) I centered my ‘K’ die then ran through my Big Shot die cutting machine. I will utilize the ‘K’ for the first card, and the negative space for the second card.
I also cut two additional ‘K’s from scrap cardstock, which I will use in my first card.
Painting
As I’m using watercolors today, I pulled out a couple panels of watercolor paper. Watercolor paper is not required to use watercolors, but it definitely holds up better to the excess water these paints require.
For the first panel, I began by loading my paintbrush with plenty of water and blue watercolor from my set. I tapped the paintbrush, allowing drops of paint to splatter the paper. Next, I sprayed the paper with water which further activated the watercolor, and it began to spread and dissipate over the paper.
I dried the paper with a heat tool, then repeated the process in its entirety with green paint, then finally with red paint. I set the panel aside to dry completely.
Taking one of the ‘K’ die cuts, I painted it using the same green watercolor paint. I did not worry about obtaining even coverage over the k, I just wanted the color on the cardstock. I set this aside to dry.
For the second panel, I freehanded some watercolors onto the panel, using plenty of water so the paint moved freely and blended lightly. I was careful not to mix colors as I did not want to muddy the paint.
I splattered the same colors onto the negative space panel, but did not add additional water as on the panel above. This will result in the two panels tying in together on the finished card.
I left both panels to dry completely as well.
Card 1
Using Avery Elle’s Reverse Pinked Die, I cut a frame just smaller than an A2 card base. I trimmed down the first watercolor panel using the frame as a guide. I adhered the watercolored panel to the frame and set aside.
I layered and glued the three ‘K’s together, keeping the green K in the middle of the stack. As a result, I have a more dimensional die cut for the card, with some added interest of the green layer in the middle.
I adhered the die cut ‘K’ stack to the center of the card, and my first card was complete!
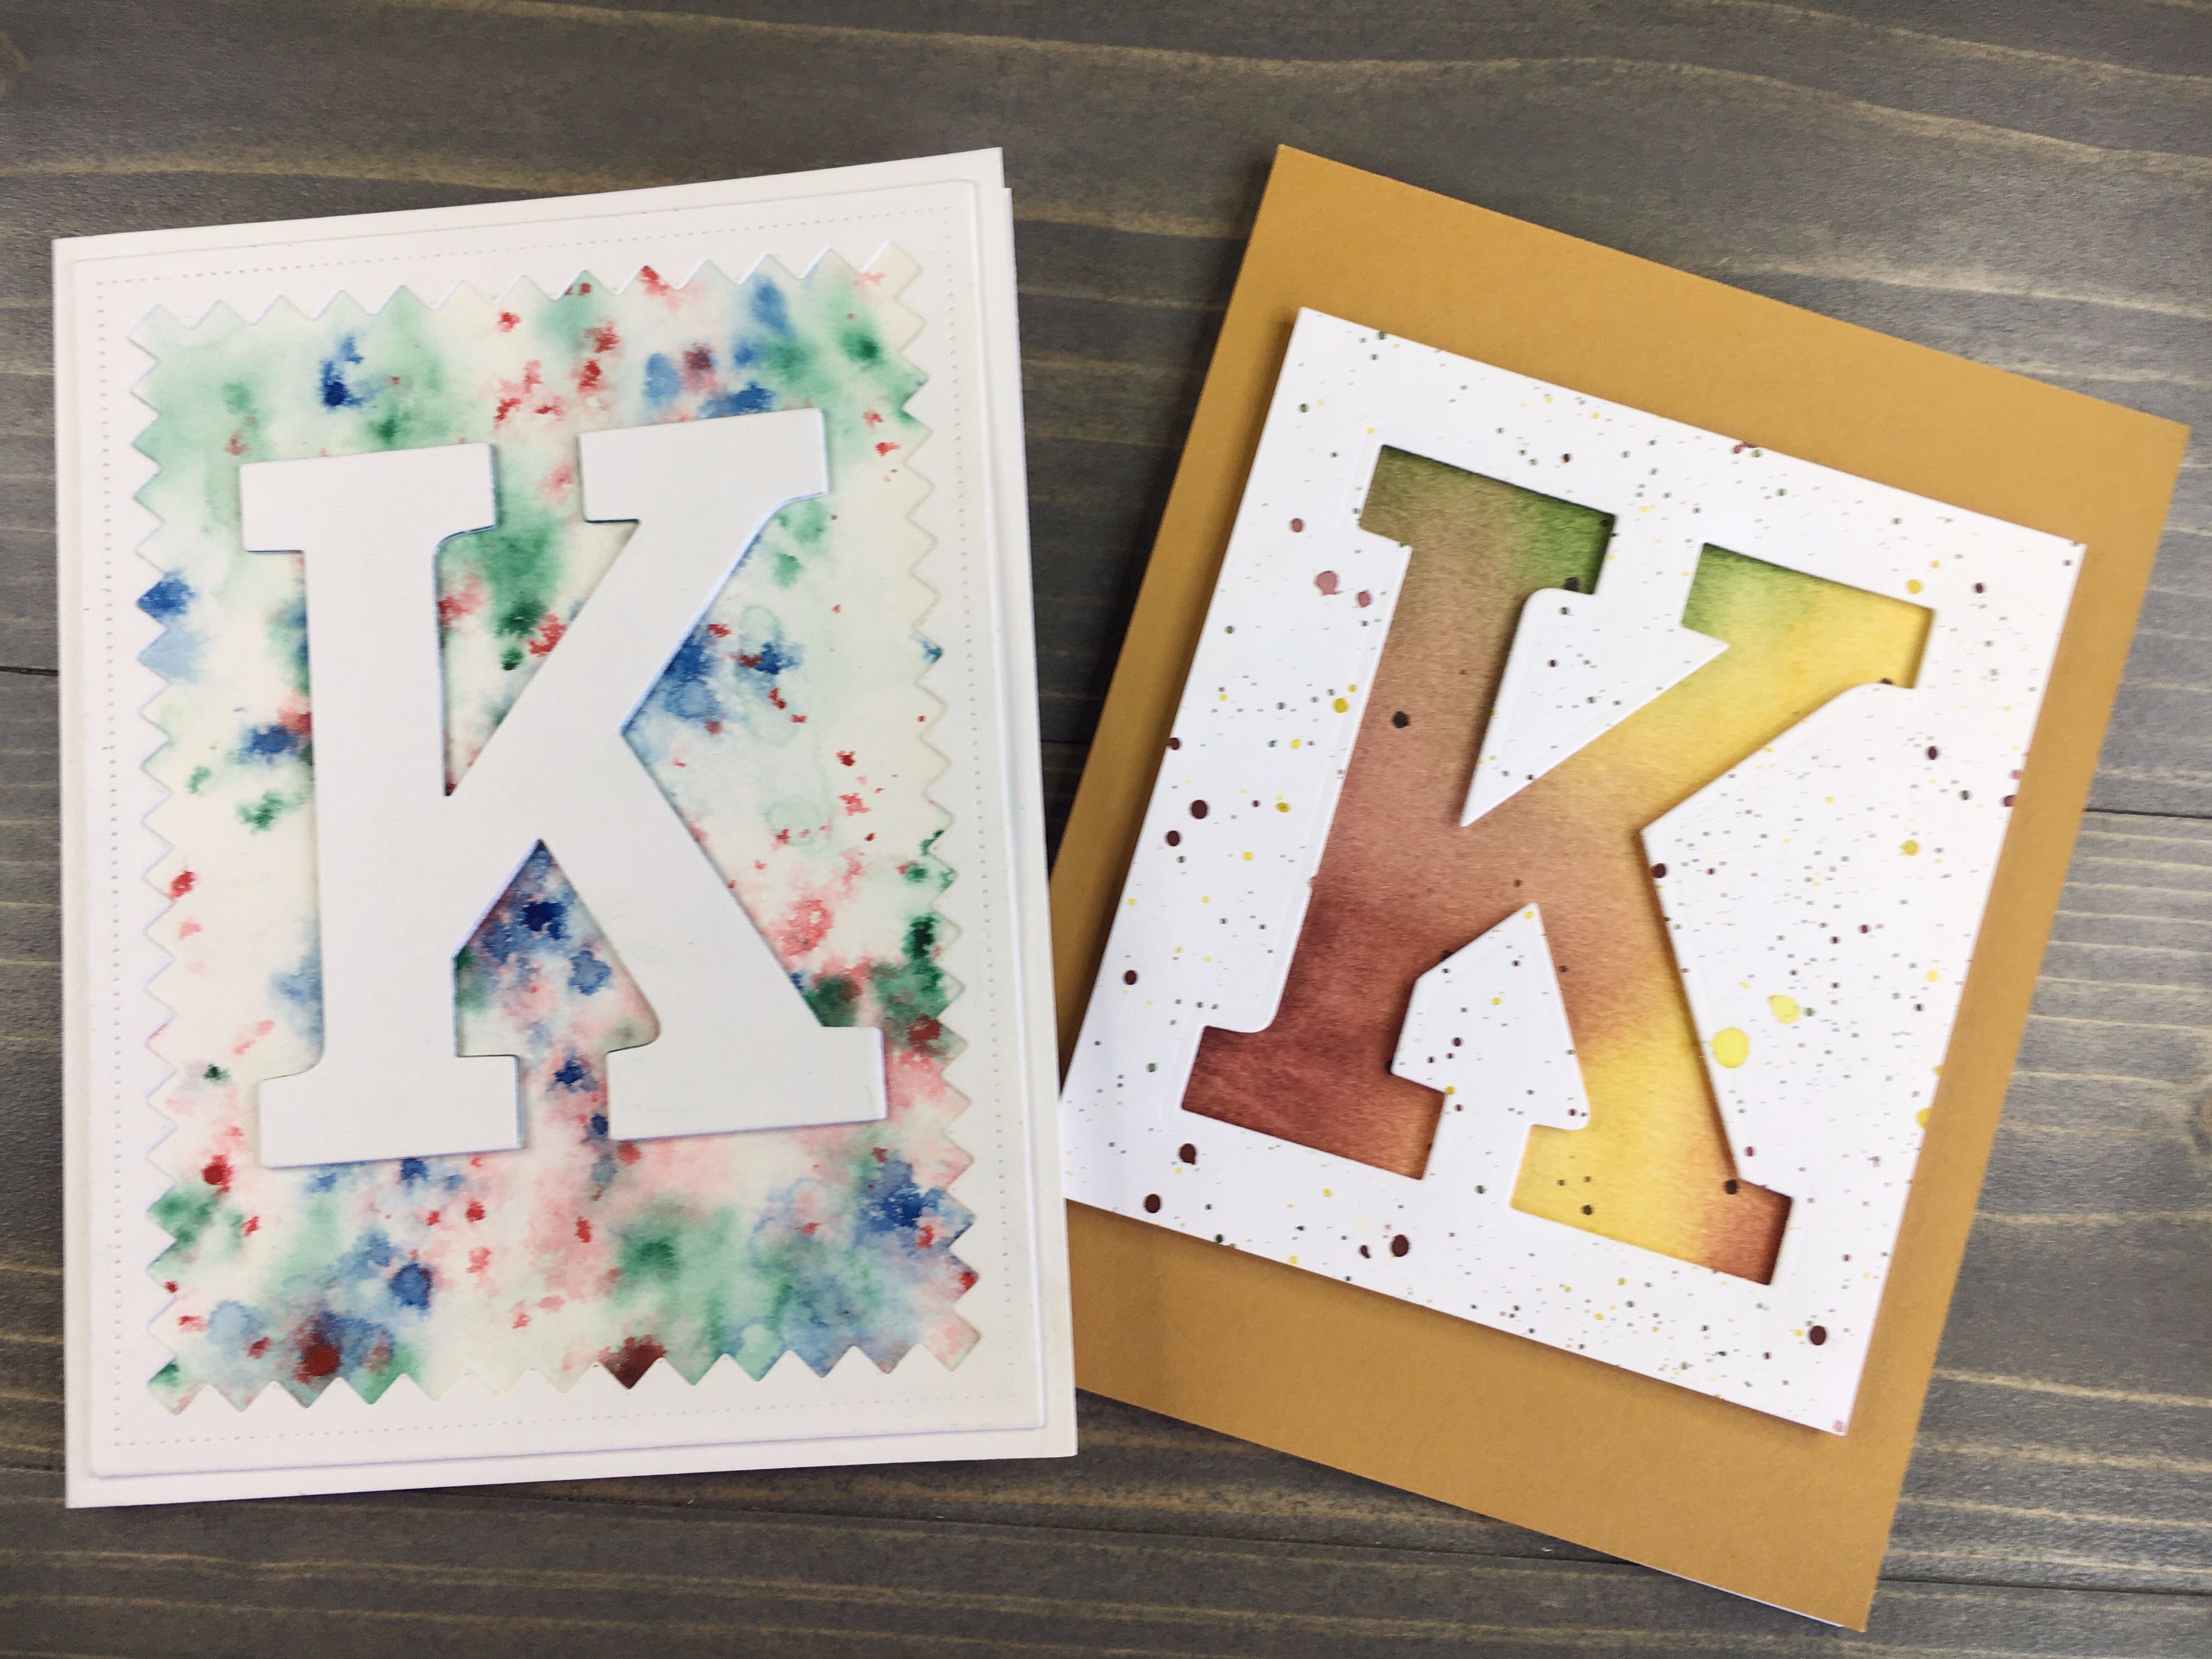
The bright white of the card base, frame and monogram offset the vibrant watercolor in the background. The K is framed beautifully by both the bright colors, and the detailed frame.
Card 2
After trimming the negative space to a size roughly 1/2” larger than the K on each side, I looked through my paper stash for cardstock similar to my color scheme. Gina K Honey Mustard matched perfectly, so I cut a panel and adhered it to an A2 card base.
Using foam tape, I popped up the speckled panel above the watercolor panel, then adhered the stack to the card. The foam tape is thin, so while dimension is obtained, there will be no issues mailing this card.
This card is meant for my nephew who loves the outdoors, hence the organic color palette. It’s both masculine and personalized, perfect for him.
Though both cards use the same monogram and watercolors, they garner entirely different feelings. The first is whimsy and bright, the second earthy and masculine. It’s great to see how differently similar elements can result in, and how you can customize and tailor your supplies for those you create for.